There is a lot of information to sift through when it comes to 3-D printing, especially when it comes to first-layer settings. So, when I began my journey beyond the Cura recommended settings, I decided to gather everything I learned about first layer settings together in one article to make it a little easier.
Cura first layer settings are the settings that allow you to adjust the initial layer height and line width. You can find the Cura first layer settings under the “Advanced” tab in the “Quality” section and will be labeled “Initial Layer Thickness.”
It’s important to understand how to set up your first layer for a successful model, along with a few other related settings. It’s simple when you break it down to better understand what these settings do and why they are so important.
What Should Your Cura First Layer Settings Be?
Your first step is always to make sure the printing bed is level. Follow the instructions for your specific model of printer to achieve a level surface before you begin the printing process. If you don’t have a level build surface anything else you do is basically pointless, so do not skip this step. Once you have that taken care of, you can move on to your first layer settings.
Here is a video I made going over how to level the build plate on an Ender 3 Pro, available on Amazon.
The goal of your first layer is to achieve adhesion to the printing bed. If the nozzle is too high, your printing material will simply lay on top of the bed. The nozzle needs to be low enough to create compression of the printing material to the bed.
The initial layer should be about 10% lower than the other layers. The same amount of printing material will be applied in that space. That said, the first layer height in my profiles, which you can download from here, matches the layer height value. I only lower it when I’m trying to print something high quality like a miniature.
Here is a table with a few examples of your layer height vs. your initial layer height.
| Layer Height | First Layer Height |
|---|---|
| 0.30 mm | 0.27 mm |
| 0.25 mm | 0.23 mm |
| 0.20 mm | 0.18 mm |
| 0.15 mm | 0.14 mm |
| 0.10 mm | 0.09 mm |
The initial line width is the width of the lines of the initial layer. This will depend on your project. Line width should be close to the nozzle size and depend on your layer height. Slightly decreasing the line width of the outer wall will add more detail to your model while an increase of line width for the infill will result in quicker printing.
Why is the First Layer Important?
You can gauge the probability of a successful model by your first layer. When you see errors in your first layer, it’s time to reconfigure your settings. Most likely, you forgot to level your print bed or you need to adjust the nozzle height. Catching these mistakes on the first layer means you won’t waste time and materials.
Leveling the build plate may take some time to perfect, and will need to be kept up with between builds. I recommend you relevel the build plate every 3-5 prints or use a printer with an auto-level feature. You can use a single piece of paper to get your nozzle the correct height. A sheet of paper is about 0.1 mm thick, so it can be folded to increase the nozzle height needed for your model.
Other factors that can impact your first layer are filament temperature, a possible filament jam in the nozzle, or incorrect extrusion amount. Using a slower printing speed can help avoid any trouble in your printing if time isn’t an issue.
How Do I Get My First Layer to Stick?
Of course, adjusting the height of your nozzle is a good start for getting your first layer to stick, but what else can you do? There are a number of items that can be applied to the build plate to help ensure your first layer sticks. Don’t forget to clean your build plate regularly.
- Glue-stick – Applied to the build plate, helps with adhesion.
- Hair spray – Can help with glass build plates, apply generously and let it dry before printing *Make sure you only get the hair spray on the build plate
- ABS slurry – Mix your plastic scraps with acetone to form a mixture that can be applied to your build plate with a glue stick or a cotton swab
- Painters tape – Best for PLA adhesion
- Kapton tape – Best for ABS adhesion
- Build-Tak – Works on heated build plates
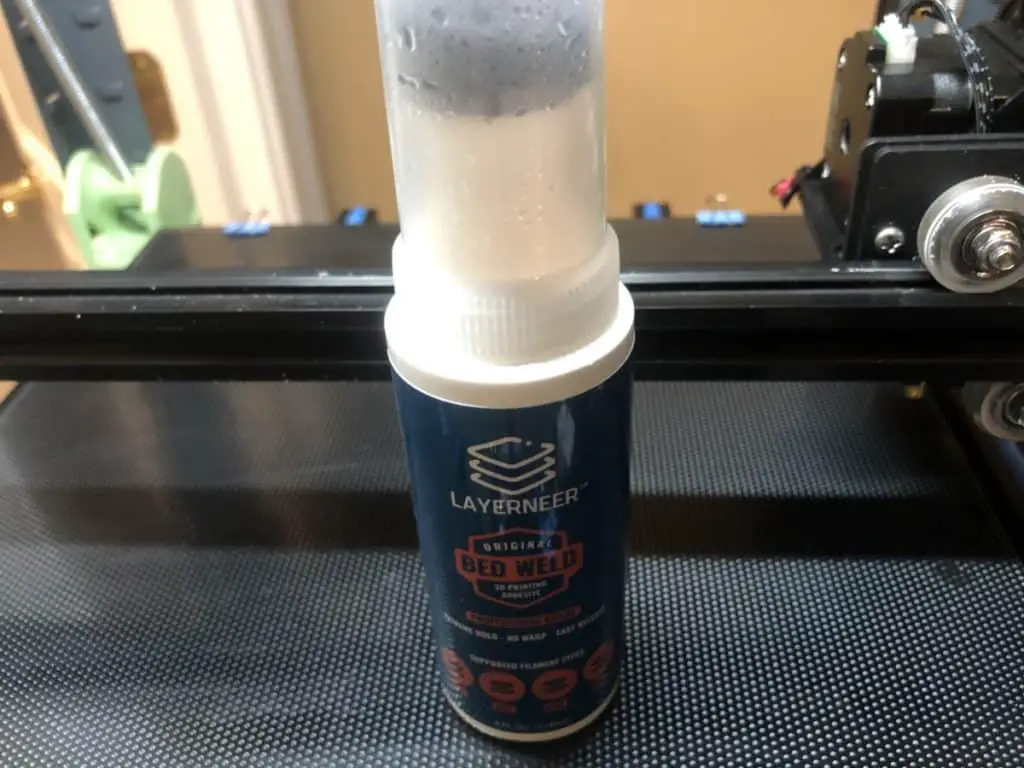
- Specialized Glue – This will typically be similar to a glue stick up is meant for 3d printing. I personally use Bed Weld (pictured below and available on Amazon) but there are many others.
Try experimenting with additional materials that you think could help your model’s adhesion to the build plate. You could find an inexpensive or less messy that works best with your chosen material and design.
Sometimes factors unrelated to your 3-D printer or Cura software may negatively affect your model as it prints. If your printer is located near a fan, window, or door that could be causing a draft, this may be the cause of your unsuccessful first layer.
Build Plate Adhesion Types
You can choose to have no build plate adhesion type or decide between skirt, brim, or raft. I’ll describe each type so you can decide which is best for your model and how it can affect your first layer.
Brim: This adds a single layer flat around the base of the model to prevent warping. The brim is connected to the base of the model.
Using a brim to create a bigger surface area of the bottom of your model can help with adhesion to the build plate. It can also help prevent warping. You’ll want to use this type for materials that are prone to shrinkage.
Options for the brim setting include:
- Brim Minimum Length: Length in millimeters of filament extruded.
- Brim Width: Width of the brim in millimeters.
- Brim Line Count: Sets the width by the number of printed lines. Overrides brim width.
- Brim Only on Outside: For models with holes on the initial layer. A brim will only be printed on the outside of the model.
Raft: A raft will add a thick grid with a roof between your model and the build plate. It’s a great option when the first layer of your model is uneven or won’t adhere to the build plate.
The raft is divided into top layers, middle layers, and base layers. You can adjust the thickness, line width, and spacing for each layer of the raft.
Important settings for the raft:
- Initial Z Overlap: This lowers all layers of the model except for the first layer so it can be compressed against the raft.
- Raft Base Layer: This layer will look oversized since it needs to be pressed right up to the build plate.
Skirt: This is a line printed around the model on the first layer, but it does not touch the model and is what I use for most of my prints.
This adhesion type will help prime the nozzle and show any issues with bed leveling before you begin printing. Options for the skirt setting include:
- Skirt Line Count: Number of skirt lines printed around the model.
- Skirt Distance: Distance between the model and the skirt.
- Skirt Minimum Length: Total length of the skirt.
How to Tell if Your Nozzle is at the Correct Height
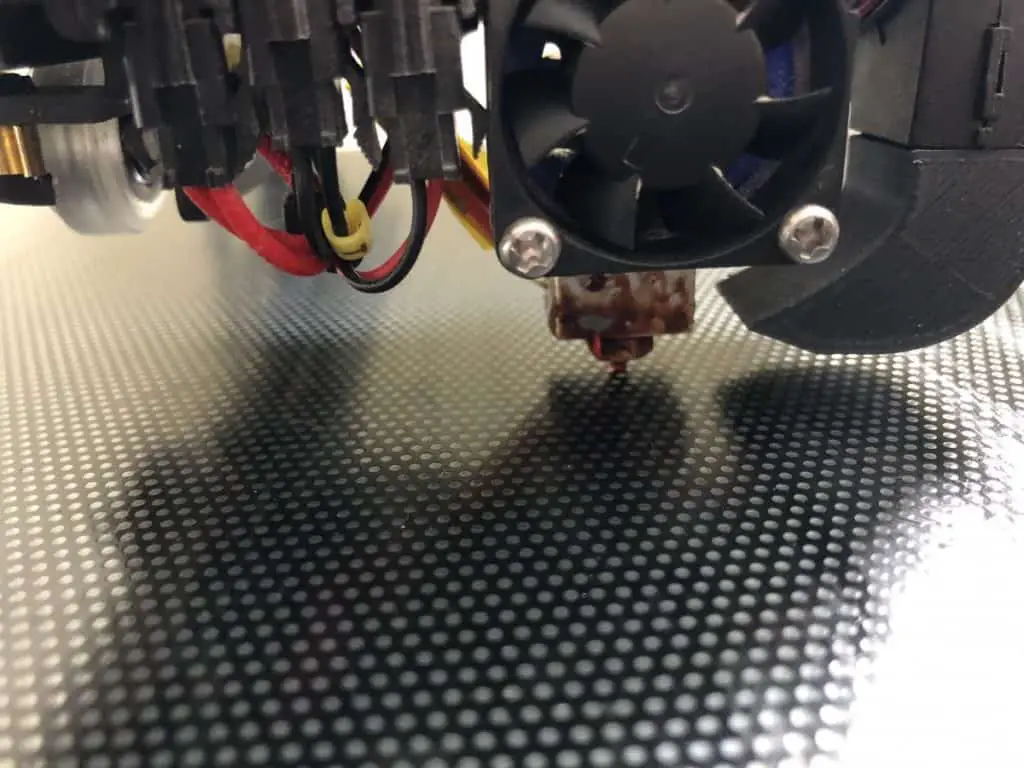
I can’t help but make a Goldilocks and the Three Bears comparison. Here’s how you can tell if your nozzle is too high, too low, or just right for your first layer:
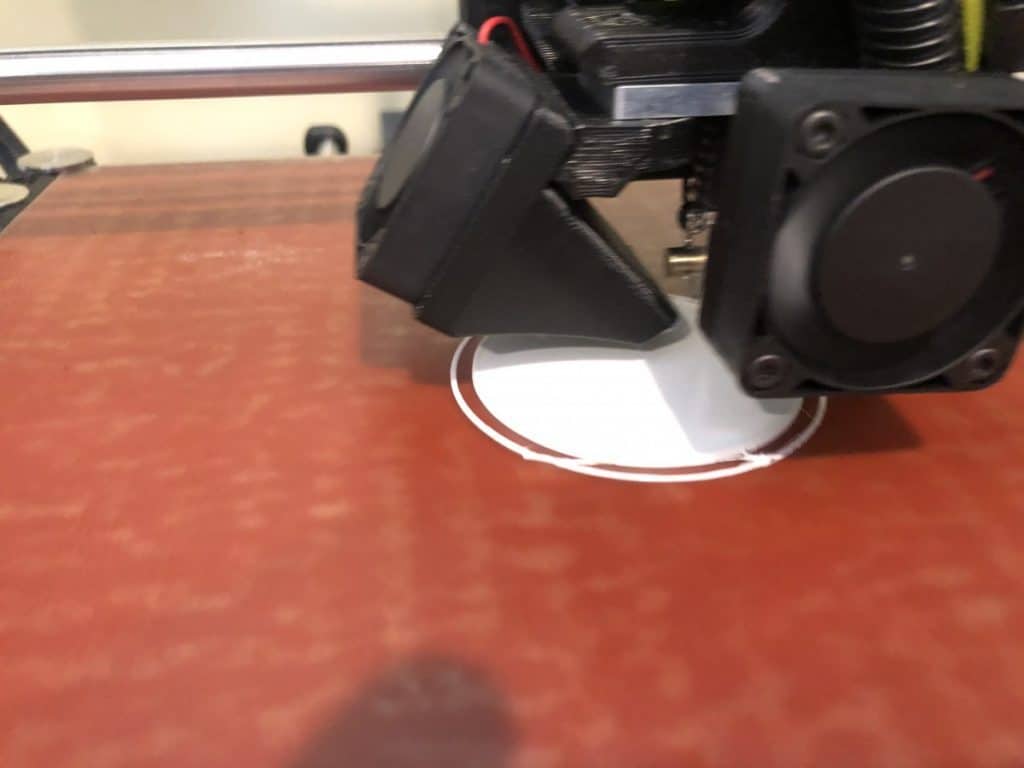
- The nozzle is too high. Your filament is coming out into the air and not being pressed into the building plate. Most likely, it will be dragged and will not lay precisely on the build plate.
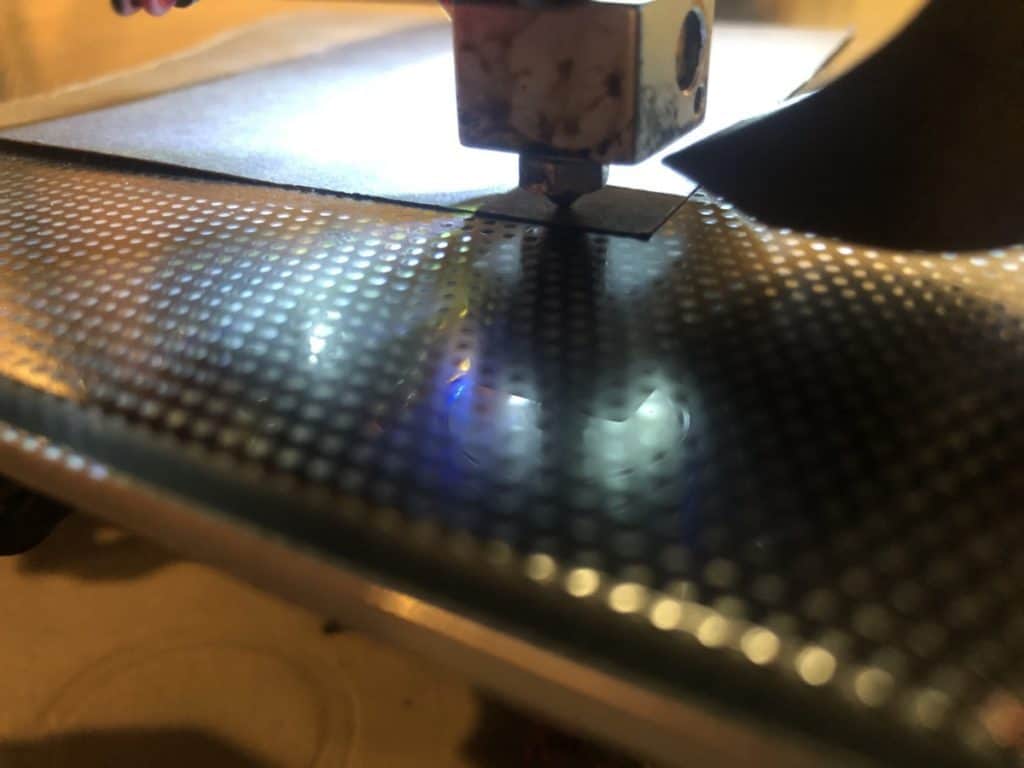
- The nozzle is too low. Your filament is being compressed too much onto the build plate. This can cause a thin first layer, and could also cause a blockage in the nozzle.
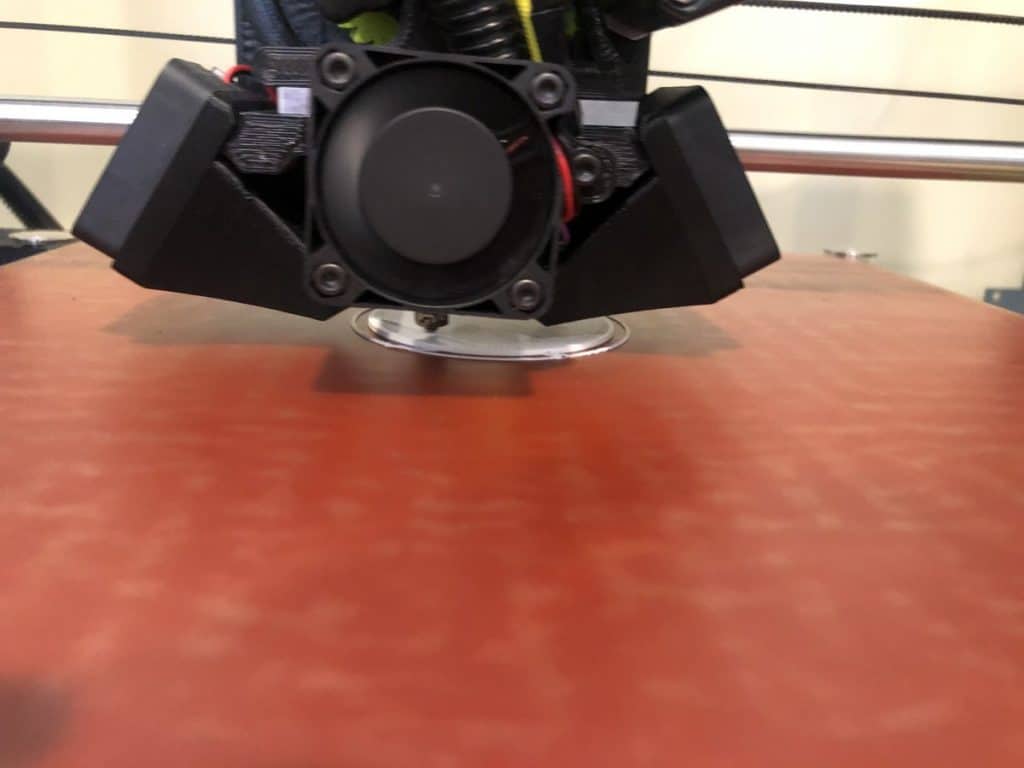
- The nozzle is just right. Your filament is being compressed between the nozzle and the build tip and will lay down precisely. This first layer will lay down nicely and adhere to the build plate, creating a successful first layer.
Remember that there is no perfect gap size for every print. You need to take into account the material you are using, your nozzle size, your print speed, print surface, etc. This takes practice to perfect.
Additional Settings That May Affect Your First Layer
Layer height can definitely make or break your first layer, but there are other settings to keep in mind for your project.
- Shell Thickness: These settings define the thickness of the wall of your print. Cura will automatically add or reduce lines for the shell depending on how thick it is set.
- Bottom/Top Thickness: This defines the number of solid layers at the bottom and top of the print. The default setting is 0.8 mm but can be adjusted if necessary
- Bottom/Top Pattern: This setting allows you to change the pattern of the bottom and top of your print. You can choose for it to print in lines, a concentric pattern, or a zig-zag pattern.
Do the Bottom and Top Layers Need the Same Settings?
Cura allows you to set separate settings for your top and bottom layer if needed for your print. Setting a separate top and bottom thickness can help when your top layer needs to be thicker to prevent “pillowing” but you want to save some time and materials on the bottom layer.
Using Material Settings to Perfect Your First Layer and Overall Project
A default temperature setting can be chosen depending on your material. You can set a separate temperature for your first layer. Using a slightly warmer temperature for your initial layer can help it adhere to the build plate.
Keep your material in mind when setting your build plate temperature, as each material will have an ideal temperature. If you’re using two different materials, average their ideal temperatures. You can even set your build plate to be slightly warmer for your first layer, which will help with adhesion.
You need to know the best settings specifically for the model you are printing and the material you are working with. You wouldn’t want to use a particularly rigid material for an item that requires flexibility. Alternatively, a flexible material isn’t ideal for a model that needs to be strong or supportive.
There are many different materials you can choose, such as:
- PLA *Most Common
- ABS plastic
- Nylon or Polyamide
- Glass-filled Polyamide
- Epoxy Resins
- Wax
- Metals like Silver, Titanium, and Steel

Using Different Print Speeds for Different Layers
Print speed is calculated in millimeters per second and can be adjusted for each part or layer or your print project. A quicker speed may save time and materials but can also create a sloppy print.
If quality is more important than speed for your chosen model, be sure to choose the appropriate print speed.
Some layers may be fare better than others with a quick print speed. Here are some examples of varying print speed for different parts of your model:
- Infill Speed: This setting will adjust how fast or slow the infill material is printed. You can use a quicker print speed here if the visual quality is not important, although that may negatively affect the strength of your model.
- Outer Wall speed: This will adjust the print speed of the outer wall. Choosing a slow speed here will create a better overall finish of your model.
- Inner Wall Speed: This is the print speed of the inner walls. Again, if this isn’t a layer that will be seen you can set it at a quicker print speed, but it can affect the strength of the model.
- Top and Bottom Speed: The speed at which the top and bottom layers are printed. A lower speed for the top and bottom will create a more reliable outcome. For the top layer, this is especially important for the closure of larger areas.
- Support Infill Speed: This is the speed at which support structures are printed. You can choose a quicker print speed here, as the quality of the support is not normally important.
- Support Interface Speed: This setting adjusts the speed at which support roofs and bottoms are printed. Adhesion of these layers is vital, so they should be printed at a slower speed.
I’ve also included this table to show how additional speed settings can affect your model, by giving the optimal speed for each one.
| Speed Setting | Optimal Speed Setting |
|---|---|
| Travel Speed | Higher speed creates better control of the filament flow. |
| Initial Layer Speed | A low speed will help with adhesion to the build plate. |
| Skirt/Brim Speed | Use a speed similar to your first layer. |
| Maximum Z-Speed | Usually set at maximum and capped off by the machine. |
What are the Cura Infill Shapes?
When picking an infill shape for your model, keep in mind the strength necessary for your design to function properly. Decorative items won’t need to be as strong as say items designed to support weight or keep items connected.
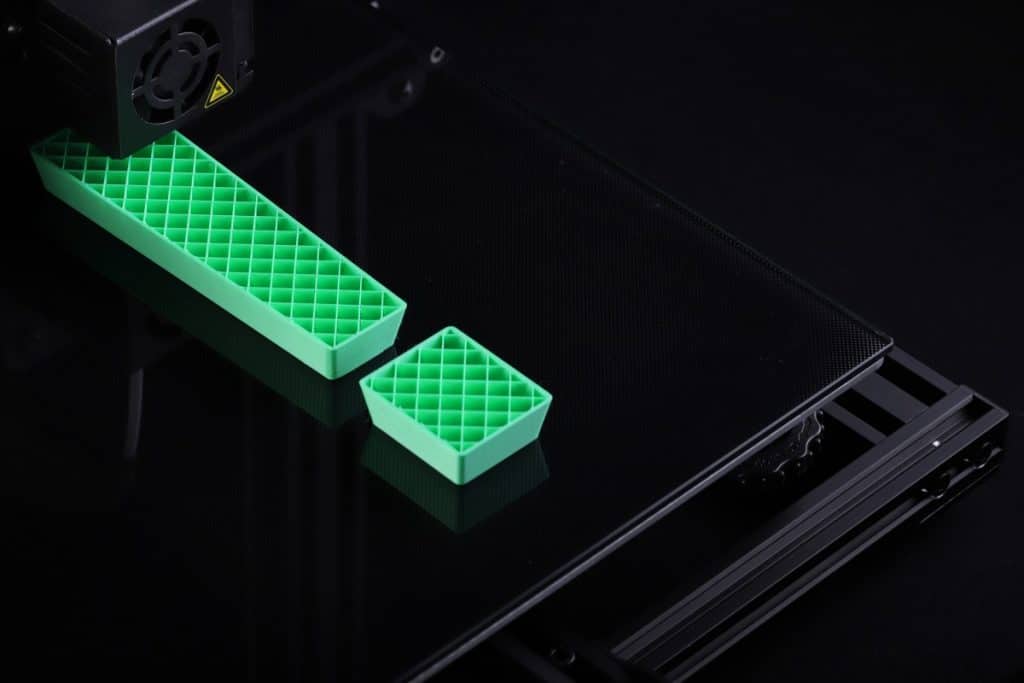
Here’s a list of the different options available:
- Rectangular: This is the standard infill pattern. This will provide a good amount of strength in all directions and is one of the more easily applied infill shapes.
- Triangular: Important when the strength of the shell is necessary but will take longer to print.
- Wave/Wiggle: This is a waveform infill pattern. This is best for a model that requires flexibility.
- Honeycomb: Provides optimal overall strength in all directions, and is one of the more popular infill shapes. It won’t increase your print time either.
You can also increase shell thickness to reduce the amount of time and materials needed for whichever infill pattern you choose for your model.
Importance of Cooling.

Enabling cooling fans will ensure the material if properly cooled before the next layer is printed. This is going to enhance the overall quality of your model.
You can even adjust the fan speed for different materials and for the separate layers of your model. A higher fan speed can reduce oozing and will result in better cooling, but can also increase shrinkage.
Special Modes to Keep in Mind when 3-D Printing
- Print Sequence: This is important when you have multiple models on the build plate. There are two options for this setting:
- All At Once: One layer of each object will be printed before moving on.
- One At a Time: Objects printed separately, all the layers of one object and then all the layers of the other object.
- Mold: This will print your model in negative, or without a filling and is useful for creating molds for other materials. Options available for this setting:
- Minimal Mold Width: Specifies the minimum width of the mold.
- Mold Roof Height: Specifies the height of your mold.
- Mold Angle: Maximum angle the mold may take outside of the model.
Related Articles
- Create a Temperature Tower Using Cura – The Easy Way
- Cura Jerk Settings: How to Set Them
- Cura Profiles
- How to Remove the Disallowed Areas in Cura
What I’ve Learned
The first layer of your 3-D model is the most important step in the printing process. Getting your first layer to properly adhere to the build plate can be the difference between a successful model or an unsuccessful one.
Common factors that could affect your first layer include nozzle height, speed of printing, the temperature of the material and build plate, and what type of material you choose. These factors are all important with the printing of the entire model, and Cura software is very adaptable to ensure the quality of your model.
Make sure you check out our YouTube channel, and if you would like any additional details or have any questions, please leave a comment below. If you liked this article and want to read others click here.
This appears to be a really good article so I’m definitely going to read the whole thing soon. But I have a question about the initial layer thickness. You say the initial layer should be 90% lower than the rest of the layers but then that the space should be 10% lower than the rest of the layers. How can it be both 90% lower and 10% lower? I must not be understanding this properly.
Hi. That was probably a poor choice of words on my part. The point that I was trying to make there was the 10% that was missing from the first layer wouldn’t affect the amount of filament being used for the print. That said, since Cura 4.7 I stopped doing this and just started setting the initial layer height to 0.2mm. I need to go back through this article and update a couple of things.