One of the biggest decisions you will have to make when purchasing a 3d printer is what max build volume is right for you. The max build volume of 3d printers can vary greatly, but most printers on the market are between 200-300 millimeters squared, including one of my favorite printers, the Ender 3, which has a 220×220 build pate. Most of the time, that decision is made without considering what restrictions the slicing software may put in place.
In Cura 4.5 they started adding machine disallowed areas to the definition file of many common printers that reduces the usable areas on the Y-Axis by about 20 mm. While this may not seem like a lot in practice, it really is, especially with smaller printers. Think about it this way, with an Ender 3, that’s almost a 10% reduction in usable space on the Y-Axis.
The Cura disallowed area can be removed by removing the contents of the machine_disallowed_areas section in the printer profile located in the definitions folder.
In this article, I’m going to show you how to remove this restriction and get your full build volume back. I will be using my Ender 3 as an example, but the process will be the same for all printers with the disallowed area. The only difference being you will need to choose the definition file for your printer.
*Disclaimer: Cura added the machine disallowed area to help prevent the extruder from running into obstructions, like a clip to hold a glass build plate on. If you decide to remove it, make sure you don’t have anything blocking the extruder or account for the obstruction when placing your objects.
How to Remove the Disallowed Zone
Now that we have talked about what the disallowed area is and why it was added, we can get to the reason you guys are here, how to remove it. We need to make a backup of the original definition file and remove a couple of lines from the original one. Making the backup isn’t required, but I prefer to do that just in case I mess up the file I’m working with.
Written Instructions
Here is the step by step process.
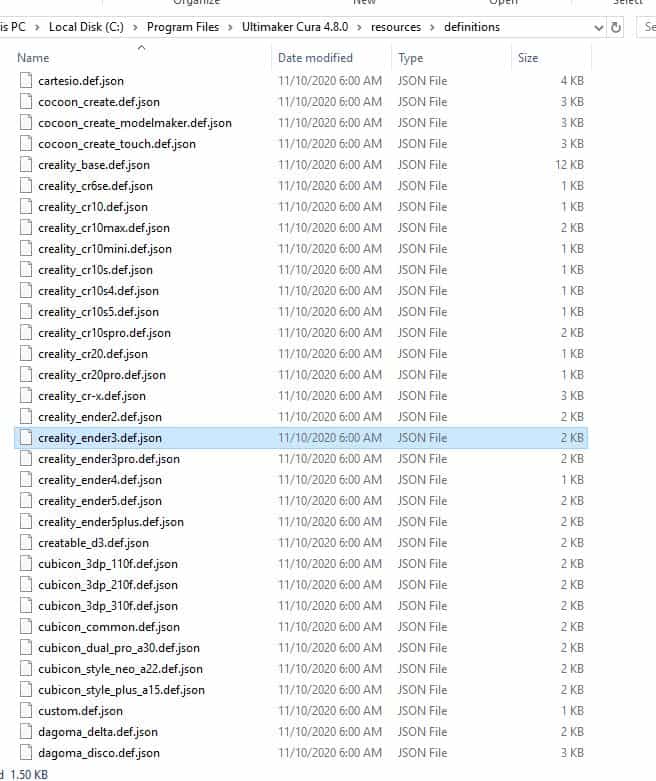
- Browse to the definitions directory of the Cura version you are working with. If you are using Windows, the directory will be “C:\Program Files\Ultimaker Cura VERSION\resources\definitions”. If you are using a MAC, you will need to go to the Cura install location à resources à definitions.
- Version should be replaced with the version of Cura you are using
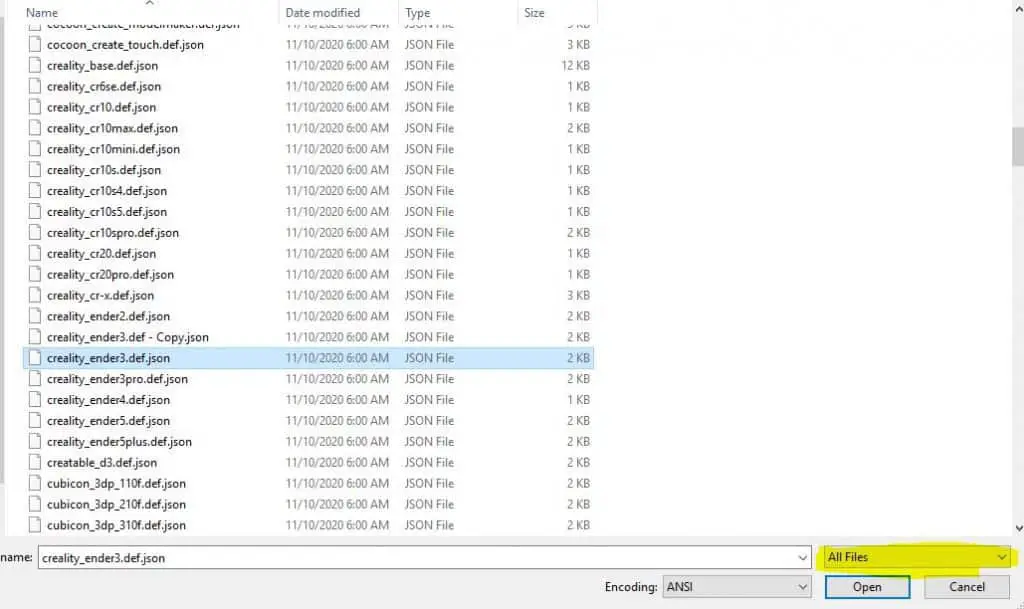
- Find the definition for your printer. In my case, it will be creality_ender3.def.json.
- Create a copy of the definition by right-clicking on the file and selecting copy. Then past the file in that same location.

- Open notepad or notepad ++ as an administrator
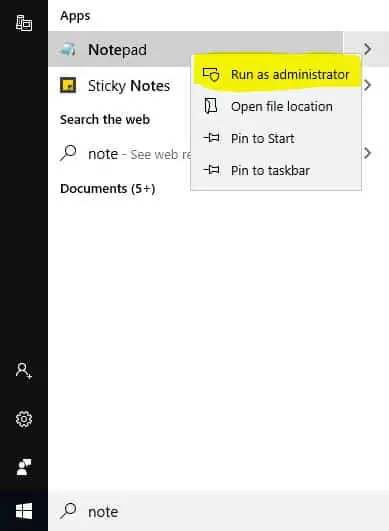
- In notepad, go to file –> open
- Browse to the directory with the definition files, change the file type from *.txt to all files, then select the definition you are working with.
- Delete these lines under machine_disallowed_areas
- Before
“machine_disallowed_areas”: {
“default_value”: [
[[-117.5, 117.5], [-117.5, 108], [117.5, 108], [117.5, 117.5]],
[[-117.5, -108], [-117.5, -117.5], [117.5, -117.5], [117.5, -108]]
]},

- After
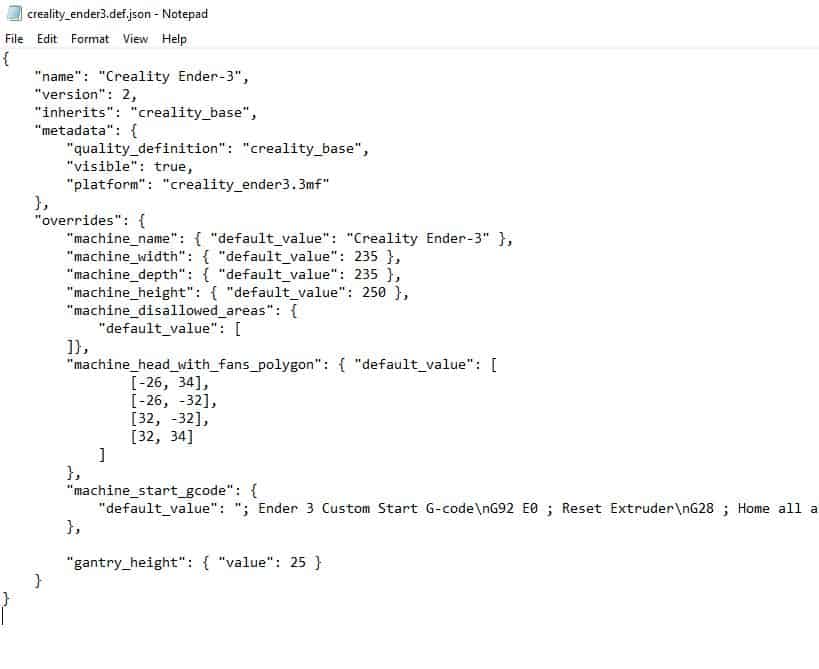
- Save the file by going to file and save.
- Restart Cura if it was running.
Video Instructions
Note: You will need to repeat this process each time you install or upgrade Cura.
*Disclaimer: Cura added the machine disallowed area to help prevent the extruder from running into obstructions, like a clip to hold a glass build plate on. If you decide to remove it, make sure you don’t have anything blocking the extruder or account for the obstruction when placing your objects.
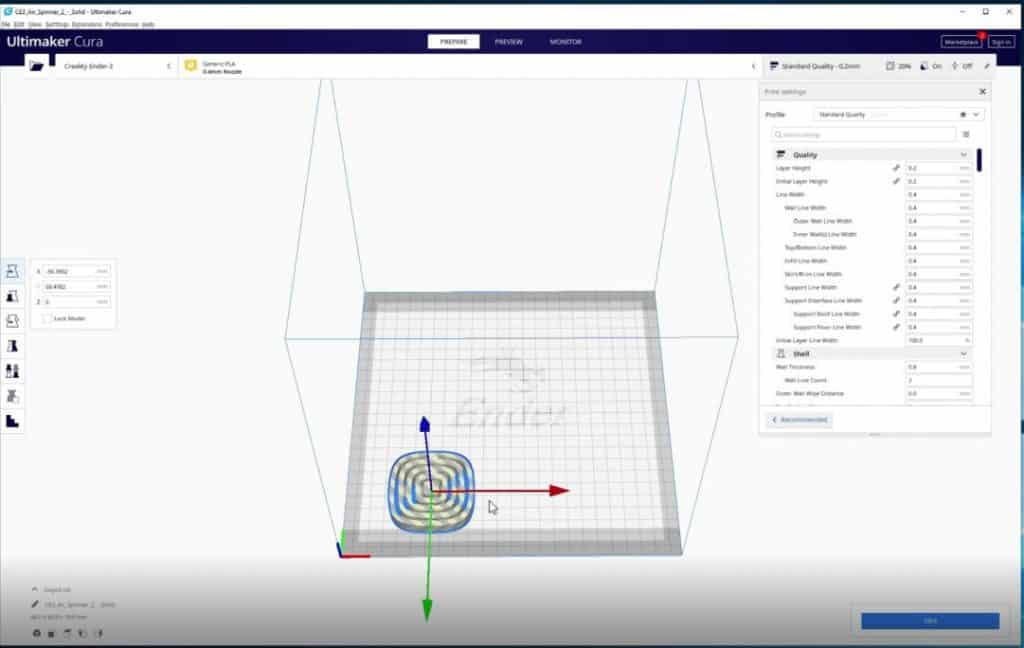
What Is the Disallowed Area in Cura?
The disallowed area is a greyed out area on each side of the Y-Axis that prevents you from slicing a print if anything is in them. From what I have seen, the area is about 10 mm on each side, but that may not be the case across all printer profiles. Here is an image of what the disallowed area looks like.
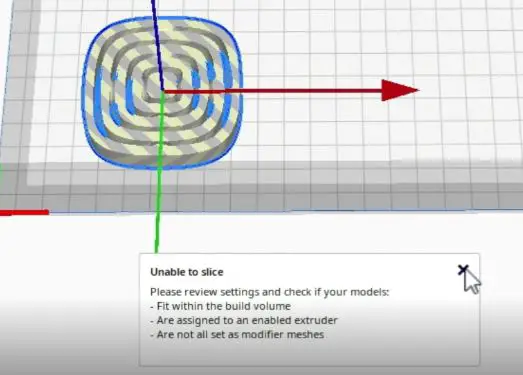
If you attempt to slice a print with something in the disallowed area, you will get this error message.
Why Is the Disallowed Area There?
From what I have been able to gather, the disallowed area was added to prevent the extruder from running into obstructions in areas where they are common. The most common example of this would be the clips that are added to hold a glass build plate in place. It also gives the user the option to block off certain areas of the build plate. This can be useful if the build blate has an area that is blocked from a modification or a damaged area, though I don’t see this being needed often.
I believe that Ultimaker added the default disallowed area to help prevent new hobbyists from accidentally damaging their printer. They also made it somewhat easy to diable to give more advanced users the option to remove. As much as I hate the disallowed area, I think that adding it was a smart move on Ultimaker’s part. I also like that it was added in a config, or definition, file because it makes it easy to modify or remove.
Related Articles
- Create a Temperature Tower Using Cura – The Easy Way
- Cura First Layer Settings
- Cura Jerk Settings: How to Set Them
- Cura Profiles
Recap
In Cura 4.5 they started adding machine disallowed areas to the definition file of many common printers that reduces the usable areas on the Y-Axis by about 20 mm. In this article, I showed you how to remove this restriction and get your full build volume back. The process isn’t difficult and shouldn’t take more than five minutes or so.
Make sure you check out our YouTube channel, and if you would like any additional details or have any questions, please leave a comment below. If you liked this article and want to read others click here.