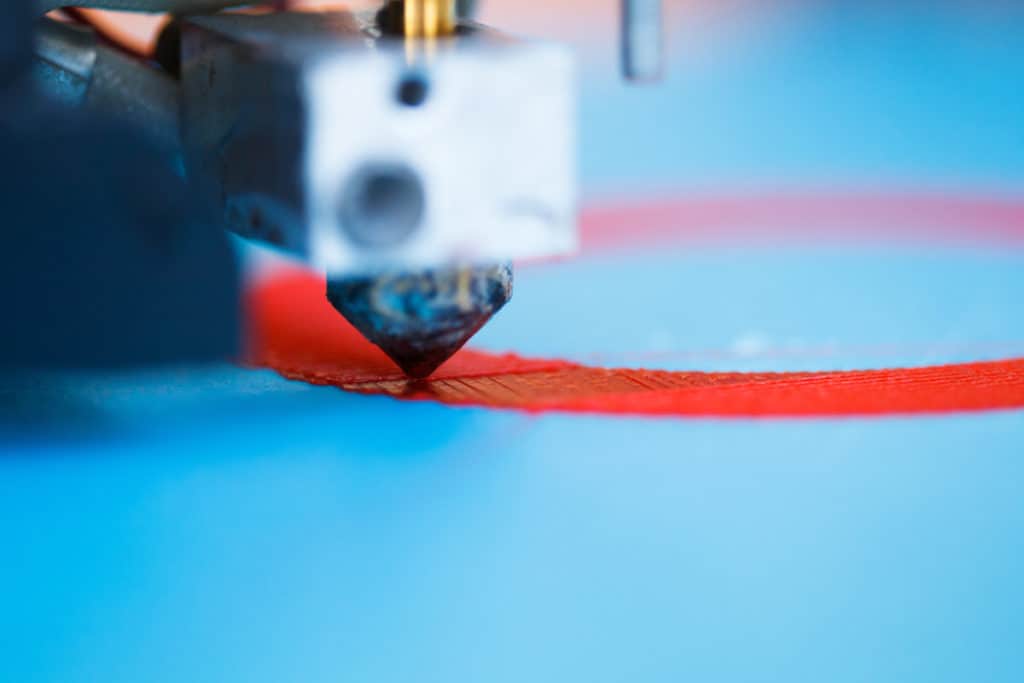
If your 3D printer is shaking everything around it and the extruder head comes to an abrupt stop every time it needs to move to a new position your jerk settings are probably to blame. I had a similar issue when I was first setting up my 3d printer and was able to solve it by enabling jerk control in Cura and cutting speeds in half. Jerk is the maximum instantaneous speed change of the print head.
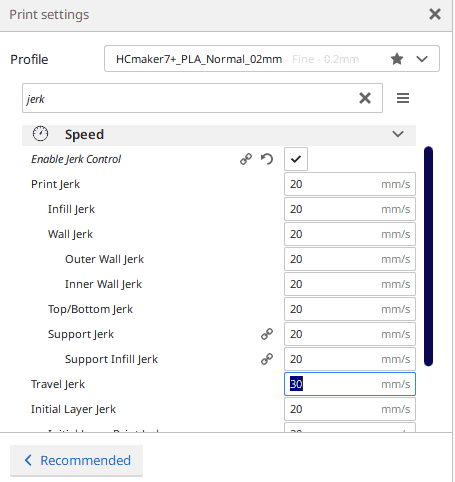
In Cura 4.X jerk control is disabled by default, which means your printer will fall back to what’s on its firmware. You can override this at the printer console but I prefer to have all the settings in the G-code file as it provides less room for error. On my 3D printer, I set the Travel Jerk speed to 30 mm/s and all other jerk control setting to 20 mm/s. This significantly reduced the abrupt stops for me but you may need to play with the settings some to see what works best for your printer.
In 3D printing, different speed settings can be used to suit specific sections of the print.
Jerk settings describe the speed of the print head before a hard stop and following change of print direction and velocity. This means that while printing, the print head makes a complete halt at certain points of the printing process before continuing to print a different section.
If the change is made at high speeds, the move is damaging to the printer head and the quality of the print. A high-speed jerk can be noticed from vibrations of the printer head and a screeching sound.
Think of a high-speed jerk in the analogy of the brakes of a car. If braking is done at high speed, the ride is uncomfortable and the brake parts are compromised.
Read on to understand jerk setting among other speed settings and also explore enabling Cura jerk settings.
Jerk Setting Among Other Speed Setting
Because 3D printing takes a lot longer than normal document printing, Cura offers several settings to control print speed. A general rule of thumb is higher quality 3D printers can print faster, without issues, than cheaper made ones.
Print speed is measured in mm/s. It is the velocity of the print head while printing is in motion. Print speed settings are found in the Speed option of the Custom settings. The default Cura print speed is 60mm/s. Note, this value may differ based on the printer profile selected.
I recommend you review the documentation for your printer to see if they have any recommendations on speed and jerk settings or if they provide a printer profile that you can import into Cura with the settings already defined.
When printing speed is high, shorter printing time is expected and vice versa. But high printing speed can compromise quality if other factors are not considered. For example, if printing speed is increased, the filament may not melt at the same rate. This means that the temperature must also be amplified to ensure that the filament melts fast enough to keep up with the increased printing speed.
Increased print speed also makes the printer head to jerk and vibrate, compromising print quality.
To create a balance, Ultimate Cura has different speed settings depending on the specific aspect of the printing task. They include:
Travel speed
The speed of the print head when in motion from one point to another (when not extruding). High-speed travel gives a cleaner print by preventing filament leak. If too high, the nozzle can overprint on already printed sections.
Initial layer print speed
It specifies the print speed for the first layer. Low speed allows the print to stick better.
Initial layer travel speed
It defines the travel speed for the first layer and should be kept low.
Skirt speed
Also known as brim speed and specifies the printing speed of the skirt. It should be the same as the initial layer speed.
Maximum Z-speed
The setting that alters the speed for the built plate movement. It should be set at maximum.
Number of slower layers
Specifies the number of layers needed to obtain the print speed from the bottom layer. Set at a higher value, this setting reduces the possibility of warping even though printing time is increased.
Equalize filament flow
The setting allows higher speeds when printing thin walls.
Enable acceleration control
Enabling acceleration control allows you to adjust firmware settings for speed. For example, you can reduce firmware speed for accurate printing at lower speeds. If you opt for maximum acceleration, it’s enough to disable the option.
Jerk control
As indicated earlier, jerk settings control the speed before a hard stop.
Cura Jerk Settings: Enable Jerk Control
3D printers come with a firmware jerk setting. Usually, this setting is high implying a minimum jerk. As a rule, however, Cura software settings override firmware settings.
Cura jerk settings decrease the speed settings of the firmware. This makes the printing slower but increases print quality and accuracy.
If the jerk setting is disabled, a maximum jerk is activated. As a general principle, the Cura ‘Enable Jerk Control’ option should always be enabled.
When you start Cura, click the Preferences menu and then the Setting option. The Settings option has all the different sub-options including Quality, Shell, Infill and Speed. Under speed, choose the Enable Jerk Control.
Under the Enable Jerk Control are all the specific jerk settings that you can choose depending on the specifics of your printing. They include:
- Print jerk
- Infill jerk
- Wall jerk
- Top service skin jerk
- Support jerk
- Travel jerk
- Skirt/brim jerk
Enabling the jerk settings under Preferences allows Settings Visibility when you get to the Custom Print setup. Enable Jerk Control settings here will typically override the settings defined in the printer’s firmware and will give you more control over your print.
With the jerk control settings in place, Cura will add the G-code to effect these settings every time printing requires it. If they are not set, then the printer goes for the firmware jerk settings.
Related Articles
- Create a Temperature Tower Using Cura – The Easy Way
- Cura First Layer Settings
- Cura Profiles
- How to Remove the Disallowed Areas in Cura
Summary
Cura offers many options to control the jerk settings and speed of your printer. I set the Travel Jerk speed to 30 mm/s and all other jerk control settings to 20 mm/s. This has worked well with my printer but it’s not a one size fits all setting as no two printers are completely alike.
If the above settings don’t work well with your printer, I recommend reviewing the documentation to see if they have any recommendations or if they provide a printer profile that you can import into Cura with the settings already defined. If you’re looking for a new 3d printer, I recommend one of the Creality ones. I have owned a couple of them and they are great for the price.
Also, if your printer is producing good quality prints with jerk control disabled in Cura I would not mess with it. I like to follow the “ifs it’s not broken don’t fix it” rule. Though if that was the case you probably wouldn’t have ended up coming across, or reading, this article.
Make sure you check out our YouTube channel, and if you would like any additional details or have any questions, please leave a comment below. If you liked this article and want to read others click here.