When it comes to Cura settings, tips, and tricks, some just work so well that they feel like a “hack”, like you’ve cheated in some way to get an amazing result. These are the settings and plugins I wish I knew about when I just started with 3D printing.

Display File Name And Current Layer On Printer Display
This trick is so that you can see the filename of what you’re printing to make sure you selected the right model. Go to Extension, Post Processing, Modify G-Code. Click on “Add a script” and select “Display filename and layer on LCD”. Leave the box on the right side blank for now.
Now slice the file and change its name to whatever you would like it to be.
Now open up the g-code file you’ve just named and search for the name followed by the word “layer” within the code. Remove any colon after the word “layer” in your g-code.
Create Custom Supports
You can create custom supports in Cura by adding the Cylindric Custom Support plugin from the Marketplace.
Install the plugin and restart Cura. Now you can load up a model and click on it to get a menu on the left. Hover over the support icon and choose out of 5 different support shapes. You can also set the size and angle from the base in these settings as well.
With your support type selected, click anywhere on the model that requires support. To remove any supports, just double click it.
Don’t go any less than 2mm on the size and 1° on the angle or you may run into problems.
This plugin will save you on time and filament and is a feature on paid software like Simplify 3D.
Adaptive Layer Height
Adaptive layer height will save you time and materials by printing higher detail layers in areas of the model that require high resolution while printing lower layer heights in the areas of the model where you don’t require fine detail. For example: If you print a baby Yoda like this one on thingiverse.com, you could set the layers that form the base to a lower layer height because it doesn’t need as much detail as the rest of the model.
A better example would be a model that comprises a cube at the bottom with a more detailed figure at the top. You can set the layer height of the cube to a lower resolution because it doesn’t have much detail. As soon as the nozzle finishes the cube and reaches the height of the detailed model, it can change to a finer layer resolution according to your settings.
To activate adaptive layer height:
- Hover over preferences at the top of Cura.
- Select “Configure Cura”
- Select “Settings”
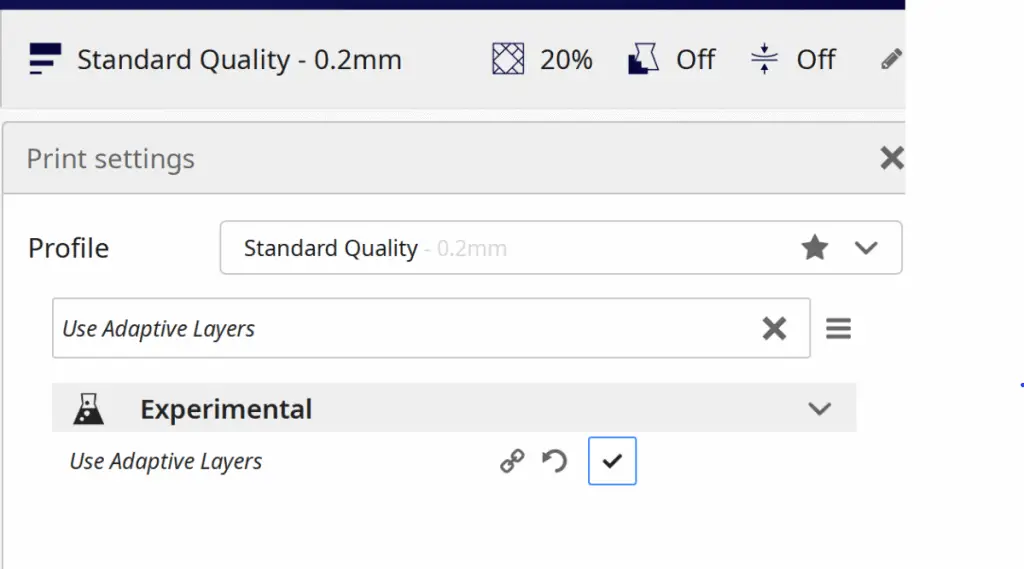
- Go to the “Experimental” section
- Check the box for “Use Adaptive Layers”
You can now adjust the Adaptive Layer feature values in the printer settings drop-down menu. How you configure the values will depend on what you’re printing. It’s important that you don’t exceed a layer height of 0.32mm with a 0.4mm nozzle. The layer height should not be more than 80% of the nozzle size for best results.
Lower The Model Into The Bed For Precise Slicing
Here’s an easy way to cut models at whichever layer level you decide without any code or altering of the model. As you preview the model in Cura, lower it into the bed to slice it exactly where you need to. Everything below the surface of the bed won’t be printed. This works well to print parts you plan to stick together later.
Reorient Your Prints To Reduce Supports
A good way to save on materials and print time is by orienting your print in the best way possible before printing. For example, you can print a cosplay helmet upside down to save on time and filament because you’ll require fewer supports in that position.
You should try to increase the model’s footprint on the printing bed to reduce the supports needed. The rotate tool also allows you to position the model at any angle to achieve optimal layer bonding directions.
Simply select the model and use the rotation tool to position it in the best way possible according to the information above.
Add A Start And End G-Code
By adding some custom g-code to your printer settings, you can get the nozzle into position to print and out the way when it’s done. You can use g-code to retract filament on print completion and also turn off the extruder. Here is how you can do all that and more.
- Hover over settings.
- Select Printer.
- Select Manage printers.
- Click the “Machine Settings” button.
- At the bottom of the window is your start and end g-code and you can add the following to it if it’s not already there:
The following g-code values are for my Ender 3 but you can just replace them with the values you require for your specific printer. Everything except for the values remain the same for any 3D printer. The words after the semicolon are just notes that you can leave in the code or remove, the actual g-code instructions are all the characters that precede the semicolon. (;) I suggest you leave the g-code notes in the code just for your own reference.
Start G-Code
G92 E0 ; Reset Extruder
G28 ; Home all axes
G1 Z2.0 F3000 ; Move Z Axis up little to prevent scratching of Heat Bed
G1 X0.1 Y20 Z0.3 F5000.0 ; Move to start position
G1 X0.1 Y200.0 Z0.3 F1500.0 E15 ; Draw the first line
G1 X0.4 Y200.0 Z0.3 F5000.0 ; Move to side a little
G1 X0.4 Y20 Z0.3 F1500.0 E30 ; Draw the second line
G92 E0 ; Reset Extruder
G1 Z2.0 F3000 ; Move Z Axis up little to prevent scratching of Heat Bed
G1 X5 Y20 Z0.3 F5000.0 ; Move over to prevent blob squish
End G-Code
G91 ;Relative positioning
G1 E-2 F2700 ;Retract a bit
G1 E-2 Z0.2 F2400 ;Retract and raise Z
G1 X5 Y5 F3000 ;Wipe out
G1 Z10 ;Raise Z more
G90 ;Absolute positioning

G1 X0 Y{machine_depth} ;Present print
M106 S0 ;Turn-off fan
M104 S0 ;Turn-off hotend
M140 S0 ;Turn-off bed

M84 X Y E ;Disable all steppers but Z
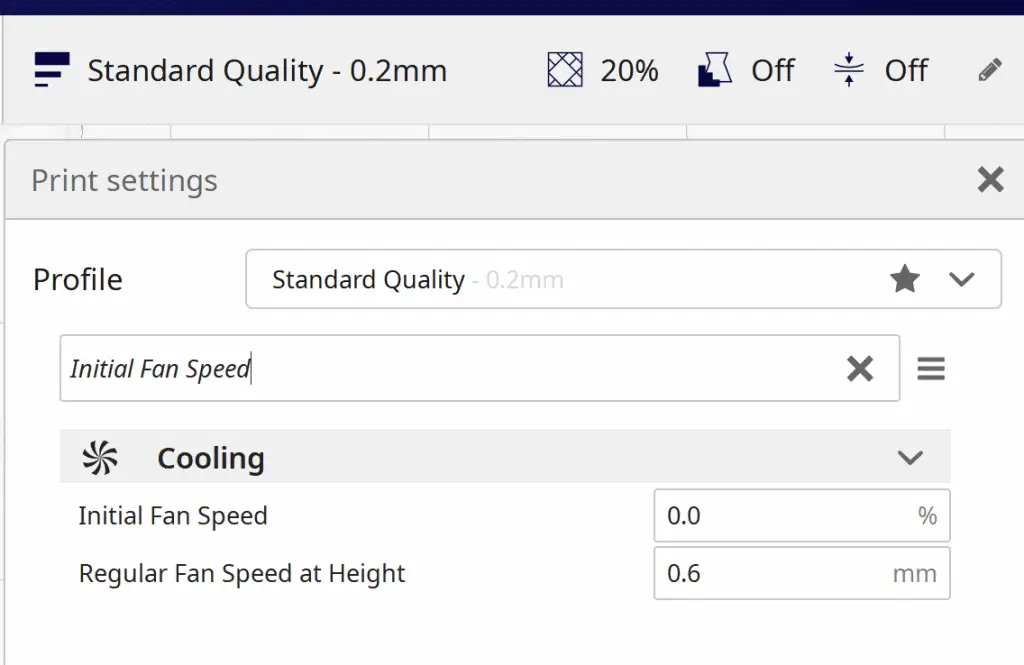
Deactivate Cooling Fan For First Layers
If you deactivate the fan at the beginning of the print during the first layers, the model will stick to the bed easier. You can find “Initial Fan Speed” in the Print Settings control panel. Click on the Custom button and you’ll see the Cooling options in the settings, you can also search by typing “Initial Fan Speed” in the search bar.
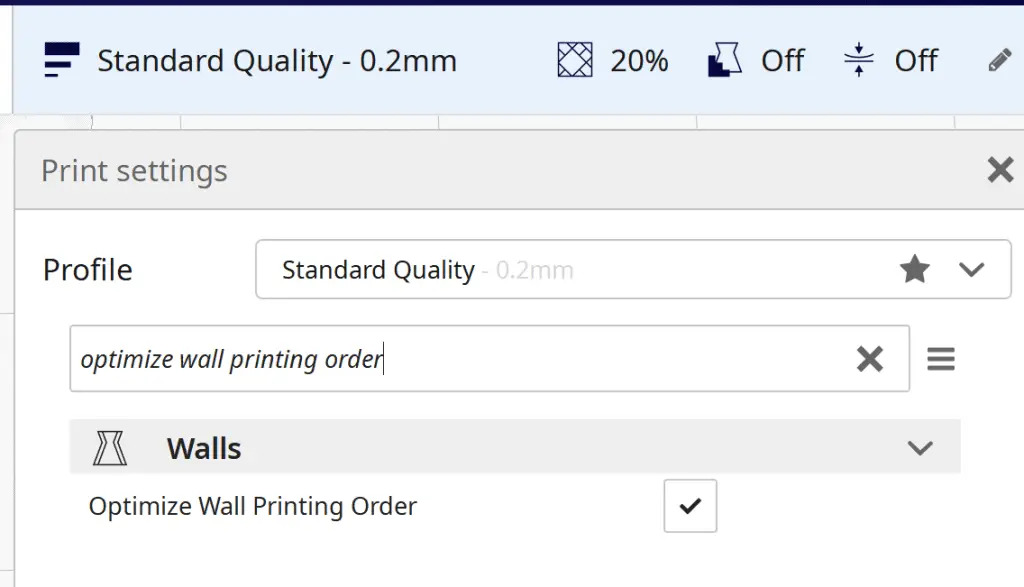
Optimize Wall Printing Order
This is a setting that will reduce your printing time. It will also help the wall layers stick to each other better because the entire wall is printed before moving to the next area.
You can make this setting visible in Cura by going to Settings – Configure setting visibility. Search for “Optimize Wall Printing Order” and check the box. After that, the setting should be available in the printer settings. You don’t have to add any values to this setting, it’s either on or off, I suggest you keep it on in many instances. Whenever you don’t need it, just uncheck the box in the printer settings.
Besides saving time and having better layer adhesion, this method reduces wear and tear on your printer because it doesn’t need to move around as much.
Related Articles
- How to Print a File from Thingiverse (The Easy Way!)
- Create a Temperature Tower Using Cura – The Easy Way
- Cura Profiles
- Best PLA Glue – The Answer Inside!
Conclusion
Technically, none of these tips and tricks match up to the true definition of the word “hack” (To gain unauthorized access). But if you’re searching for “Cura hacks” in Google, I’m sure these are the types of settings you’re looking for.
One thing I can guarantee is that if you implement these Cura tips, you will benefit in all the ways I’ve explained, faster printing times, higher quality prints, and easier printer operation.
For more information on how to set up and use Cura, check out my video here on YouTube.
Make sure you check out our YouTube channel, and if you would like any additional details or have any questions, please leave a comment below or join us on Discord. If you liked this article and want to read others click here.