A level printing bed is crucial for accurate 3D models. If the bed isn’t level, the first layer won’t be level, causing the entire model to be ruined.
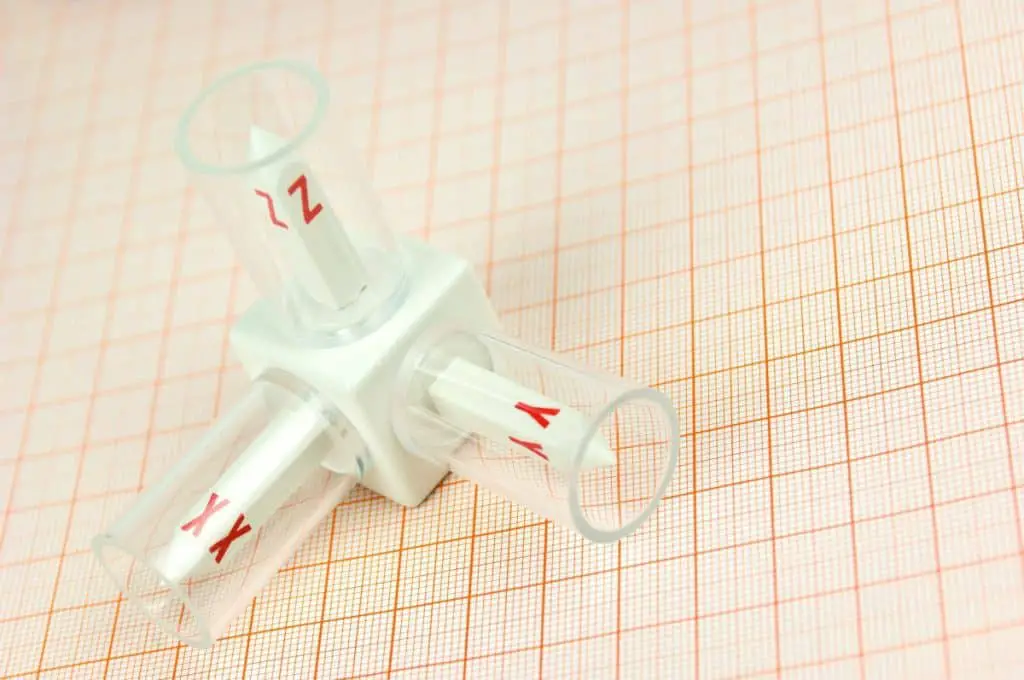
The good news is that there are printers that can level the print bed automatically. Well, they don’t actually level the bed physically. Instead, a sensor near the print nozzle measures the distance to the print bed. If the distance differs from one area to the next, the sensor will tell the printing software how much to correct the nozzle on the z-axis to counteract the uneven bed.
If the print bed is attached to the z-axis, the software will move the bed up or down at the right time to compensate for any uneven areas.
But that doesn’t mean you never have to level the print bed manually again. In fact, you still need to level the bed manually after every 5 to 10 prints.
There are many printers that claim to have auto leveling when in fact they don’t. These are printers like the Flashforge Adventurer 3. They claim to have auto leveling purely because the distance from the nozzle to the bed can be measured with a sensor. But you still have to turn the screws and level the bed out manually. The sensor does not instruct the software to do anything in this case.
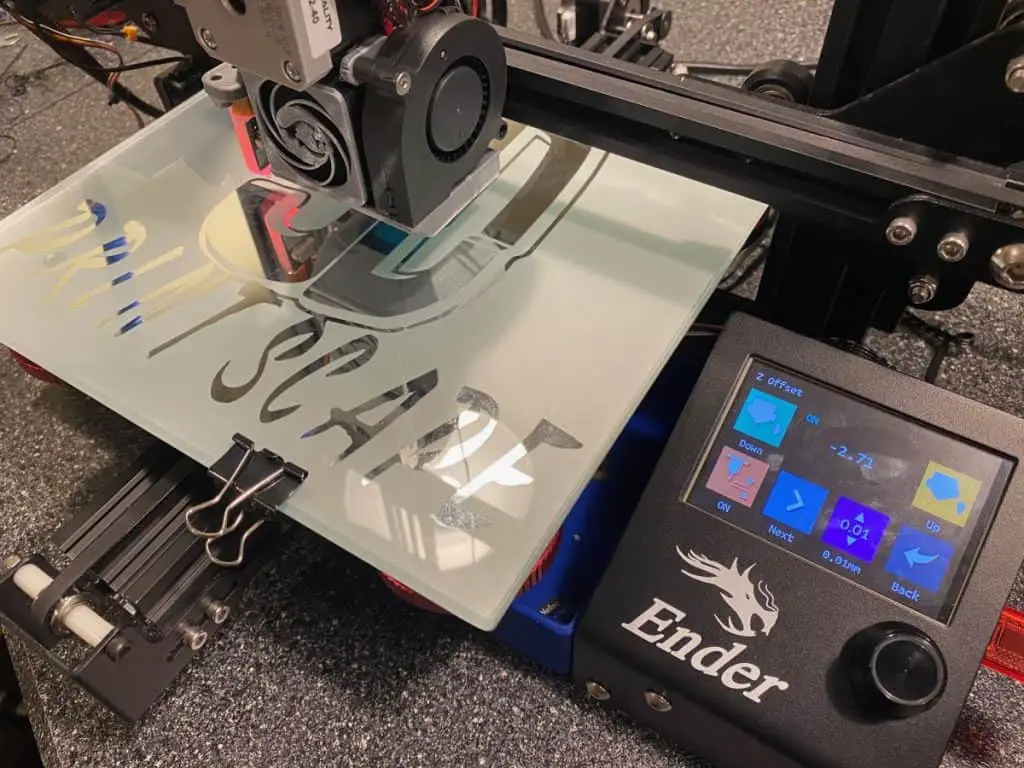
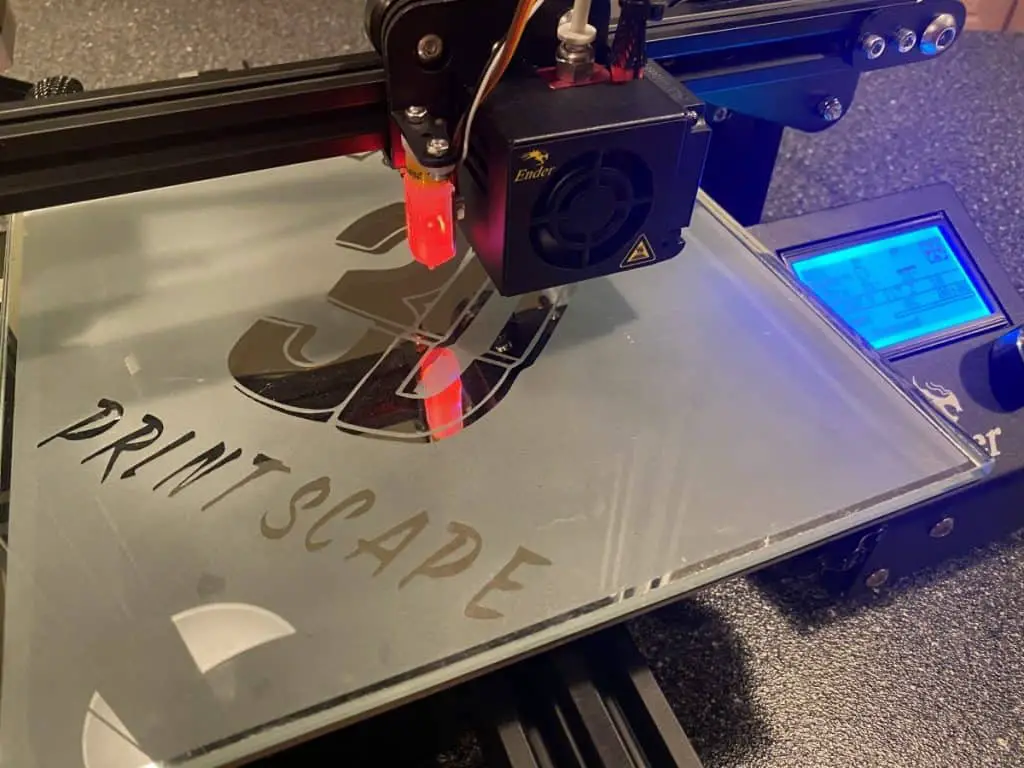
Printers that have leveling sensors by default are usually quite expensive. Although some options like the FLSUN Q5 are surprisingly affordable. But if you’re looking for auto bed leveling cheaper than that, rather buy a lower range printer, like this Ender 3 on Amazon, and add a leveling sensor yourself for $10 to $50 depending on the type of sensor you choose.
I’ll also explain how these sensors work in basic terms. But first, let’s look at an entry level, mid range, and high range printer that already has leveling sensors included.
FLSUN Q5 Delta
The FLSUN Delta is one of the lowest priced 3D printers with auto bed leveling. It uses the induction method to measure the levels.
FLSUN machines are known to be easy to set up and low on maintenance. There are many schools that use them for these reasons.
You can compare this printer with other entry level models like the Ender 3 but at this price point it’s the only printer I know to have true auto bed leveling by default. If you buy the Ender 3 and a BL touch sensor it will still be slightly cheaper than buying this machine.
Here’s the latest offer for the FLSUN Q5 on Amazon.
Prusa i3 MK3S+
This printer uses a SuperPINDA probe for automatic bed leveling. This sensor determines the bed levels by monitoring magnetic field variations as the metallic bed gets closer.
The i3 MK3S+ is more than just a 3D printer with built-in bed leveling. It has many advanced features like an 8-bit controller board, filament sensor, ethernet, wi-fi, 3 thermistors, auto filament loading, Octoprint, and more.
Take a look at the Prusa i3 MK3S+ here on Amazon.
Ultimaker S3
The Ultimaker S3 uses a capacitive sensor to measure inconsistencies across the print bed. The sensor lets the software know how much to adjust the z access at certain locations on the bed to compensate.
This is a high range 3D printer, besides a solid enclosure and dual nozzles, there are plenty of other advanced features as well. Printers at this level are a few thousand bucks so if you mainly want it for auto bed leveling, you can save a lot of money choosing another printer and adding a sensor on yourself.
Have a look at the S3 here on the Ultimaker website.
Upgrade Your 3D Printer By Adding Auto Bed Leveling
You can add a sensor, like this one on Amazon, to your 3D printer for auto bed leveling on almost any model printer.
My preference goes to the BL Touch because it’s extremely reliable no matter the environment or bed material. Here’s a video I made to explain what it does and how to set it up.
While I like the BL touch, there are a few different types of print bed level sensors. These are the most popular amongst hobbyists and professionals.
Types of 3D Printer Auto Leveling Sensors
If you can afford it, buy a touch sensor. Touch sensors are the most reliable because the material of the bed does not matter. The temperature and humidity around the sensor also make no difference to a touch sensor. For these reasons, I only use and recommend touch sensors. But I’ll explain how all of them work in simple terms for you to make your own decision.
Touch/Contact Sensor
A touch sensor sends a probe out to make contact with the print bed. As soon as it makes contact, the sensor sends the reading to the printing software. The software then makes the relevant z-axis adjustments where the bed is uneven.
This is my favorite type of bed level sensor because it works on any bed material and varying temperatures as well.
The BL Touch is one of the most expensive sensors, usually around 4X the price of the ones we’ll go through next, but it’s worth it.
Here’s the latest offers for the BL Touch level sensor on Amazon.
Optical Sensor
Optical sensors use infrared to detect how far an object is in relation to the amount of light that reflects. These are accurate and don’t falter when the environment changes, but if you ever want to print on clear glass, it won’t be consistently accurate.
These types of sensors are used to detect filament in some machines.
Capacitive Sensor
A capacitive sensor detects how far the print bed is by analysing the energy in the capacitor as it moves closer to the bed. It doesn’t make physical contact with the bed.
These types of sensors are very affordable but don’t provide consistent readings if the room temperature or humidity changes throughout the print. The readings will vary from the early morning to midday because of the increase in heat. If it’s raining, the readings will be different because of the moisture in the air.
I advise heating the print bed before commencing auto leveling or you’ll run into inconsistencies.
This is how a capacitive sensor looks. (Amazon)
Inductive Sensor
The inductive sensor detects changes in the magnetic field created by an inductor coil inside. Metallic objects will change the magnetic reading in relation to how far it is from the sensor.
That explains why it only works with metal beds. It won’t detect glass, garolite, plastic, or any other non-metallic bed. Unfortunately, changes in the environment also affect the inductive sensor. If the room has a controlled environment and you never plan to use non-metallic beds, this sensor could work for you.
Heat the print bed up before auto leveling the bed for consistent results.
This is how an inductive sensor looks on Amazon.
Signs Of An Uneven Print Bed
These are the primary defects that could show an uneven bed:
- Filament builds up around the nozzle. This happens when areas of the bed are too high and the nozzle scrapes against the model.
- The first layer doesn’t stick to the bed. Whether it’s a skirt, brim, or just the first layer of the model, if the plastic isn’t adhering to the print bed, it might be uneven. The filament drops onto the bed instead of being firmly extruded.
- Print layers don’t stick to each other properly. Just like the first layer adhesion problems, every layer after that won’t be printed firmly against the previous if the bed is uneven.
Advantages of Auto Bed Leveling
Even though you still need to level out the actual bed from time to time, there are some benefits to having leveling sensors.
- A bed leveling sensor will help if your print bed is warped. Manual leveling will not work with a warped bed.
- The print bed can become slightly uneven after only one print. This is where a sensor will come into play.
- A bed leveling sensor is an additional step in making sure you have the most even print bed possible.
- The sensor enhances the manual leveling and can easily check the level before every single print.
How Often Should You Manually Level A 3D Printer Bed?
For manual print bed leveling you’ll need to level the bed after 5 to 10 prints. Sometimes you might find that the bed is still level, but most times you’ll be adjusting the leveling screws slightly.
Related Articles
- 3D Printing Actual Costs with Examples
- Why Do 3D Printers Use Stepper Motors? (We’ve Got The Answer)
- Is 3D Printing Worth It? – Details Inside!
- Why Is 3d Printing Slow?
- Best 3D Printer For Kids – 2021 Edition
In Summary
It’s important not to confuse physical bed leveling with auto bed leveling. Here’s the difference:
Automatic bed leveling is when sensors measure the distance between the bed and the nozzle and tell the software to compensate for any inconsistencies. Auto bed leveling does not physically level the printer bed.
Manual print bed leveling involves moving the print bed into a fixed level position. This is where you adjust the screws on the corners to raise or lower the bed. Most people do this while inserting standard A4 paper between the nozzle and the bed to gauge the distance. Here’s a video I made to show manual bed leveling.
In my opinion, you shouldn’t look for a printer with auto bed leveling by default. You should just buy the BL touch and attach it to any printer you choose. This way your options won’t be limited by a feature that’s so easy to add on yourself.
Make sure you check out our YouTube channel, and if you would like any additional details or have any questions, please leave a comment below. If you liked this article and want to read others click here.
Hello Mr. Rob,
Hope you are doing well. Could I ask you a questions regarding bed-leveling for my Ender-3?
Thanks for help. Should I post the question here in the comment section?
Hi,
Sure, you can post your question here or join our Discord server and ask there.
Thank you Mr. Rob. I will ask the question here. Not sure how to join the Discord server though…
My Creality ender 3 has 4 knobs to turn under the print bed. The z-axis limit switch is at its lowest position which means that the nozzle is as low as it can be. I believe that I turned and adjusted all 4 bed knobs as much as I could but I still cannot bring the bed up enough to the correct distance from the nozzle: the bed is still too far from the nozzle… How can that be? What should I do?
Thank you!
Rob,
What is the difference between your firmware and the stock firmware. I tried the stock firmware and did not make any progress so someone pointed me to your firmware which I loaded on my Ender 3 Pro with the 4.2.2 board and the BLTouch. I hooked it up as per your instructions. Can I still go back to the stock firmware for the BLtouch and get it to work?
Hi,
The biggest change is the firmware is Marlin, not the Creality version of it. I also add in everything necessary for the BLTOUCH to work. I set up this page, and firmware, to help troubleshoot issues that come up with people in the community. It’s a known good starting point and in many cases, people just use whats there but I also provide the config files in case they want to make changes. You can go back and forth between Marlin and the stock firmware without issues.
Hi Rob, appreciated your videos. I have a Ender 3D PRO updated with a 4.2.7 board and a BLTouch ver 1.3 5 pin plug. I have tried to edit various source files from Marlin, but could not get any of them to work. Now I am at the point where my printer won’t accept any further updates, but only gets to the Marlin bugfix starts screen, but won’t go past that. Have you run across this before, and do yo have any suggestions how to fix?
Hi. I’m assuming you have the BLTouch v3.1, not 1.3. If you do have one of the v1 BLTouched, I don’t think that will work with the 32-bit board. On the firmware, try to add a date or something to the name to make it unique. If that doesn’t work, I would try to download a fresh copy of the firmware and make the changes again. If you run into issues, you can also reach out on YouTube or Discord. https://discord.gg/Bu94EYVkrU