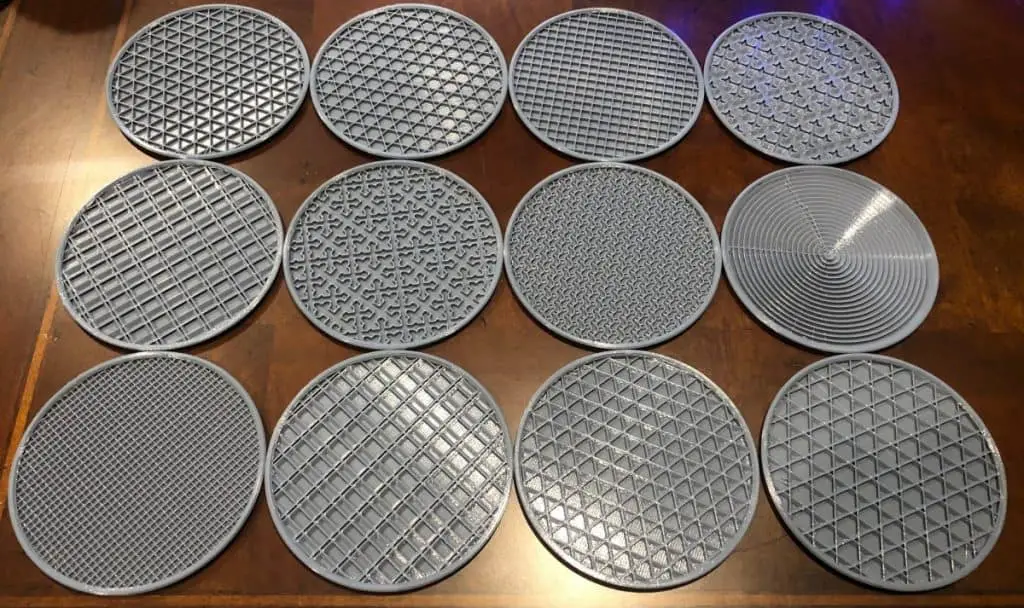
There are so many infill patterns to choose from, a grand total of 13 with Cura. So choosing the best infill pattern for each job can be quite overwhelming. Some infill patterns are definitely better than others in terms of strength, while other patterns reduce the amount of filament and time required to print.
The cubic infill pattern is the best infill pattern overall. You can use it with any model, knowing it will be structurally sound without using too much filament. For models that don’t need strength, lines and grid infill patterns are the best because they’re fast to print and use less material.
However, the best infill pattern really depends on what you’re printing. Some parts don’t need any infill at all, while others may need 50 to 100% infill. To help you choose the best infill pattern for different types of models, I’ll explain each one in detail.
But before we get into the patterns, let’s look at infill density and how you should use it appropriately.
If you’re looking for a good filament to use. I recommend HATCHBOX or OVERTURE PLA (both available on Amazon). They are both great filament and reasonably priced.
3D Printing Infill Density
Simply put, 0% infill density will produce a hollow part while a part with 100% density will be completely solid. For most non-functional parts, like figurines, an infill between 10 and 20% will be perfect. The higher the infill density, the more material it will use. Of course, it also takes longer to print at a higher density. I go into that in much more detail in this article “Choosing the Right Infill Percentage for the Job“.
For functional parts like shelving brackets and anything else that bears a load, 20 to 50% might be necessary. But there are other ways of strengthening your parts without adjusting infill settings. I’ll go through those later.
Lines Pattern
Lines infill is the most basic pattern. It doesn’t offer a lot of strength, but it’s fast to print and doesn’t take much material.
Lines is the best 3D printing infill pattern for display pieces that have some areas with overhang. The lines pattern will hold the overhanging areas up to prevent sagging.
Lines are not good when printing objects that need to be strong. Lines are also not good for any parts that you plan to drill into.
The infill density of lines usually ranges between 5% to 20%.
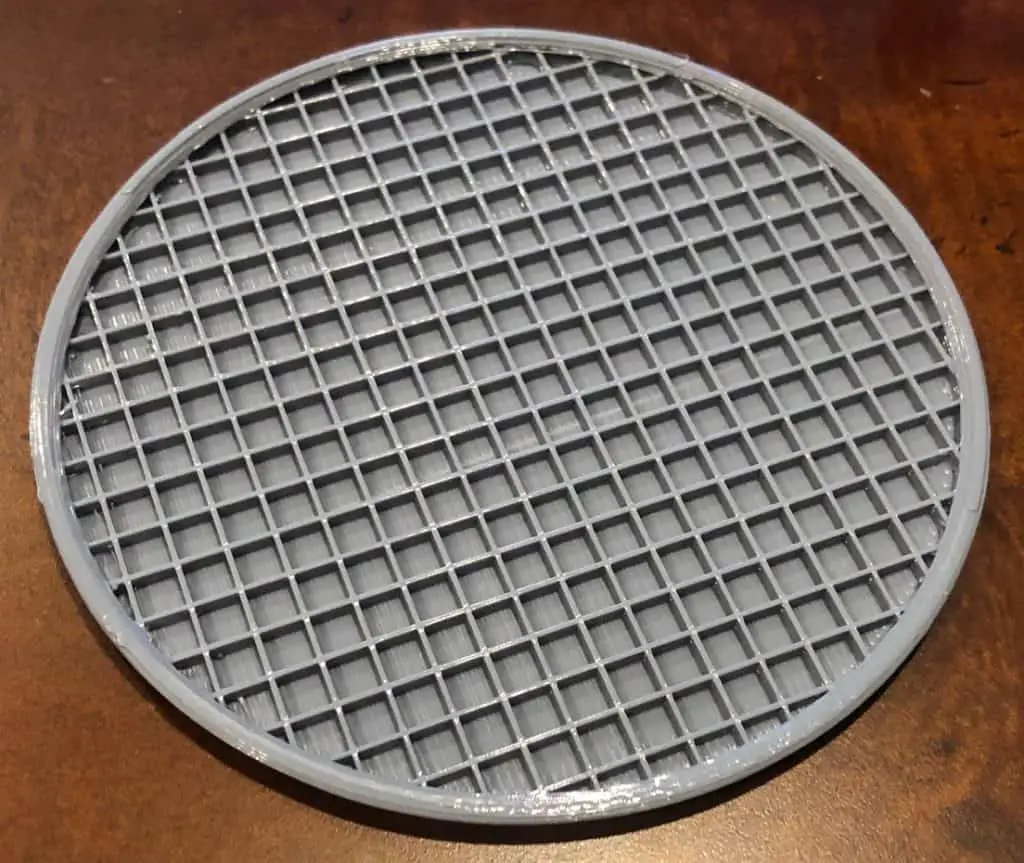
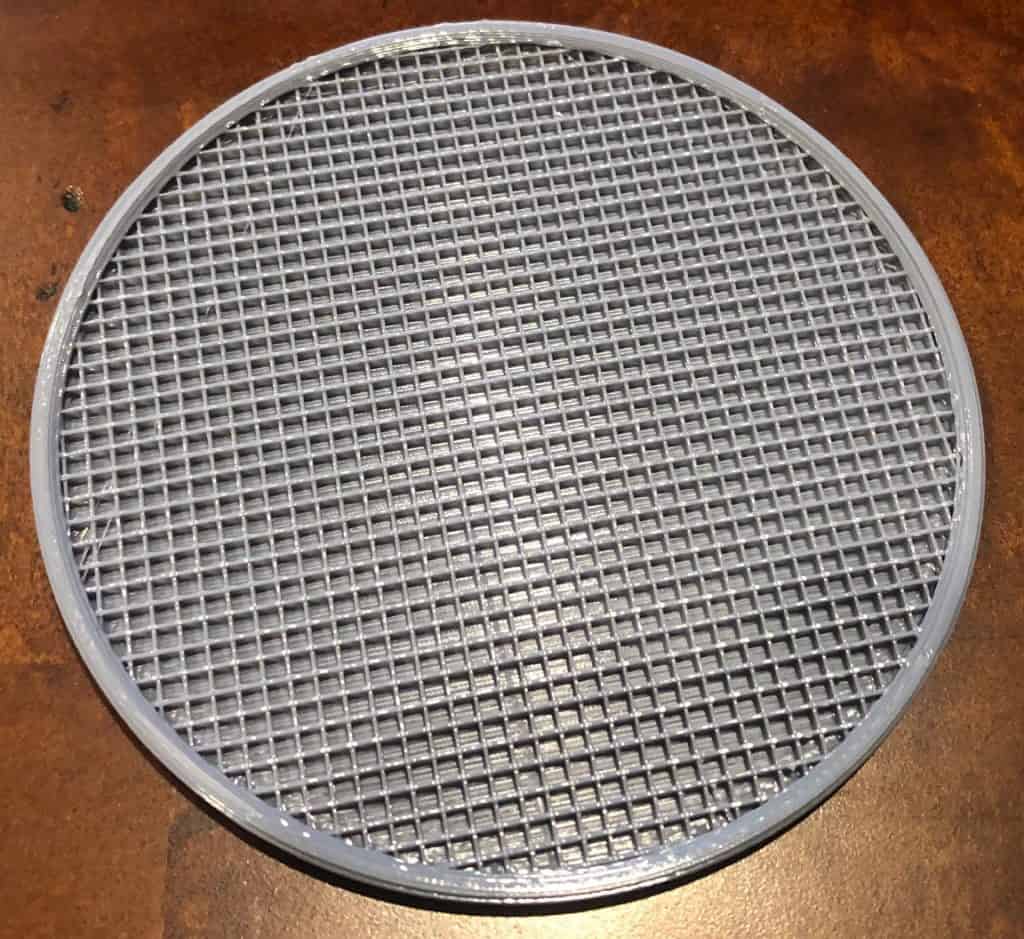
Grid
The grid pattern is very similar to the lines pattern, but instead of only going in one direction, the grid pattern lines go in two directions on the X and Y plane. So the lines cross each other, making the grid pattern. This makes it a lot stronger than lines. It’s still pretty quick to print and uses less material than stronger patterns below.
Grid is the best 3D printing infill pattern for parts that need little strength, like large figurines and spray-can handles.
Grid patterns aren’t good for printing anything that will undergo a lot of force. Increasing the density will help, but other patterns will achieve better results while using less material.
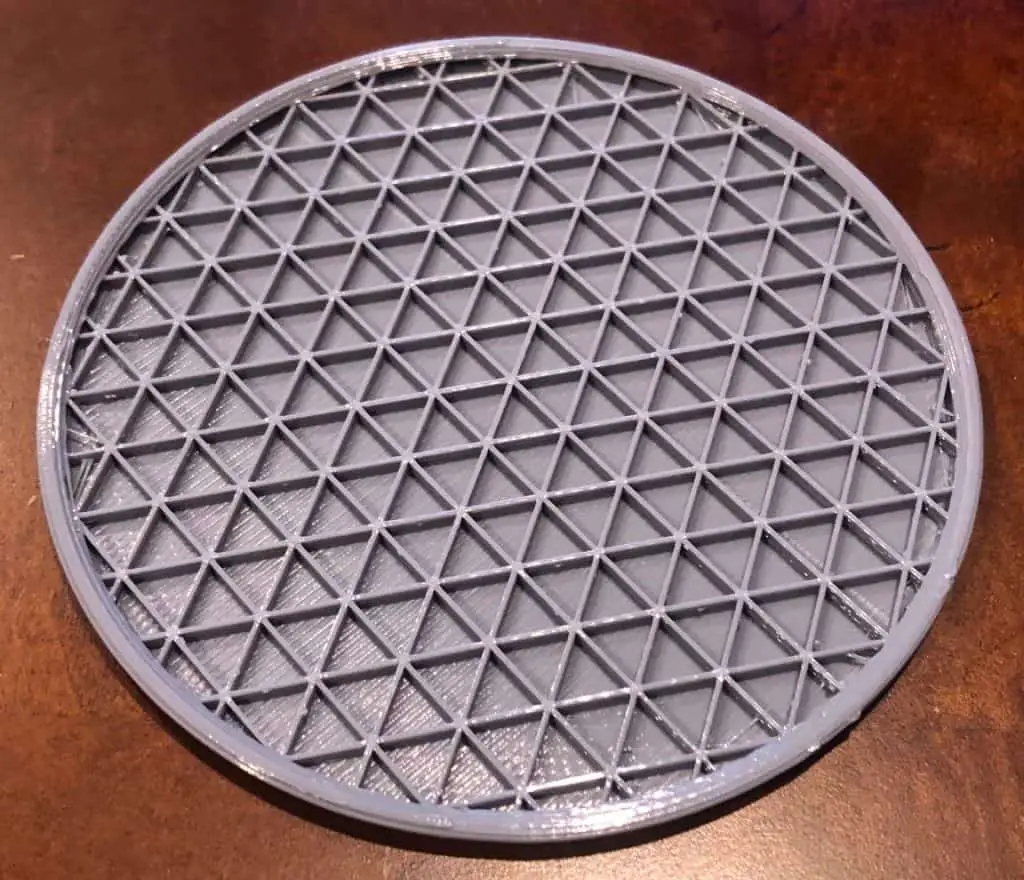
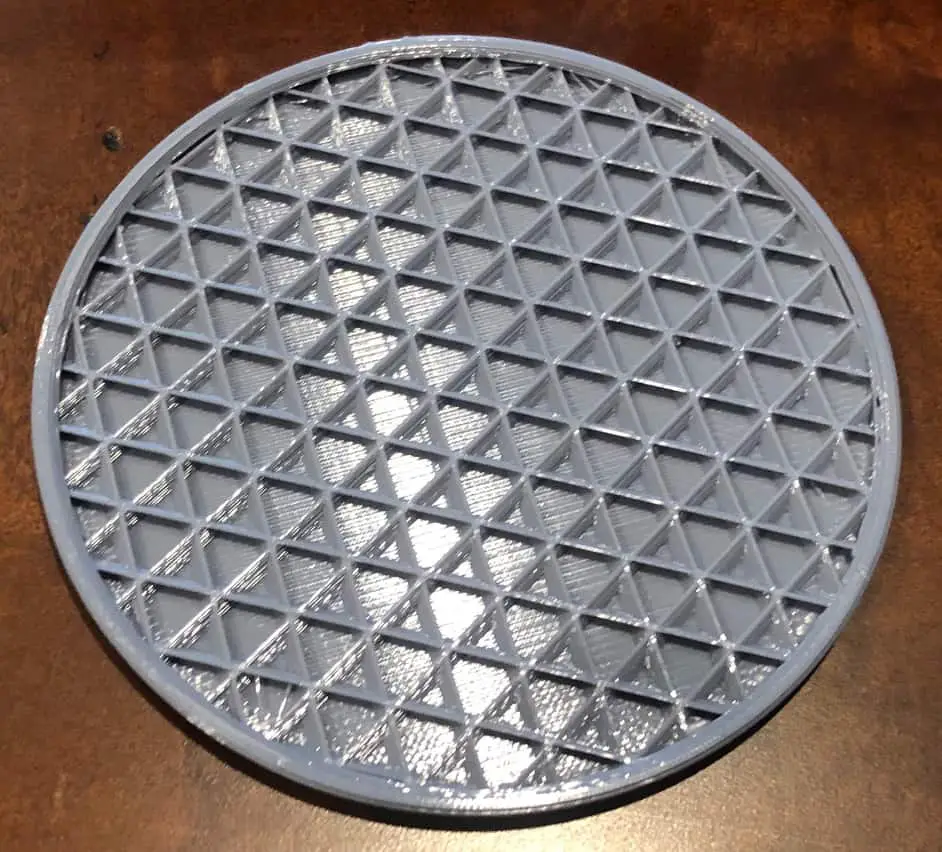
Triangles
This pattern consists of lines going in three directions on the X and Y plane, making it much stronger than line and grid patterns.
The triangles pattern is the best infill for functional parts that require high lateral load strength.
Triangles aren’t good if you’re printing parts that don’t need strength because it will waste time and material. It’s also not the best for parts that need maximum strength because the patterns below will do a better job.
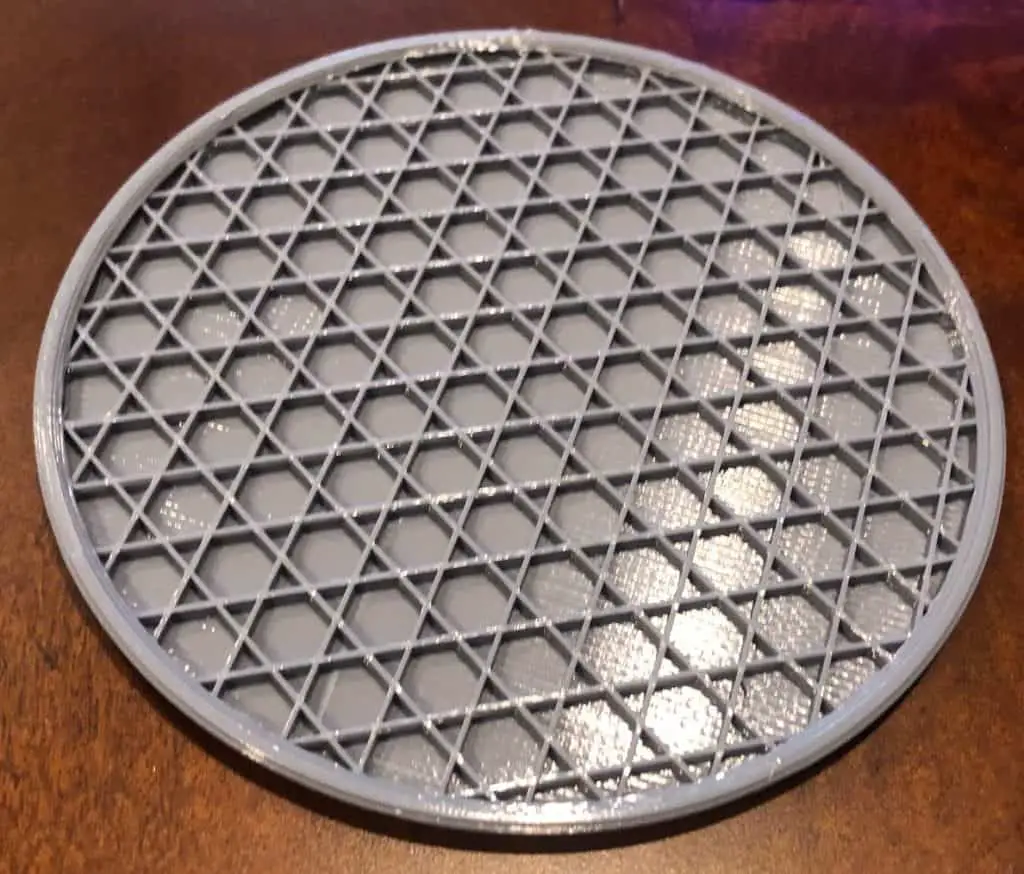
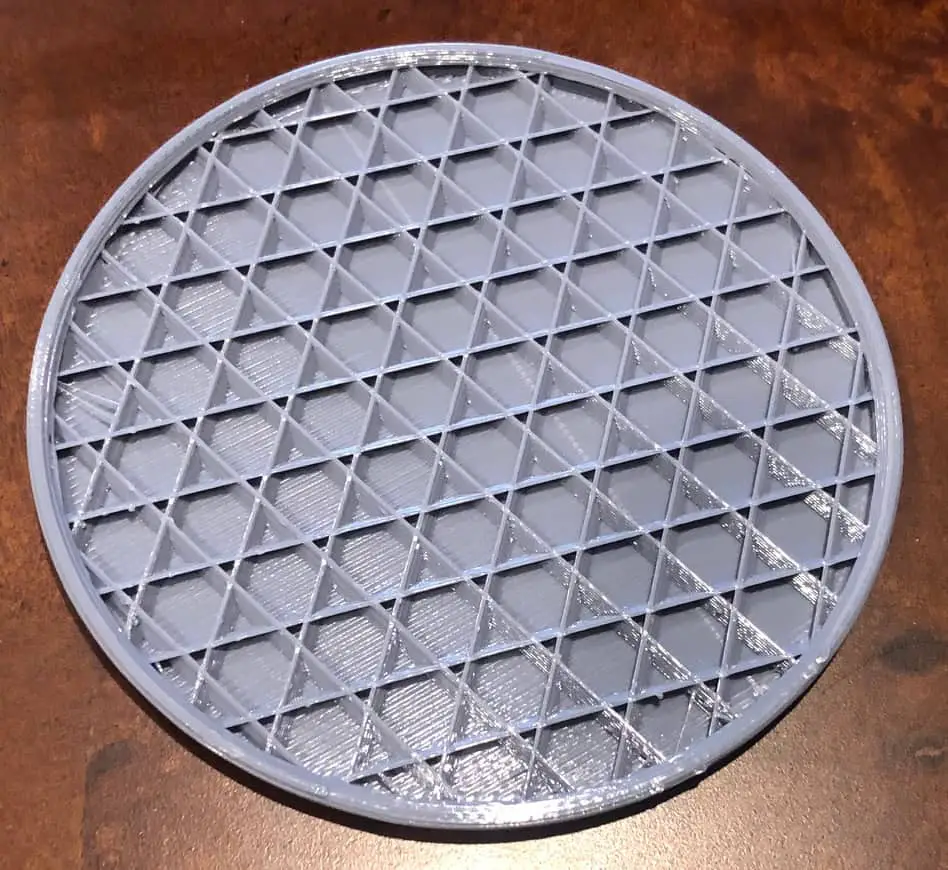
Tri-Hexagon
The Tri-hexagon pattern is achieved by printing lines that travel in three directions on the X and Y plane. It’s similar to the grid pattern, but has an extra set of lines travelling over it to create hexagons and triangles.
Tri-Hexagon is the best 3D printing infill pattern for parts that require high strength. Shelving and anything else that needs to resist some force.
Tri-hexagon infill is not good when printing parts that don’t need high strength because it will use more plastic and time than necessary. It will make the model heavier as well.
Cubic
The cubic pattern consists of cubes printed at a 45° angle. This type of infill doesn’t take as long as some infills below because the printer nozzle doesn’t need to change direction much, the cubic pattern is achieved by printing straight lines over each layer.
Cubic is the best infill pattern for parts that require high-strength while still optimizing print time and material.
Cubic infill shouldn’t be used on any parts that don’t need to be really strong because it will waste time and material.
Cubic Subdivision
Cubic subdivision will produce the cubic infill pattern in varying sizes. The center of the part will have large 45° cubes while the infill closer to the walls will be printed at a smaller size. This pattern uses less material than standard cubic and works well for parts that won’t be drilled into.
Cubic subdivision is the best infill pattern for large parts that require strength around the walls while conserving material and time spent in the center of the part.
Cubic subdivision won’t work well for any part that requires a consistent infill pattern. For example, if you’re printing a bedside shelf, it’s best to have the infill the same in all areas to properly support the things you load onto it.
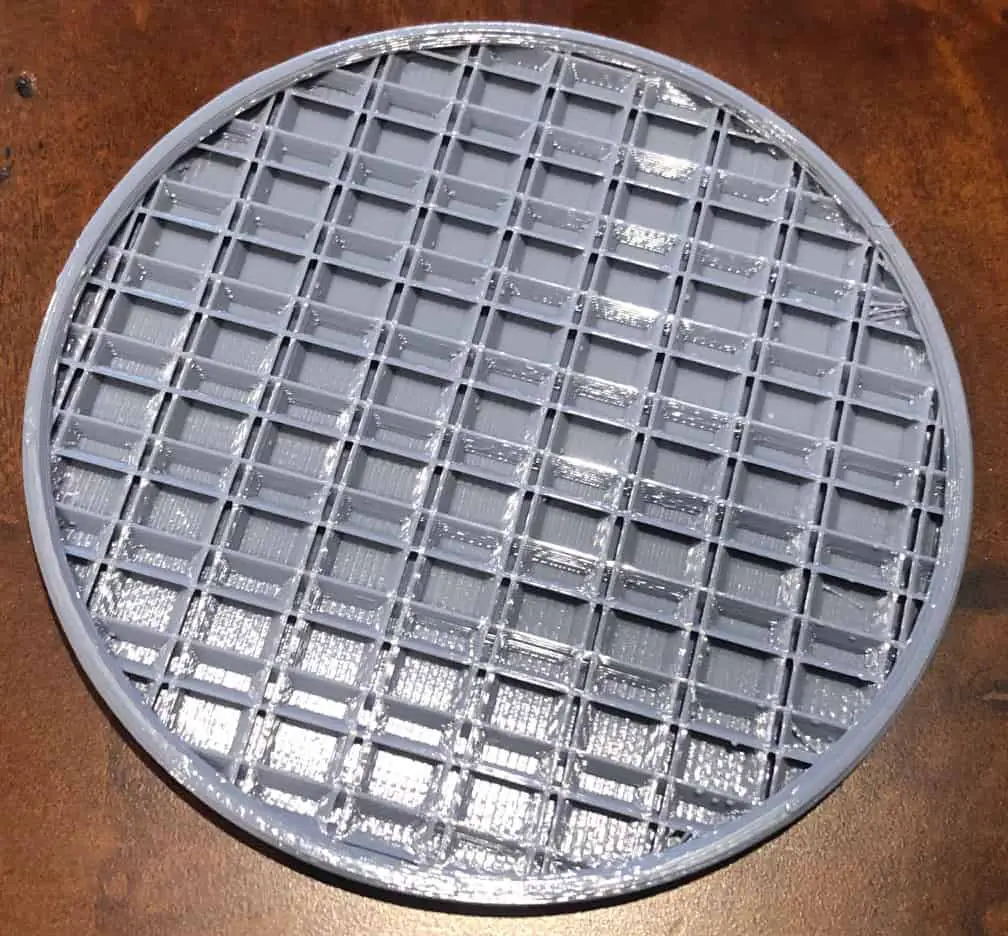
Octet
This infill pattern creates pyramid shapes by printing squares from large to small. This is a very strong infill pattern, especially vertically.
Octet is the best 3D printing infill pattern for models that need to endure vertical loads.
Octet infill is not good for basic models that don’t require much strength because it uses too much material and takes more time than other simplistic patterns.
Quarter Cubic
This is another infill pattern that creates multiple squares to form pyramids inside the part. The difference with quarter cubic is that the pyramids are slightly offset from each other to create more connection points and a higher strength.
Quarter Cubic is the best 3D printing infill pattern for parts that require the highest strength possible, like shelving brackets for paint cans or other heavy things.
This is not a good infill to use if you want to save filament and time.

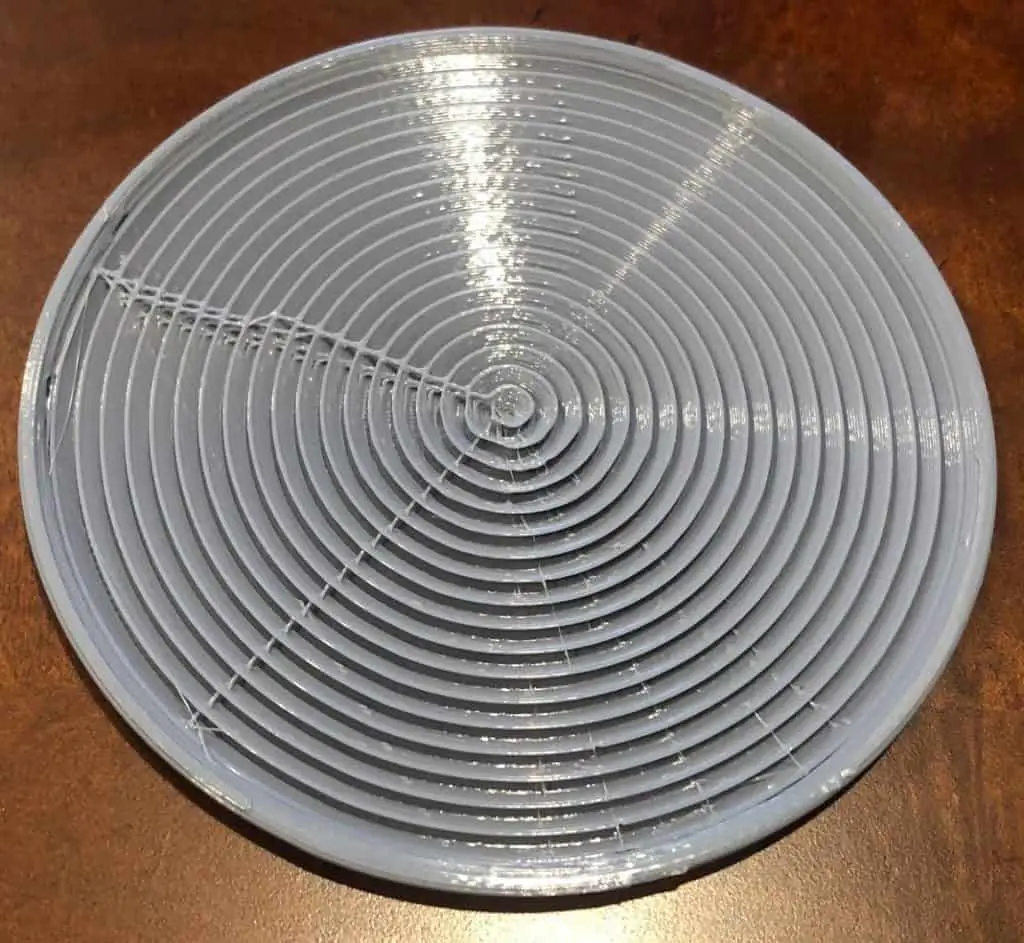
Concentric
Concentric infill prints lines that correspond with the walls of the model. Almost like printing the part multiple times at a smaller and smaller scale all the way to the middle of the part. This doesn’t create the strongest parts, but it is more flexible and uses less material than stronger infill patterns.
Concentric is the best 3D printing infill pattern for parts that need a bit of flexibility and strength. It’s also good to use if you want some strength but don’t have the time or filament for stronger infills like cubic and quarter cubic.
This pattern isn’t very good for parts that require strength on the X and Y plane.
Zig-Zag
The Zig-Zag pattern produces continuous lines throughout the model in a zag-zag pattern. This is very similar to the lines pattern, but offers a bit more strength.
Zig-Zag is the best 3D printing infill pattern for parts that don’t require much strength, like display pieces like figurines. It also looks good for time-lapse footage.
Zig-Zag infill is not good when printing anything that requires high structural integrity, like nuts and bolts.
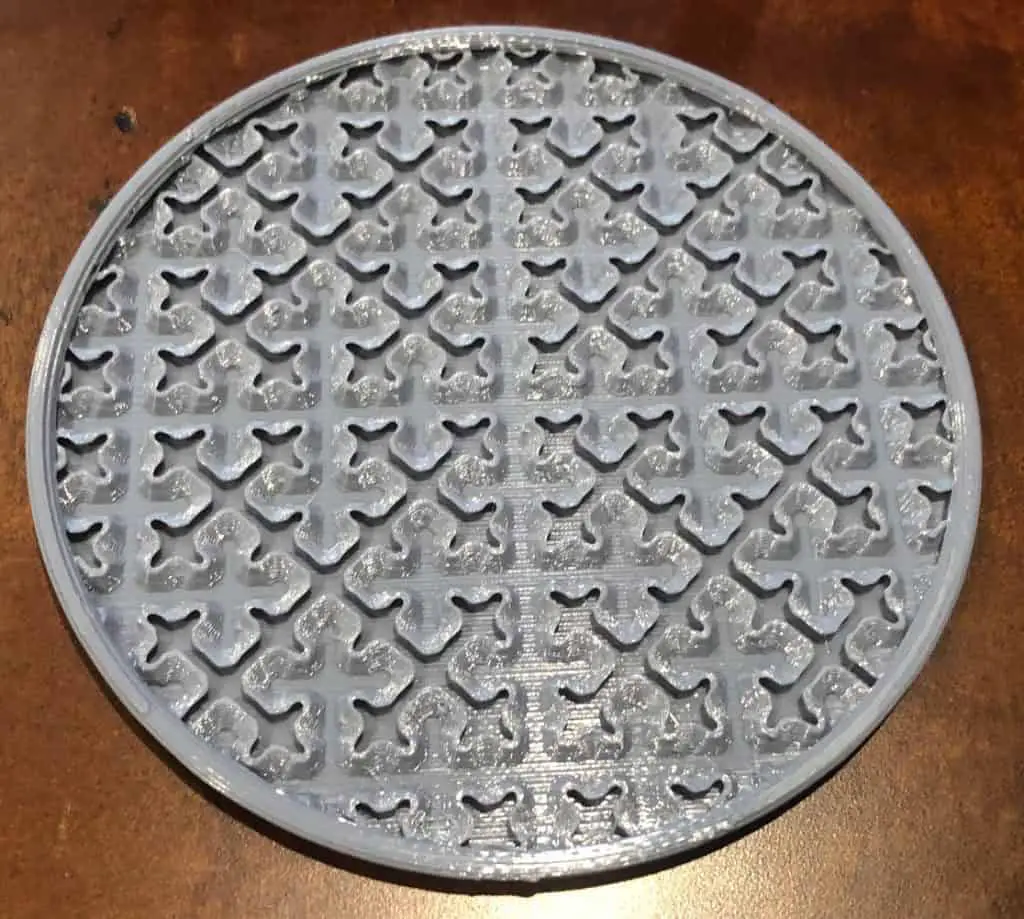
Cross
The cross infill consists of lines that change direction at 45° and 90° angles to create a flexible part.
Cross is the best 3D printing infill pattern for flexible parts that don’t require a lot of strength.
Lines are not good when printing parts that take a consistent force.

Cross 3D
Similar to the cross infill, lines are printed within the part but never travel from one side to the other without making many turns along the way.
Cross 3D is the best infill pattern for parts that require the maximum amount of flexibility without breaking. This is not a good infill pattern to use on any part that needs high strength.
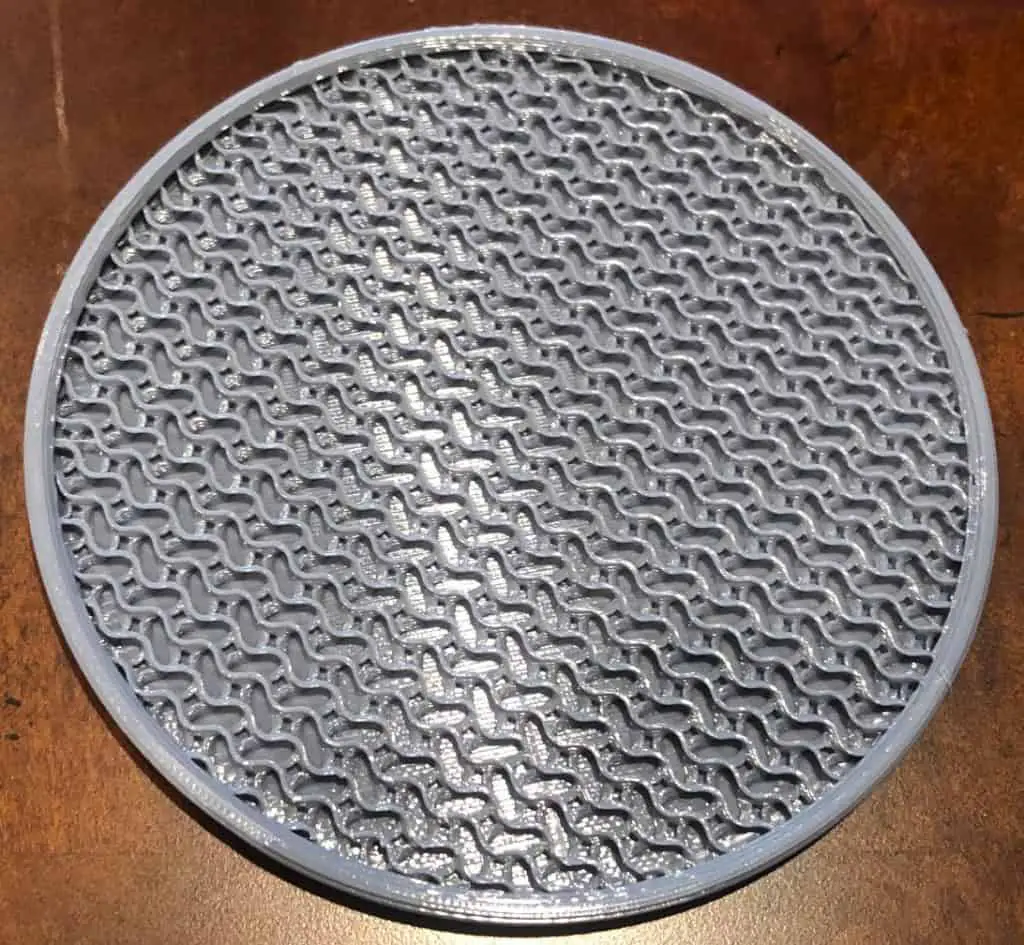
Gyroid
The gyroid pattern consists of multiple waves that are printed within the part. The result is a flexible part with decent strength.
Gyroid is the best infill pattern for parts that require some flexibility while still achieving a good amount of strength.
Gyroid is not good for printing parts quickly. It also takes a lot of computing power to print properly.
How To Increase Model Strength Without Infill
You can increase the strength of a part by increasing the wall thickness or infill multiplier instead of changing the infill. This means that you can use basic infill patterns like lines and grid and still have a very tough part if you increase the wall thickness.
Multiple Infill Densities In One Model
Sometimes you’ll want to make the infill density higher in specific areas of the model that need it.
You can create areas with higher infill densities in certain parts of the model only, like when you want the base of the part to be stronger than the rest. I’ll show you how to do so in Cura.
- Select your model.
- Click on support blocker.
- Select the areas where you would like the infill to be different from the rest. (Place the blocks)
- Select scale to size the blocks appropriately for what you need. Use non-uniform scaling for precise coverage.
- Select the block and click on “Per Model Settings”.
- On the drop down menu, select “Modify settings for overlap with other models.
- Now you can use the “select settings” button and adjust the infill for the model within the area of the block.
Related Articles
- Choosing the Right Infill Percentage for the Job
- Why Is 3d Printing Slow?
- Do 3D Printers Use a Lot of Power? (The Numbers Inside)
- Create a Temperature Tower Using Cura – The Easy Way
- 3D Printing Blobs and Zits: Tips to Avoid Them
Conclusion
The best infill pattern depends on what you’re printing. Sometimes, the best infill is simple lines or grids. If you need a very strong part, use cubic, triangles, and other strong infill patterns listed in this post.
Increasing the infill density also makes parts stronger, but if you want to save time and material, increase the wall thickness and use a cubic pattern with around 20% density.
Ultimately, you’ll have to experiment with different infill patterns for various parts to get a general understanding of what to use in each case.
Make sure you check out our YouTube channel, and if you would like any additional details or have any questions, please leave a comment below. If you liked this article and want to read others click here.