Getting into the 3d printing hobby can be exciting and overwhelming at the same time because of the steep learning curve. Once you get the printer put together, you will need to get a slicer set up to work with it, which is where this guide comes in.
I’m going to walk you through installing Cura and getting it set up to work with your printer. I’m using an Ender 3 for reference in this article, but the steps pretty much apply to all 3d printers.
Here are the steps to get Cura set up for an Ender 3.
- Download Cura
- Install Cura
- Setup Machine Profile
- Review Machine Settings
- Import an STL File (3d Object)
- Select the Profile you Want to Use
- Slice the Object
- Save the Object to an SD Card
- Kick-Off Test Print
Step-by-Step Cura Setup Guide
Requirements
Required Hardware
*Links are to Amazon and for the products I use.
Additional Recommendations
There are a couple of things that I would recommend you do after you get Cura setup and before kicking off any prints that are meant for anything besides testing.
- Print a Temperature Tower: This would be one of the first things I print. It’s used to help you choose the correct temperature for the filament that you are using.
- Calibrate your e-steps: This doesn’t have to be done now, but I recommend doing it at some point to make sure you are extruding the right amount of filament.
Step-by-Step Guide
Download Cura
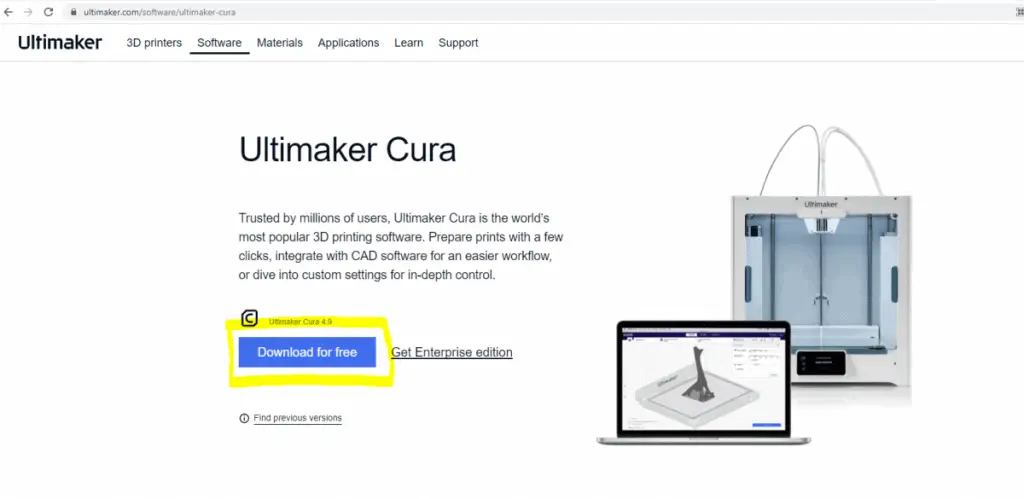
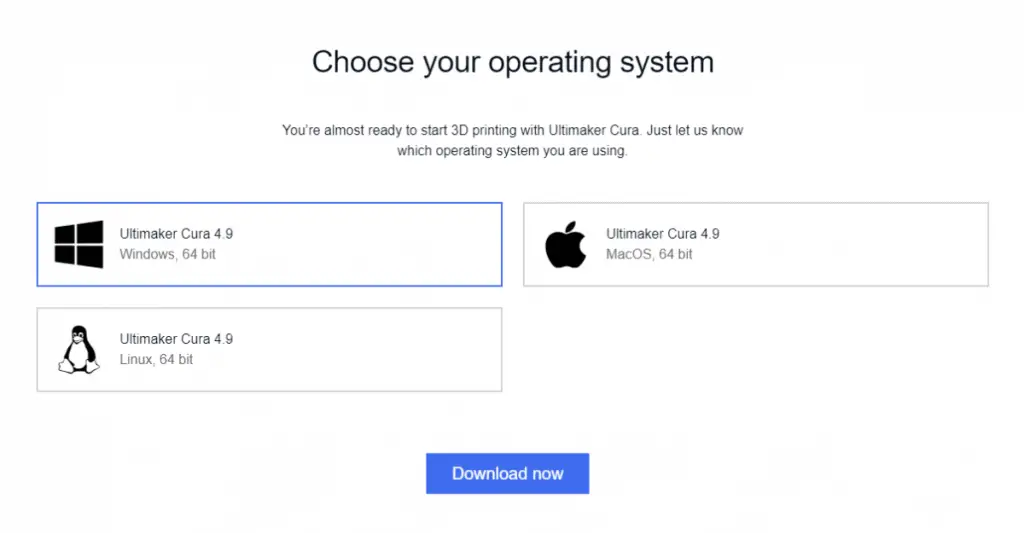
The first thing you need to do is download the latest version of Cura. To do that, go to their download page and click on “Download for Free”. From there, you will be prompted to choose your operating system. If your running on a Windows computer, you will want to choose Windows 64 bit, then click “Download Now”.
Now you will wait for the download to finish. The download time will vary based on your internet connection, but the file is around 200Mb, so it shouldn’t take very long.
Install Cura
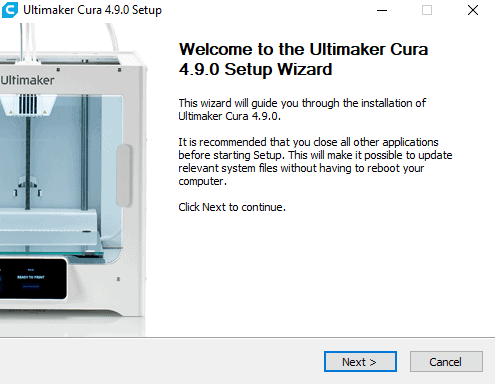
Once the installer finished downloading, you will want to launch it by double-clicking on it. You will then be prompted to windows user access control, asking if you want all the app to make changes to this device, click yes.

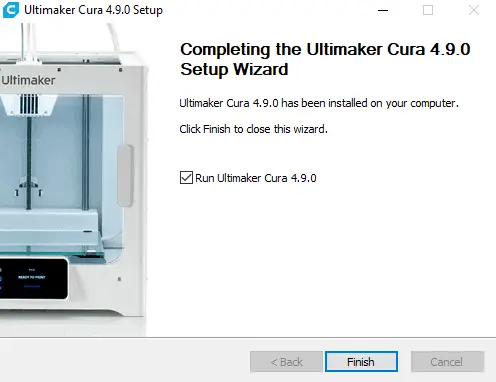
Assuming you want the default install parameters, which most people will, you will choose the default setting on each page in the installer. Once the install finishes, you will want to make sure you leave run Cura checkbox checked then hit finish.
Setup Machine Profile
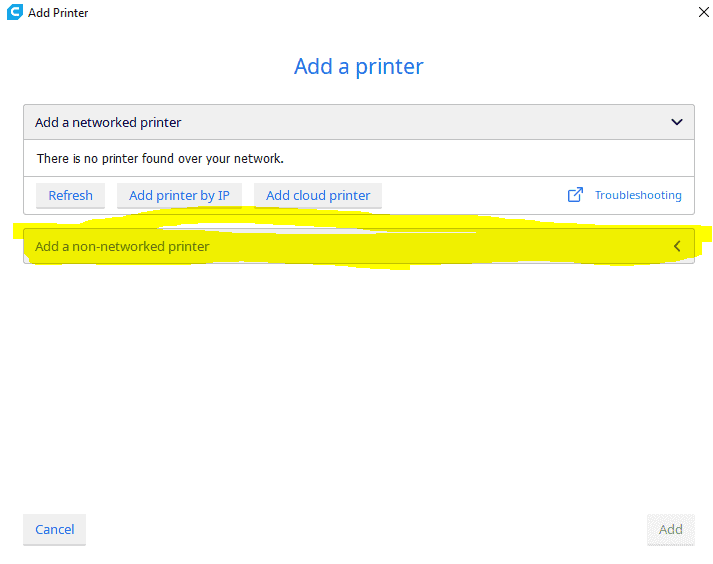
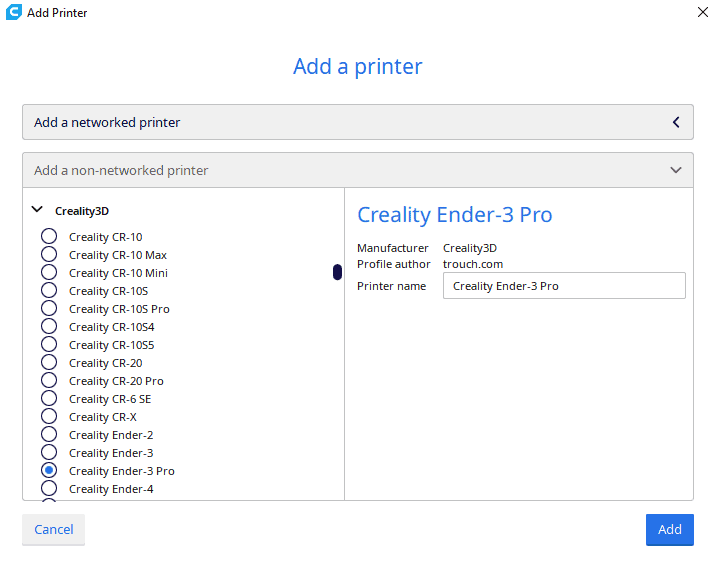
Once Cure launches, it should launch the add printer panel. In that panel, you will want to go to add a non-network printer, then scroll down until you get to Creality3D. Once there, click on Creality3D, then select your printer. Since I’m using an Ender 3 Pro for my example, that’s what I will choose. Once you select your printer, click add in the bottom right of the window.
Review Machine Settings
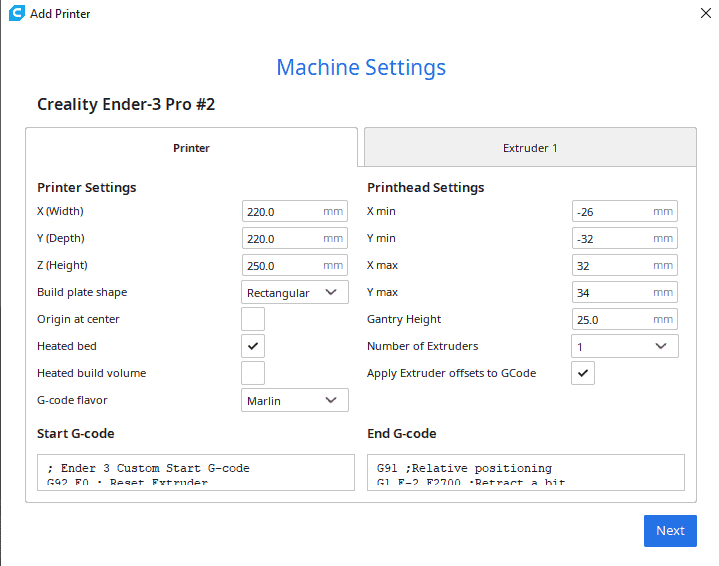
Next, you will want to review the machine settings. In most cases, including this one, the values are correct, so you will just hit next.
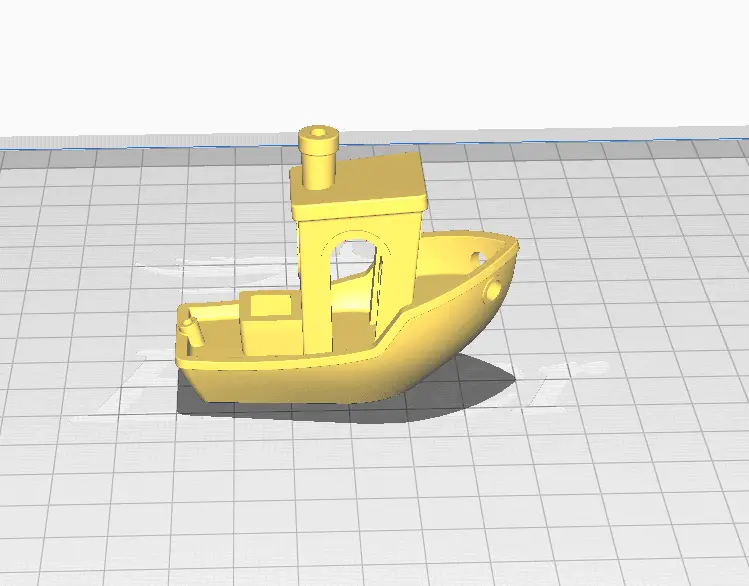
Import an STL File (3d Object)
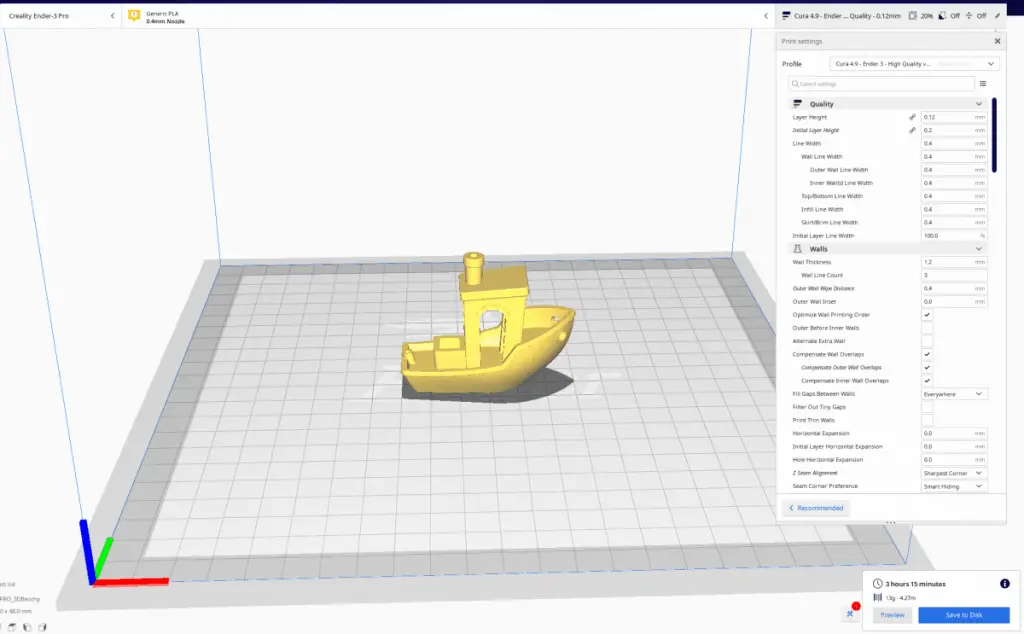
Now that the printer is set up, you can import a 3d object that you want to print. I’m going to use a Benchy in my example; you can download that here if you wish. To import the object, all you need to do is drag and drop it into Cura.
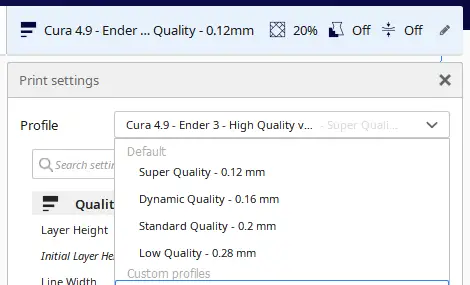
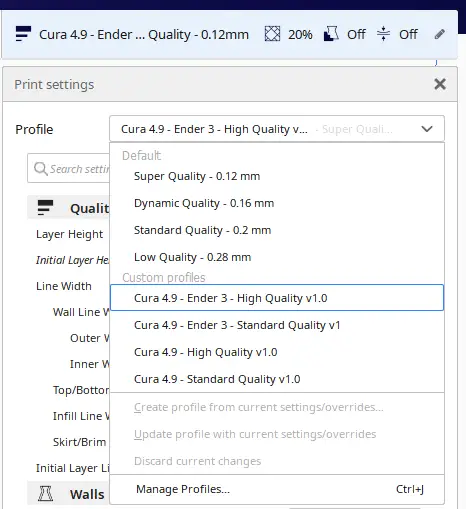
Select the Profile you Want to Use
Now we have a couple of options. You can use one of the Cura default profiles or import mine. If you want to use one of the Cura ones, you can just select it from the menu on the right. If you would like to use one of mine, you can download them from my Cura Profiles page and import them by going to Preferences à Configure Cura à Profiles à Import and selecting the files you downloaded. Once you import them, you will see them in the normal Cura profile dropdown.
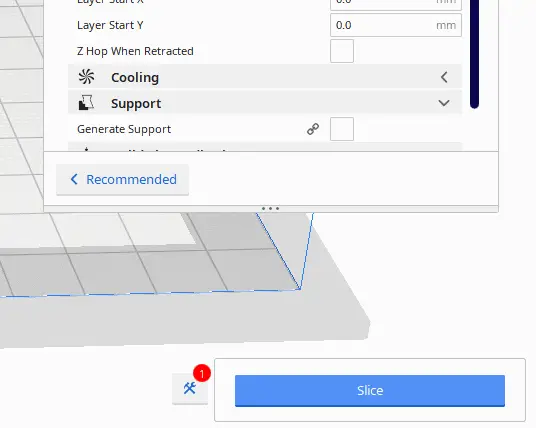
Slice the Object
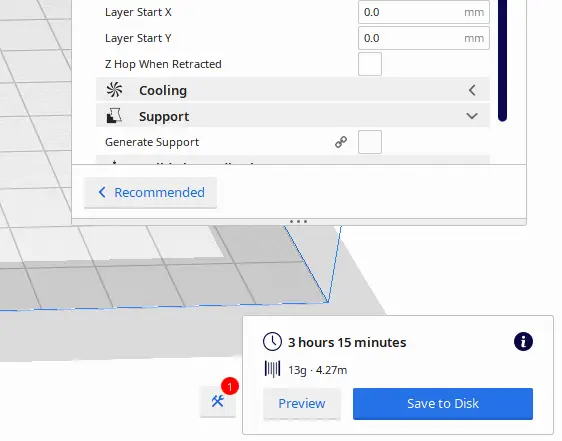
Once you selected the profile you wish to use, you will want to make sure you review/set the printing temperature and supports as needed, then hit slice in the bottom right of Cura. After you slice the object, Cura will give you an estimate on how long it will take to print and how much filament will be used.
Save the Object to an SD Card
Once you slice the object, you will need to save the g-code file to an SD card that your printer can use. You will want to make sure you have an SD card reader, if you don’t you should take a look at this one on Amazon.
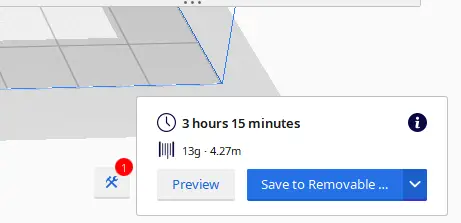
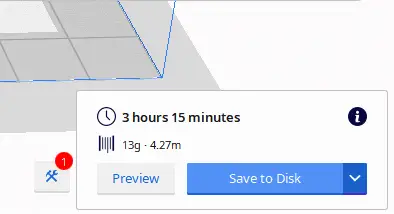
To save the file to your SD card, you can click on save to removable drive in Cura. This will automatically put the file on your SD card, and no other actions are required. If you’re your computer doesn’t see the SD card, Cura will show save to disk instead. You can choose to save it to a folder on your drive, then copy it to an SD card once inserted, or plug in an SD card and let Cura do it for you.
Kick-Off Test Print
Now that the g-code file is on your SD card, you can put it in your printer and kick off a print. One thing to note is that your bed should be level before kicking off a print. If its not, you will have issues with the filament not sticking to the build plate or with the nozzle scratching it.
Related Questions
What is the bed size on the Ender 3? – The actual bed size is 235x235mm, though only 220x220mm is usable. If you’re looking for build plates, you will want to get 235x235mm.
What are the dimensions of the Ender 3? – The Ender 3 Pro assembled comes in at 440x440x465mm and weighs 8.8kb. That said, the box it’s shipped measures 595x495x165mm.
Do the e-steps need to be calibrated? – I highly recommend calibrating the e-steps to get the proper throughput any time you assemble a new printer or make any changes around the extruder or hotend. I wrote a guide covering the process that you can see here “3D Printer E-step Calibration (Step-by-Step Guide)”.
Where can I get free STL files (3d objects) from? – The most popular place to get 3d objects is Thingiverse but there are other good sites as well. Here are the five sites I use.
Related Articles
- Create a Temperature Tower Using Cura – The Easy Way
- Cura Profiles
- Creality 32-Bit Mainboard Firmware Upgrade Guide
- How to Print a File from Thingiverse (The Easy Way!)
- 3D Printer E-step Calibration (Step-by-Step Guide)
Recap
Getting into the 3d printing hobby may seem overwhelming at times but this is a large community that is willing to help each other out. In this article, I covered all the steps required to configure Cura to work with your printer. If you run into any issues, I recommend reaching out to the 3d Printscape community on Discord.
Make sure you check out our YouTube channel, and if you would like any additional details or have any questions, please leave a comment below or join us on Discord. If you liked this article and want to read others click here.