Back when I had no experience with 3D printing, I used to watch time lapses and always wondered why some printers would print a line of plastic around the model before starting with the actual design.
After doing some research on how to increase bed adhesion without glues and sprays, I discovered what brims, skirts, and rafts are. I learned I should always use one of them even with the most basic print, and I’ll tell you why.
Before going deep into brims, you should first understand what a skirt is. A skirt helps prime the printer nozzle by printing a single line around the base of the model. This gives time for the nozzle to reach its optimal temperature before starting with the base of the model. It allows the flow rate of the filament to be consistent from the start. Unlike a brim, a skirt does not connect with the model.
Brims are like multiple skirts, usually at least five, and start printing from the outside in toward the model’s base to stabilize the print. Unlike a skirt, a brim prints up against the model to help secure it from moving. After it’s printed, you just need to snap the brim off the model and polish if required.
Because the brim is bigger than a skirt, it uses much more filament. However, it warms up the printer a lot better and ensures the flow rate of the filament is acceptable by the time it starts with the first layer of the model.
What Is Brim In Cura?
In Cura, brim is a setting that instructs the printer to print multiple lines around the model for support. Printing a brim primes the printer nozzle, assists with bed adhesion, prevents model warping, and more. A brim prints on the first layer and surrounds the base of the model to reduce print defects.
Adding a brim increases the model’s footprint on the bed, that’s why it stabilizes it, the extra area to grip onto and the fact that it prints snug against the model.
You can set Cura to print the brim underneath the part for extra stability but most of the time you should only print the brim on the outside of the model. Printing a brim underneath the part will use more material, take more time, and be more difficult to clean off afterwards.
How To Activate Cura Brim
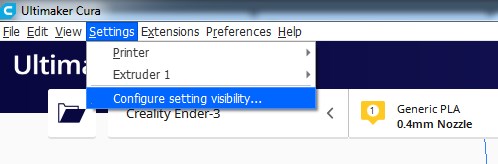
To adjust the brim settings in Cura, click on the Settings tab and select Configure setting visibility…
Search for brim in the search bar and check off all the brim settings.
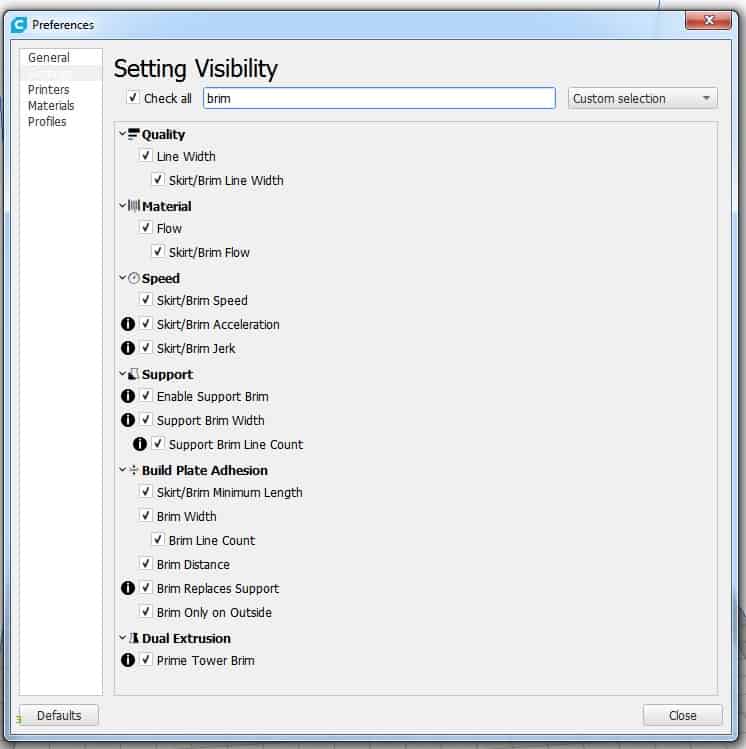
Now you’ll be able to adjust the brim settings in your main menu.
Best Cura Brim Settings
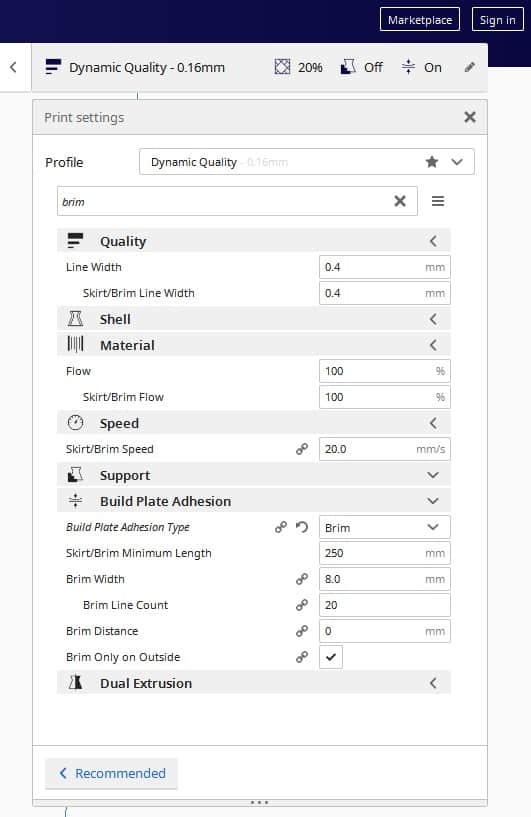
The best brim setting values will depend on what you’re printing, the size and shape. Here are all the settings related to brim in cura with my explanation on how I set them accordingly.
Skirt/Brim Flow
This refers to the flow of filament from the nozzle while printing the brim. I leave this at 100% unless the print instruction says otherwise.
Skirt/Brim Speed
You can set the speed at which the brim prints to be faster or slower than the main part. It’s best to have this setting adjusted to the same speed as your “initial layer speed”.
If you increase or decrease the brim speed, you won’t be able to evaluate the brim accordingly because results will change once it reaches the model.
Skirt/Brim Minimum Length
You can adjust this setting so that your printer extrudes as much filament as required until the minimum length of filament is met. I’ve left mine on the default 250 mm length and it works perfectly for 90% of my prints.
However, if your brim line count is set to 5, it will only print 5 lines and might not reach the minimum length.
Brim Width
The brim width determines the area it will cover on the print bed and the wider it is, the more it will grip onto the bed. Brim width is measured from the model’s base to the outermost brim line.
Brim Line count
The brim line count is the number of lines the printer will make around the model to form the brim. The brim becomes bigger as you increase the lines. This setting will override the width setting if their values don’t match.
Brim Distance
The brim distance is the distance at which the brim prints from the model. I suggest leaving it at 0 mm so that it can support the model. If you increase the brim distance, the model won’t benefit from any extra bed adhesion.
The only time I distance the brim from the model is when I know it doesn’t need stabilization. The reason I print the brim in this case is to evaluate it to identify any defects before printing the entire model. 20 brim lines are enough to evaluate the printer before it starts with the main part.
Brim only on outside
Most of the time, it’s best to leave this box checked, otherwise the brim will print underneath the model and make it much harder to remove. It will also make cleaning the base of your model more difficult after you’ve removed the brim.
Only use this option if the outside brim isn’t holding the model in place.
How To Identify Problems By Inspecting The Brim
A brim is helpful in showing you if there are any problems with the printer before it starts with the major design. These are a few of the things to look out for when evaluating the brim.
Gaps in the brim: If there are gaps in the lines of the brim all the way to the base of the model, you should check your nozzle temperature and filament feed to see why it’s not flowing properly.
Wide brim lines: Wide brim lines can be a sign of the filament flowing too quickly, check that the temperature isn’t too high. Wide brim lines could also mean that the nozzle is too close to the bed.
Inconsistent brim: If the brim is inconsistent, with some lines higher or wider than others, your printer bed probably needs to be leveled. Watch this video if you’re not sure on how to level the bed. I have an Ender Pro 3 but many other printers are very similar.
When To Use A Brim
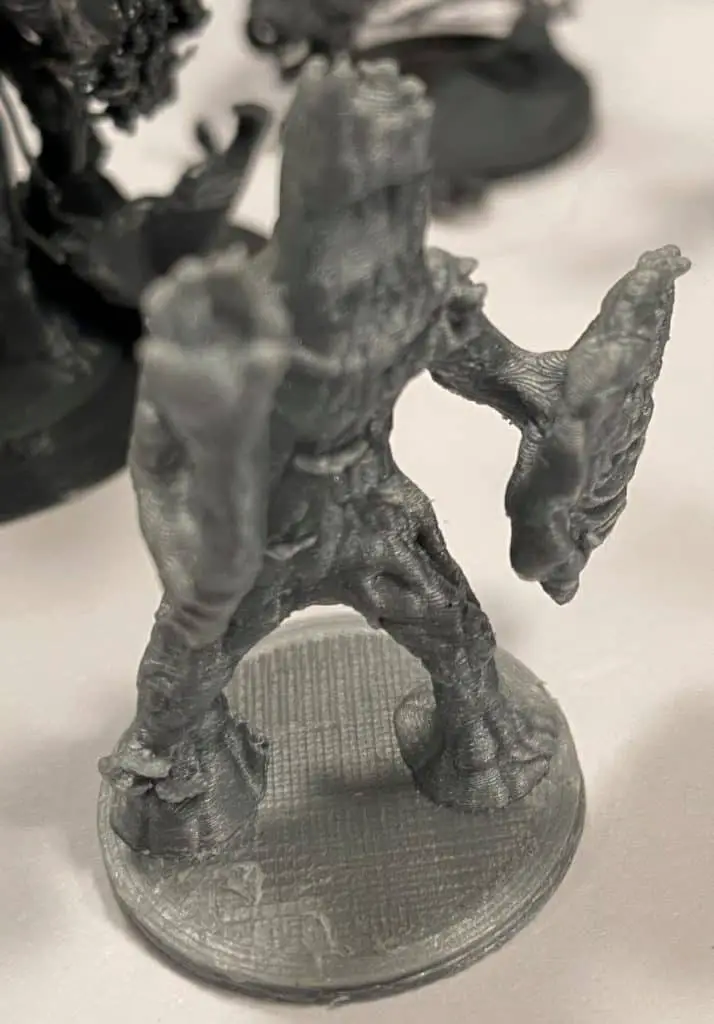
You should use brim for any project where the bottom of a large model doesn’t cover much of the bed’s surface. The brim will make the footprint of the model much bigger to stabilize it.
If you don’t need extra adhesion and stability, I recommend printing a brim of 10 to 20 lines wide to warm the printer up.
If you print a brim every time, you’ll be able to check if the printer is running smoothly before it gets to the model. Brim inconsistencies can tell you a lot about what’s wrong, from an uneven bed to a cold printer nozzle.
Will Brim Prevent Warping?
Brim will prevent warping because it adds support, secures the base of the model, and helps it stick in position. With the model’s base being secured by the brim, it’s less likely to have structural defects, the brim holds the part in place so that it doesn’t move on the bed.
Which Is Better, Raft Or Brim?
In most cases, it’s better to use a brim instead of a raft because a brim doesn’t take so much time and material to print. A brim is also easier to remove than a raft and it doesn’t go under the model, so you only have to smooth down the edges if need be.
When you use a raft, you’ll need to clean the bottom of the model from where you pulled the raft off.
A brim also makes supports stick better so create the brim wide enough to reach all the supports.
A raft is good to use if the bottom of the model has tiny features that make little contact with the print bed.
What is a raft?
A raft is a grid-like support structure, sometimes with a flat top, that provides more adhesion than the bed. Printing onto the raft is far more reliable than printing straight onto the bed. However, printing a raft is only useful when the base of a model won’t stick to the bed, normally when the bottom isn’t flat.
| BRIM | RAFT | |
|---|---|---|
| More adhesion for model and supports | Yes | Yes |
| Waste Material | Low | High |
| Time to print | Fast | Slow |
| Removal process | Easily break off from the sides of the model. | Break off from the sides and underneath the model. |
How Do You Remove A Brim?
You can remove brims by hand with little effort. Bend the brim back and forth to weaken it and snap it off the model. You can also use tools like needle-nose pliers, tweezers, and cutting blades to clean the brim off.
I recommend plucking the brim off by hand as the chance of damaging the model is far less than when using tools. If there are any remaining bits I just cut them off with a blade and sand the edges down if I really want it to be super smooth.
Related Articles
- Create a Temperature Tower Using Cura – The Easy Way
- Cura Profiles
- How to Print a File from Thingiverse (The Easy Way!)
- What Is 3D Printer Resolution?
- What Computer Do I Need for a 3D Printer?
Summary
A brim is useful in stabilizing models by increasing the footprint (surface area) of the model on the bed. Brims also cause your printer to warm up adequately before it prints the actual model.
If the brim has inconsistencies, you can stop the print, adjust your printer and then restart until the brim printed perfectly.
Make sure you check out our YouTube channel, and if you would like any additional details or have any questions, please leave a comment below or join us on Discord. If you liked this article and want to read others click here.