Most of us already know how resolution affects the quality of the images on our phones, laptops, and anything else with a screen on it. The higher the resolution, the higher the quality of the images being displayed. But that’s 2D resolution, there are only two directions, X and Y axis, there’s no height resolution (Z-axis). That’s where 3D printer resolution comes in. There are many 3D printing technologies, this article is based on the most commercially popular, Fused Filament Fabrication.
3D printer resolution is the smallest possible movement between two points, measured in microns. If a printer can make a single movement 0.1mm in length, the resolution is 100 microns. The minimum movement on the Z-axis, known as “layer height” is the primary indicator of 3D printer resolution.
The X and Y-axes are known as the planar dimensions and are just as important to resolution as the Z-axis. The planar dimensions are normally just as accurate as the height dimension, if not better. That’s why the spec sheets refer only to the Z-axis (layer height) most of the time. A 3D printer uses its highest resolution on all three axes to print tiny, highly detailed objects.
The print nozzle is where the material is melted and pushed out, and is important with regards to print resolution. If a nozzle is 0.4mm in diameter, the “minimum feature size” is 0.4mm.
What Is The Best Resolution For 3D Printing?
The best resolution for printing is based primarily on the size and shape of the object you’re printing. 100 microns could be considered the best resolution for 3D printing at this point in time because it produces a high-quality product with accurate detailing. It’s a resolution that many 3D printing enthusiasts have used, so it’s tried and tested quite a bit on different types of prints.
Simply printing something at 20 microns won’t necessarily produce a better result. There are many factors at play that impact the final print result, the resolution is just one of them.
Large objects with little detail don’t require a high resolution. A large cube is going to come out looking virtually the same on 100 microns or 150 microns, even though there’s a 50% difference in the resolution. The Z-axis surfaces of a high-res cube will simply consist of more layers. (from top to bottom)
A marble sized sphere will benefit greatly from being printed with a high resolution because a sphere has continuous curves. A high resolution makes curves appear smoother. A low resolution causes the stepping effect. A larger baseball-sized sphere can come out pretty smooth because the curve isn’t as sharp.
So the best resolution for 3D printing depends on the size, shape, and detailing of the object. Sometimes you’ll just need to do a few test prints to determine what’s best for a specific print. Once you’ve printed over a hundred items, you should have a general idea of which resolution you’ll need to use for various objects.
What Is Cura Resolution?
Cura resolution is part of settings in Cura that allow you to set the minimum print distance between two points. You can also adjust the resolution in Cura by changing the Mesh Fixes values.
- Maximum Resolution – This is the minimum possible length of a line segment.
- Maximum Travel Resolution – The maximum length of a line segment.
- Maximum Deviation – The maximum distance the printer will deviate from the above parameters.
Additional resolution settings can be found under Preferences. Click on Preferences and then Configure Cura, then go to the Profiles. Also found under Settings, Configure settings visibility. There are pre-defined values according to your printer model, you can select these settings from low to super to produce lower or higher resolutions. As you’ll see if you go through the four settings, low, standard, dynamic, and super quality, the lower the values shown in millimeters (mm), the higher the resolution.
How Do I Increase The Resolution On My 3D Printer?
You can increase the resolution on your 3D printer by reducing the Mesh Fixes and by reducing the layer height values in your Cura Profiles section.
You can set your profile to super quality in preferences. There are four profiles to choose from, ranging from low to high quality.
3D printer maintenance contributes to high print resolution as moving parts can get dirty or worn down which leads to imperfections in the print. Keep all metal on metal parts well lubricated. Cover your machine to keep it as dust free as possible.
3D Printing Resolution VS Layer Height
3D resolution and layer height are basically just two ways of phrasing the same thing. The maximum resolution possible is determined by the minimum layer height and is measured in millimeters or microns.
Microns are a thousand times smaller than millimeters, and because 3D printers can make such infinitesimal movements, it’s easier to refer to 50 microns as opposed to 0.05 millimeters.
Ways To Improve 3D Print Quality
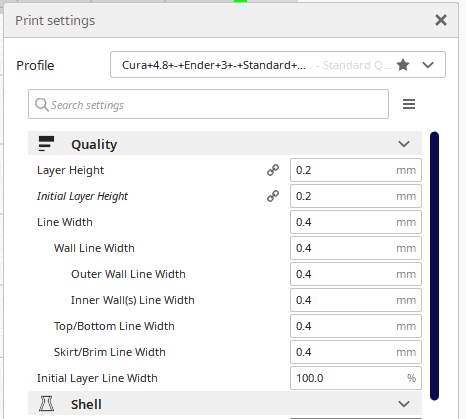
You can improve your print quality by experimenting with the resolution/quality settings. These settings can be found in Cura configuration under profiles. Increase or decrease the “Layer Height” by selecting different profiles. Certain 3D prints that don’t have much detail turn out great on lower resolutions, so the smallest resolution is not always the solution.
Here are a few more ways in which you can improve your 3D print quality.
Prevent Stringing And Increase Surface Quality
Increase the retractions distance in increments of 0.5mm to find the perfect match for the object you’re printing. Objects with deep curves can be printed with a distance of 4.75mm on an Ender 3 V2 with good results. But you will have to experiment with your printer and material to find the right setting for different prints.
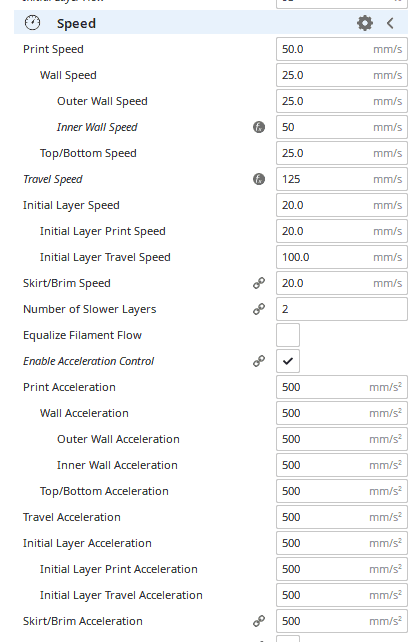
Find the perfect speed
If your print has ringing faults or weak layer adhesion, you might be printing too fast, reduce the print speed gradually and monitor the results.
If you set the print speed too low, you might land up with other problems like heat deformities in the model where the nozzle passed over very slowly.
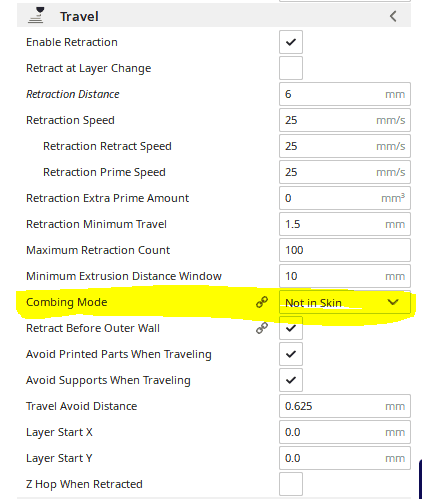
Use Combing Mode
In Cura’s settings, you can turn on combing mode in the “travel” settings. This will make the extruder travel only within the part’s area, not in open spaces. The result is no stringing in the void areas of the print.
3D printer maintenance
Keeping your printer in an optimal condition will ensure consistent prints.
- Nozzle Height: Most people just use just a piece of paper to check the height. The nozzle should only be high enough for paper to fit between it and the bed.
- Clean the machine: Dirt can lead to additional wear and tear on the machine. Keeping it as dust free as possible will increase its lifespan.
- Lubrication: Lubricate the printer in all the areas that have moving metal on metal contact. Most importantly, the Z screw that makes the printer nozzle move up and down. If your printer uses steel rods, keep them lubricated.
Here is a video I created that goes over some of the basic maintenance I do on my Ender 3 Pro.
How Resolution Affects 3D Print Time
The higher the resolution, the longer the print will take to complete. A high resolution, (low micron setting), for layer height creates smoother curves. It’s important to remember that the print speed also determines the resolution a lot of the time. In general, a lower print speed will produce better results, to a point. Too slow and you could run into other problems, overheating in the nozzle for one.
Does The Nozzle Size Affect The 3D Resolution?
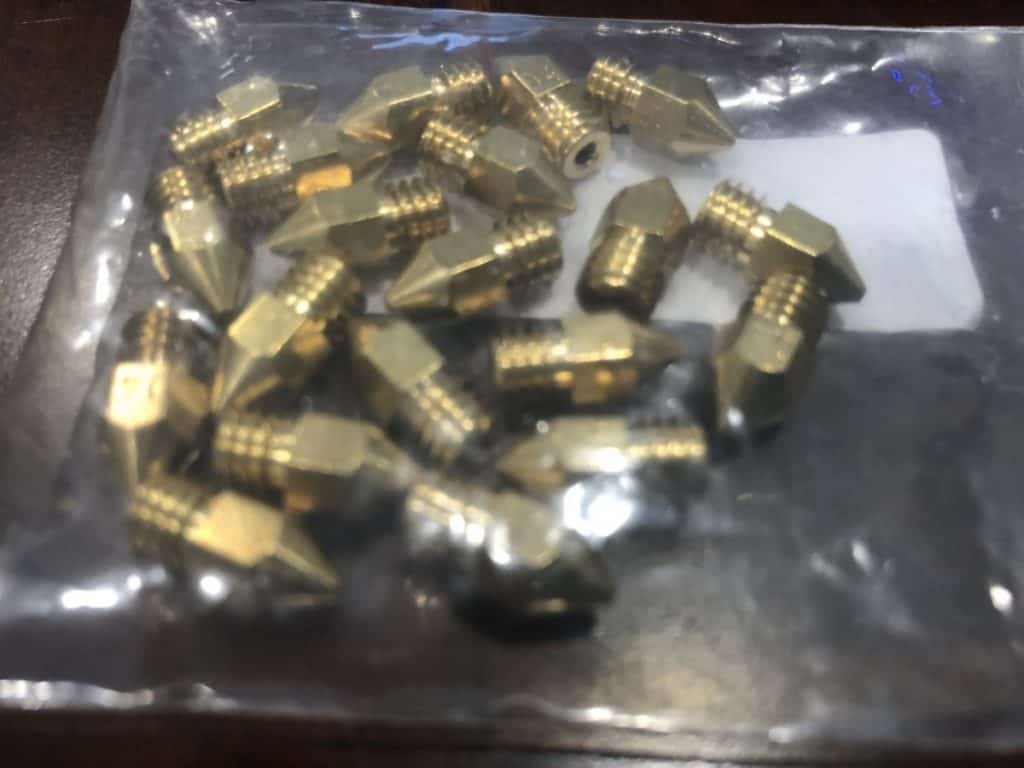
Yes, the nozzle size is similar to the tip of a pencil, the smaller the tip, the more accurate it is. A 0.4mm nozzle, like these from amazon, size is pretty much a standard these days and is capable of printing layers between 0.1mm and 0.3mm thick. As a general rule, layers are 25 to 75% the size of the nozzle diameter.
Most 3D printers support swapping out the nozzle for different sizes so that you can experiment with them with different projects.
Is 100 Microns Good For 3D Printing?
Yes, 100 microns is a good resolution for most projects. Resolutions lower than 100 microns provide finer detail but aren’t usually necessary. Extremely small prints benefit most from high resolution (low microns). So if you’re printing a tiny, highly detailed bracelet charm, 50 microns would be great. But when you’re printing things that are the size of a teacup or larger, 100 microns is an excellent option..
The Highest Resolution 3D Printer
The Ultimaker S3 is capable of a 20 micron layer height, one of the best resolution qualities on the market. It is almost $4000 for the printer though, so most people opt for a 100 micron printer for under $300.
Related Questions
Are the default Cura profiles good? – The default Cura profiles have gotten better over time but there are still some modifications I make to them. The profiles I use are available to be downloaded from my “Cura Profiles” page.
When should supports be used? – You should consider using supports anytime you have a large overhang or bridge. They will help to keep the print true to its actual shape. Failing to do so could lead to the print failing or looking awful. The downside to using supports is that you will have to remove them after the print, which can sometimes be painful.
Where can I get 3d object (stl files) from? – If your like most people and don’t want to create your own 3d object you can download many designs from various sites.
Here are five common sites, Thingiverse is by far the most common/popular though.
Related Articles
- Create a Temperature Tower Using Cura – The Easy Way
- Cura Profiles
- How to Print a File from Thingiverse (The Easy Way!)
- Best 3D Printer Under $300
Recap
3D printer resolution directly relates to the smallest possible movement that the printer can make, measured in microns. Layer height, or Z-axis movement, is primarily referred to when illustrating printer resolution capabilities.
A micron is 1000 times smaller than a millimeter. The object being printed can be regarded as high resolution if it has tiny details and sharp, well-defined edges, and little to no imperfections.
All the components of the 3D printer work together to achieve different resolutions. For example, the nozzle size affects the detailing of the prints and the components moving the nozzle also affect the resolution by how precisely they can move the nozzle. There are many factors that influence the resolution of a 3D model. If there’s one thing you’ll learn very quickly in 3D printing, it’s that most of the time, perfection is achieved through trial and error. There are no specific settings to create high-resolution models of all shapes and sizes every time.
Make sure you check out our YouTube channel, and if you would like any additional details or have any questions, please leave a comment below or join us on Discord. If you liked this article and want to read others click here.