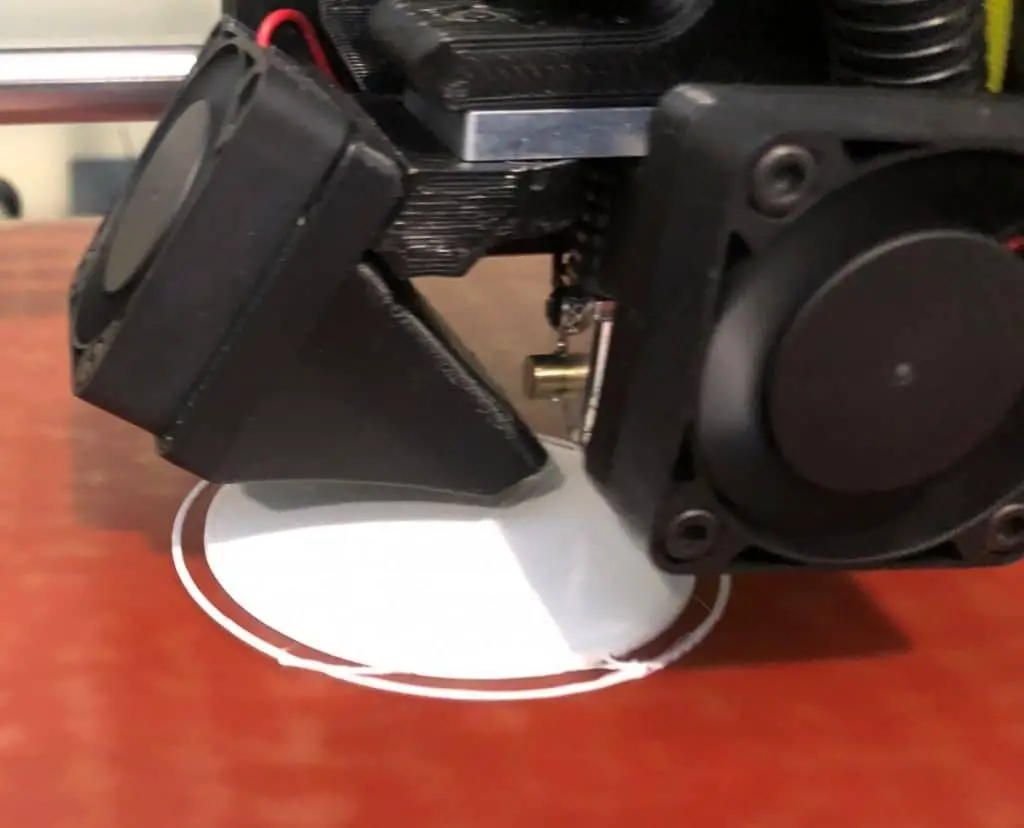
3d printers do a lot of things that look random at first but actually have a purpose. For example, the outline that gets printed around the object when a print first starts. If you didn’t know what the outline is for, you might think it’s random and a waste of filament, but there is a purpose for it. This outline is actually called a skirt, and it has a very specific purpose.
Fused Deposition Modeling (FDM) printers work by forcing melted filament through the nozzle on the hot end of your printer. When you first start a print, the nozzle may have some blockage in it, preventing the filament from coming out evenly.
The purpose of the outline, or skirt, is to prime the nozzle and to make sure you get a smooth and even flow when the printer starts on the object being printed.
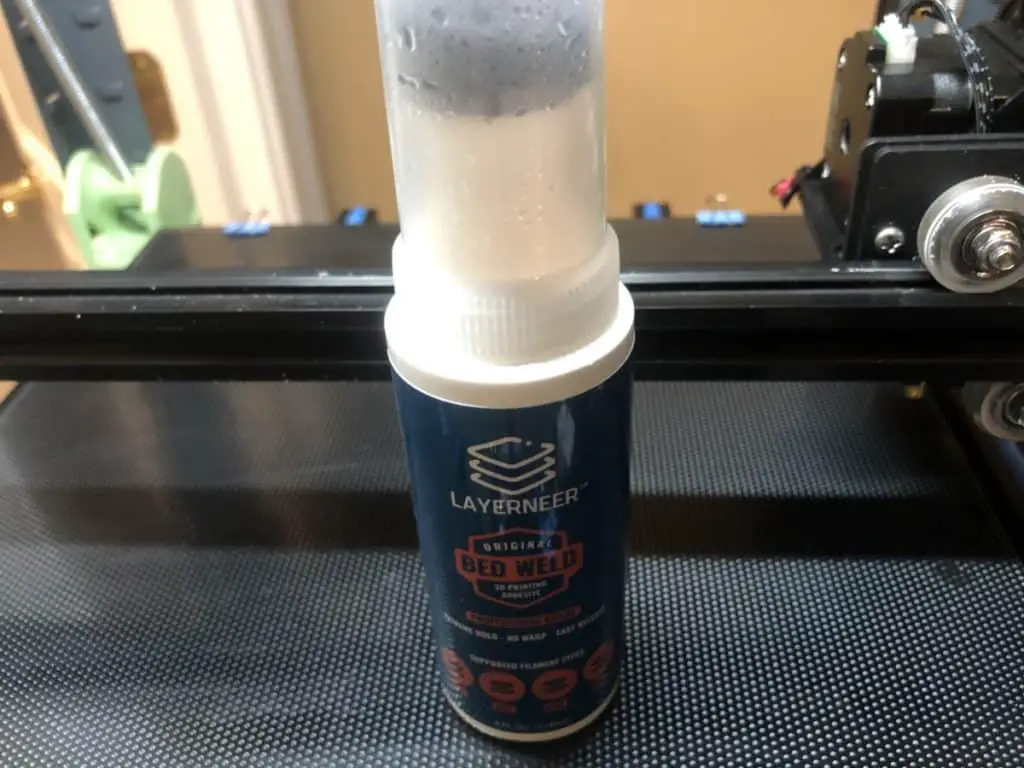
A skirt doesn’t use much filament at all and can help prevent adhesion issues and provide an overall better first layer, which is critical to the success of the print. Depending on the build plate you are using, you may also need to add an adhesion option like Layerneer’s Bed Weld as well.
Do I Need to Use a Skirt?
The short answer is no, but I highly recommend using one or another adhesion option, which we will talk about later in this article. As I mentioned earlier in this article, the skirt is meant to prime the nozzle so that when it starts to print the actual object, the filament is coming out evenly. If you opt not to use a skirt, the nozzle will still need to get primed, and it will do so on the first layer of the object you are printing. This can lead to adhesion and first layer quality issues.
That said, I think this should be answered with why shouldn’t you use a skirt or another adhesion option. The extra print time and filament used is minimal, and it will provide a better overall print, especially if you are printing a larger object what will take 10+ hours.
Why is the First Layer Important?
The first layer is the foundation for your print and needs to be as good as possible. You can gauge the probability of a successful print by how your first layer turns out. If you have issues here, they can cause print quality issues and potentially cause your print to fail.
There are many things that can cause issues with the first layer. These are the most common ones.
- Adhesion issues
- Surface not being level
- Extruder not being the correct distance from the build plate
- Extruder and build plate temperature
- Filament quality
- Dirty build plate
- Slicer first layer settings
- Filament type
If you notice any issues with the first layer, I recommend you stop the print there and fix them. I would rather stop a print 5 minutes into it to fix an issue than let it go and hope a 10+ hour print turns out ok.
This isn’t an article on troubleshooting first layer issues, so I won’t go into to much detail here. If you are having first layer issues, I would focus on making sure your build plate is level, your nozzle is at the correct height, and you are using an adhesion option such as a skirt, brim, or raft. If you are interested in learning more about first layer settings and troubleshooting, you can check out the Cura First Layer Settings article I wrote here.
How to Add a Skirt to My Print?
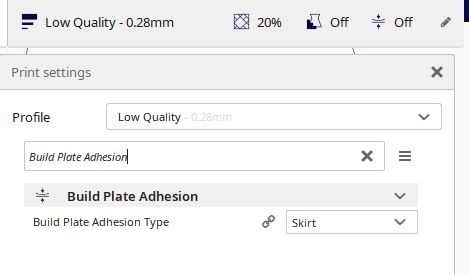
Fortunately, a skirt is the default adhesion setting and is enabled by default, but I still make sure it’s enabled before I slice an object just in case the settings were changed on me.
You can find the “Build Plate Adhesion” setting by going into the printer section and searching for “Build Plate Adhesion” (screenshot below). Once there, just make sure that Skirt is selected for the Build Plate Adhesion Type.
Skirt Settings
There isn’t really many settings you need to worry about, and the default options are typically fine. The location of the skirt setting may vary between slicers, but in Cura you can find it under the “Build Plate Adhesion” section, and in Simplify3D they are under the “Additions” section under “Edit Process Settings”.
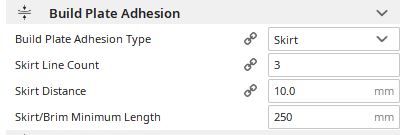
Here are the skirt setting you can change.
- Skirt Line Count – The number of lines that will be printed.
- Skirt Distance – The distance from the object to the skirt.
- Skirt/Brim Minimum Length – The minimum length of the skirt. This can potentially cause additional lines to be created if you are printing a smaller part.
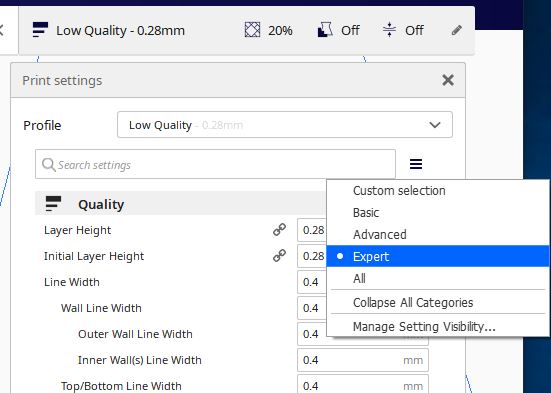
By default in Cura you will only get the option to select the build plate adhesion type, it does provide you any setting to change. If you change the printer setting from Basic to Expert by clicking on the menu bar in the printer setting area (picture below) and select Expert, or all, you can see all the settings available.
Alternative Adhesion Options
While a skirt is the most common build plate adhesion option, there are two others to chose from, including brim and raft. The use of these is far less common than a skirt, but they can very useful under certain circumstances.
Brim
A brim is basically the same thing as a skirt with one exception, it’s attached to the object and will need to be removed post-print. You will want to use a brim if you are printing a part that has small surfaces touching the build plate. This will provide a more stable surface for the rest of the print. The downside is that you will need to remove it post-print, and that can sometimes be tricky to do without it being noticeable.
Pros:
- Primes the nozzle foe the print
- Provides better support/adhesion for parts, especially those with small surfaces that touch the build plate
Cons:
- Must be removed post-print
- Difficult to cleanly remove
- Uses extra filament
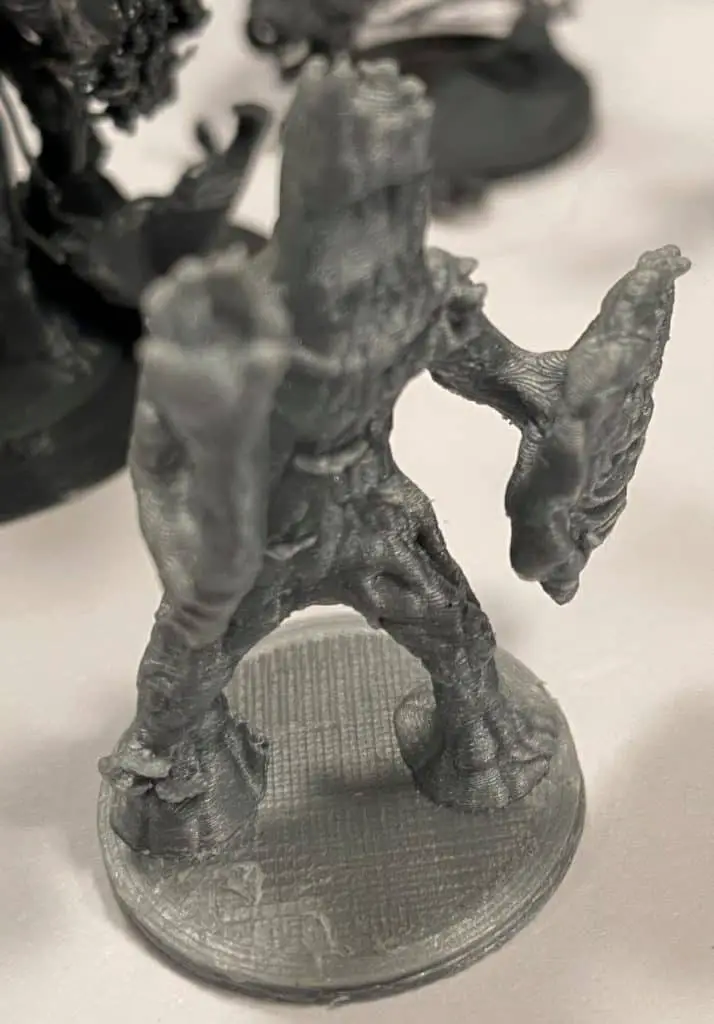
The mini figure above was printed using a brim and you can still see some signs of it being removed from the base.
Raft
A raft is a multilayer printed surface that the printed object is built on. This provides excellent adhesion and keeps the build plate heat away from the object being printed but uses a lot more filament and must be removed post-print. Since the object is printed on the raft, the raft is part of the structure and can be very difficult to remove cleanly. A raft can also help provide a level build surface for a print if you have a warped build plate. I know some people who swear by this, but its not something I have ever needed to do. I guess I have just been lucky with my build plates.
Pros:
- Primes the nozzle foe the print
- Provides the best possible adhesion and surface for a print
- Can help out if you have a warped build plate
Cons:
- Must be removed post-print
- Extremely difficult to cleanly remove
- Uses a lot of extra filament
Conclusion
An outline, or skirt, is going to prime your printer nozzle and tends to be the most common adhesion option used as it’s the best option in most cases. If you are printing something that has small objects touching the build plate, you will want to consider other options such as a brim or raft.
The reason you need to prime the nozzle is that FDM printers work by forcing melted filament through the nozzle on the hot end of your printer. When you first start a print, the nozzle may have some blockage in it, preventing the filament from coming out evenly.
Make sure you check out our YouTube channel, and if you would like any additional details or have any questions, please leave a comment below. If you liked this article and want to read others click here.