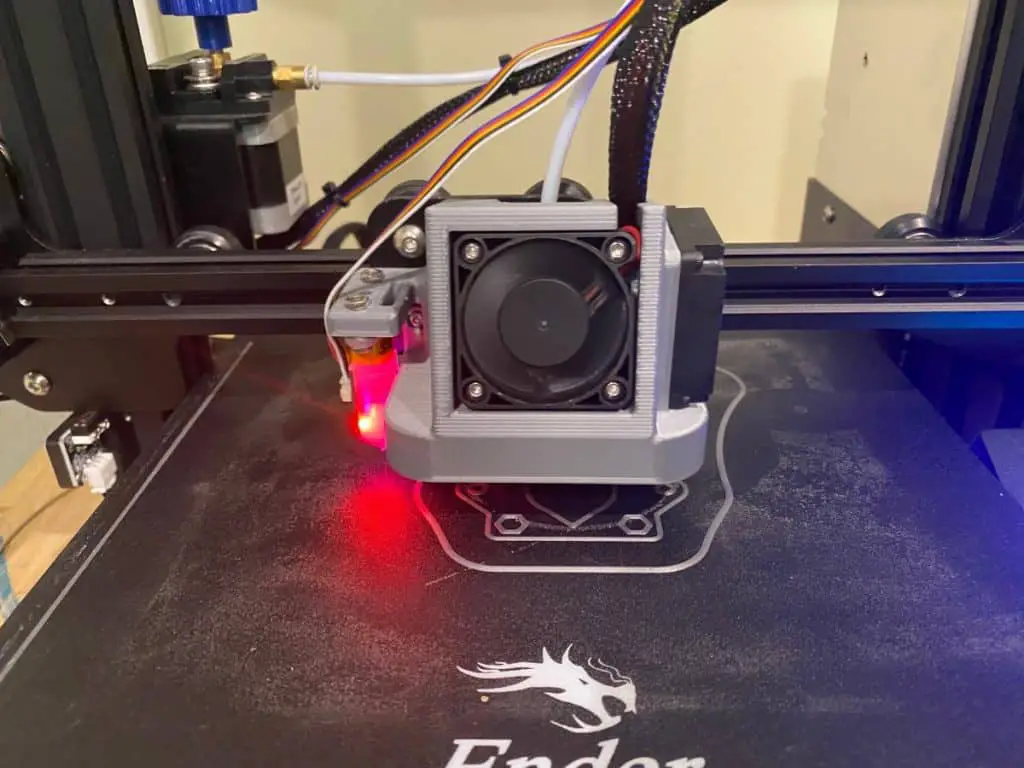
Just when you’re about to materialize your project, you notice the nozzle pointing towards the bottom left corner of the bed (build) plate (or sometimes far from the bedplate), and then begins to release PLA. This is a common issue with 3D printers, especially newly acquired ones. But why your 3d printer prints from the corner?
The slicer has undefined offsets, or the firmware’s predetermined origin for “center” is the front left corner of the bedplate, which is the default for Marlin’s firmware. The most common of 3d printer’s firmware.
There are various fixes for each case. One of which is easy and the other a bit frustrating. Nevertheless, it’ll get the job done. Read on to learn more…
Why your 3d printer prints in the corner
This is a common issue with most 3d printers. There are two probable causes for this issue and they include:
- The slicer- a 3d printing open-source application with undefined or inaccurately defined offsets
- Or it’s the manufacturer’s error which stems from the firmware itself.
In this post, we are going to delve into how to solve each of these issues, without risking damage to your printer’s settings.
What To Do Before Fixing
Before going straight into fixing, there are some actions to take. So you can properly Re-calibrate the homing offset and keep the nozzle at the proper center for printing.
The physical origin of the printer
To go about this, you need to instruct your printer’s head or nozzle to proceed to points (0,0,15) using the console or terminal. Or for convenience, make use of a G-code file that ensures the nozzle moves to the coordinate which you’ve printed onto the SD card.
It will look like this: ( G1 X0 Y0 Z15 P500).
Once the printer has executed the instructions, then the nozzles should be found at the printer’s point of origin. Which is determined by the firmware.
Usually, it would be found on the left front corner of the build plate. Given its firmware is Marlin. In the case of Delta and Cartesian printers, it is the center.
Configure The Slicer
The next action to take is to set up the slicer in such a way it matches the origin of the printer’s firmware. If the slicer isn’t configured properly, a different point of origin will be assumed. Thus, keeping the nozzle in a different position from the true point of origin.
Certain slicers such as the Ultimaker Cura is well-known for causing the printer to print from the corner instead of the center.
Determine the offsets
This is a crucial step in centering your printer’s nozzle on the build plate. It involves quantifying the offsets of the center which is recognized by the 3d printer.
Here’s how to go about it:
Print a larger square that has dimensions that are 90% of the build plate.
Ensure the paper possesses a parametric design such as ones with the bed center calibration model.
How to quantify the offsets of the center
After printing, use the paper to measure out the length from every edge of the bedplate to the paper.
Here’s a scenario: On the X-axis you should see 12mm from the left side and 8mm from the right side of the edge (as you are facing it).
The center is therefore 2mm to the right {(12-8)/2 =2mm}. This means the manufacturer has given an offset bedplate which happens to be incorrectly configured into the firmware.
How To Fix 3D Printer Corner Printing
There are up to four methods for repairing printing from the corner. The methods start from the simplest and end with the hardest.
Fix 1
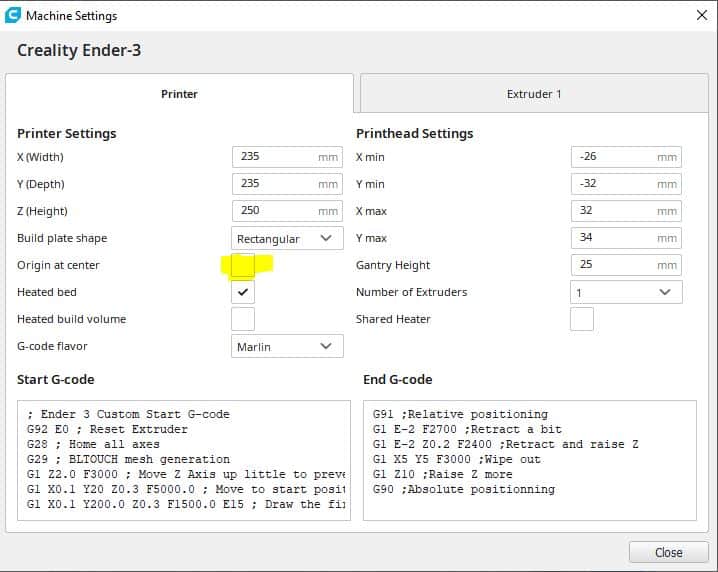
Make sure your origin is set correctly for your printer in Cura. You can find this setting in the machine settings for your printer by going to Preferences –> Configure Cura –> Printers. Most printers should have the “Origin at center” checkbox unchecked. If it’s checked when it’s not meant to be that will cause the firmware to think the corner is the center of the printer.
Fix 2
You can simply adjust the position of the endstops in such a way it matches the position change of the bed plates. Which you’ve measured from using the calibrated print.
This particular solution is only possible if your 3d-printer supports the alternation of endstop holders.
Fix 3
Another solution that is also quite easy is the adjusting offsets in the slicer.
How to go about it:
- Select printer options and then adjust the offsets (i.e if available in the slicer)
- You could also execute G-code commands to create the offset (if printer options are not available in the slicer).
This method will enable your printer to recognize the actual center of the bed (build) plate.
Note: prevent sharing G-code with other users that may be using a similar printer, as it could ruin your settings.
Fix 4
An alternate way to fix your printer is to set the offsets fixed on the firmware. You do this by updating the applicable firmware into a more recent version with a new configuration.
To update, you need to be comfortable with computer tools and software that can upload binary codes and source files straight to the printer.
There’s no general process for doing this. As each firmware has its own method. In the case of Marlin’s firmware, changes are to be made in the configuration file. Such as setting the actual bed and offset values.
How to update/install Marlin (Ender 3 Pro) firmware
Before updating the firmware, you need to flash the bootloader over a USB. If you’re making use of an ender 3 (available on Amazon) 3d printer, and it has an 8-bit mainboard, then you’ll need to install a bootloader before you’re clear to commence flashing.
Here is a video I created on this process.
Here’s what you need:
- Windows computer (with preinstalled Arduino IDE)
- One male and one female Dupont wires
- Five female to female Dupont wires
- Cable to connect to of and Arduino Uno
Steps to take:
- Visit the Arduino IDE on your system. Select ‘examples sketches’ on the interface. Then open Arduino ISP
- Select manage libraries then select U8glib library
- Visit board manager and then add sanguino board
- After that, plug in your Arduino Uno.
- From there on, select Arduino Uno as the port and also the board. Click ‘upload sketch’, then wait until it’s uploaded successfully.
- Once done, visit the home menu and choose the Sanguino board which has been added earlier.
- After this, you are clear to open the Ender3’s control box. From there on, you can commence wiring it up to the Arduino following this structure:
| 5V | 5V |
| Melzi | ArduinoMISO |
| SCK | SCK |
| RESET | Digital Pin 10 |
| GND | GND |
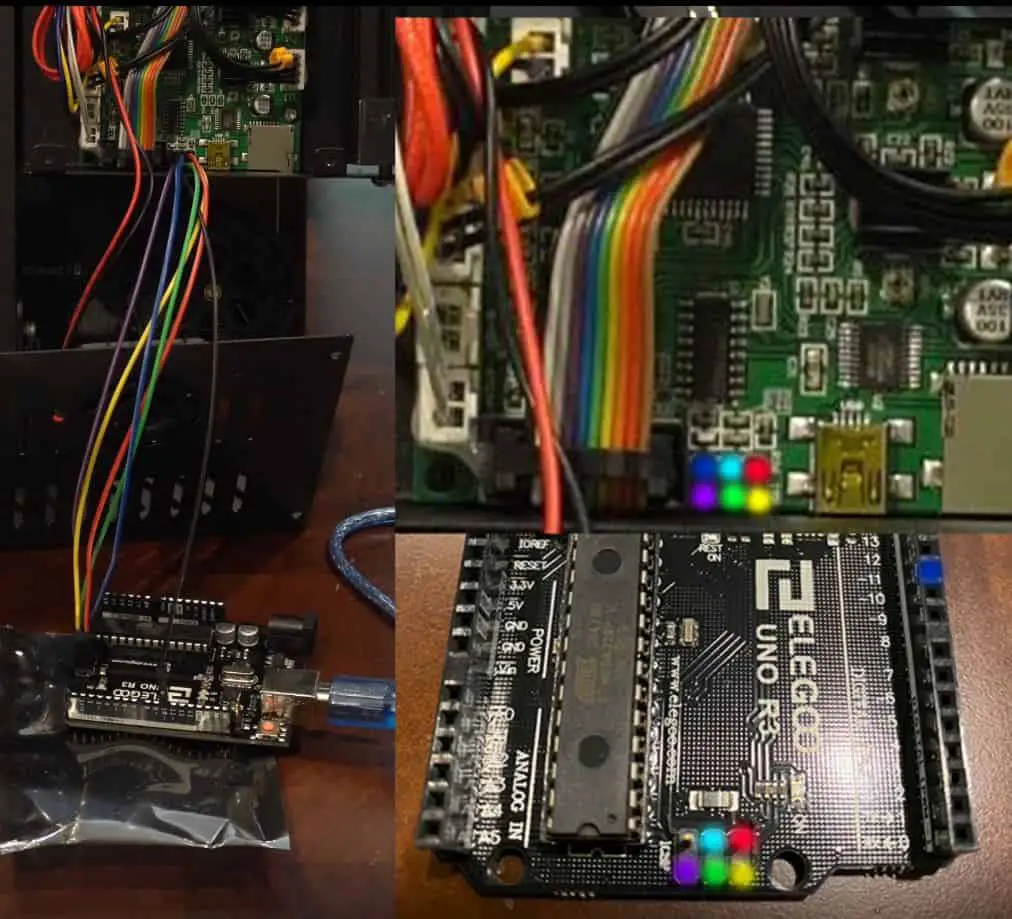
(Note: the pin with the ~10 on the Arduino in the row of pins).
- After the setup, you should notice flashes of blue light from the Creality board (this means you’ve wired it correctly).
Almost done:
- Select the Tools tab, click on the box that says ‘burn bootloader’.
- Then wait for a prompt that says ‘Output bootloader burned successfully’.
Tidy Up:
- Disconnect the Dupont connectors from your ender 3 printer and then fix the cover back onto the board for screwing.
- Then disconnect the Arduino from the system.
Now that you’ve got the bootloader installed and flashed, here are some steps to install Marlin’s firmware:
- First, you need to install the latest version of the firmware.
- Once downloaded, unzip the file onto a preferred location (file). Then locate an already extracted folder named as example configuration folder (which is within the Marlin folder).
- After opening, find another folder that’s named ‘Ender 3’. Open it, copy all the files and paste them onto the Marlin folder. You will then see a prompt that says overwrite?. Pick yes.
- Navigate down to the file named marlin.ino in the Arduino IDE and then open it.
- After opening, you’re then clear to upload the firmware. At this point, you’re allowed to add bilinear bed leveling or not. If you don’t wish to add it then ensure your printer is plugged in via USB. The port should be correct and the board selected should be Dangiuno. Click upload.
- Once completed, disconnect the printer from your system and then connect the printer to the power output. So it doesn’t die out, because the printer may take a while to boot.
Conclusion
So there you have it. All the information you need to keep your 3d printer from printing from the corner. Now you know more about the problem and how to handle it. Both when it’s just a simple slicer issue and when it’s a major manufacturer error.
Make sure you check out our YouTube channel, and if you would like any additional details or have any questions, please leave a comment below. If you liked this article and want to read others click here.
Rob,
I would like to ask a question but I don’t know where to go. My printer is an Ender 3 Pro with a 4.2.2 board
I have a creality kit that includes a 4.2.7 board a V2 color controller, filament out, and BLtouch. When I install just the 4.2.7 board nothing works I can’t print or anything. I want to install the 4.2.7 board plus the color controller the filament out and the BLtouch. What bin file do I need to flash and where can I get the file?
Richard Secrest
Rps911@mchsi.com
I am very new to this field but want to learn.
Thanks
Lucky
I don’t believe there is a prebuilt firmware package that works with the bltouch and runout sensor unless you are using the transfer board, which has been known to cause a lot of problems. I personally would look at building a copy of Marlin from the bug fix line making the necessary changes as you go. If you need help doing this, you can reach out on Discord https://discord.gg/Bu94EYVkrU .