I’ve been tinkering with 3d printers for quite some time and thought I’d write an article about connecting an Ender 3 to your PC. Here’s exactly how to do it.
So, how do you connect an Ender 3 to a PC? The Ender 3 has a micro USB port, you take a micro USB cable and plug one end into your Ender 3 and the other end into your PC. The company that makes the Ender 3 provides software for each of the different models here. But, you’ll also need one of the popular free 3d printing software like Cura.
Typically you’ll want to use an SD card to print, but they can be a bit fiddly, and using a USB cable can be easier.
However, you’ll still need some software to send files to your 3d printer for printing. Below, I’ll explain exactly how to connect it and print from your computer.
Step by step: How to connect and Ender 3 to PC
If you’ve just got your 3d printer and don’t know where to start then check out my video below, that covers the basics, and what you’ll need to do your first print.
Here is a video guide covering a similar process using Pronterface to interface with the printer.
Required Hardware
- Ender 3 or Ender 3 V2
- Micro USB Cable
- Micro SD Card *8GB or smaller
- SD Card Reader
- Computer
*Links are to Amazon, and for the products I use.
Now, on to how to connect an Ender 3 to your PC step by step.
1. Get a USB Cable
The most common USB cable is the Micro USB and Creality moved to that style with their 32-bit mainboards which is great. That said, if you have an older 8-bit board, you will need a mini USB cable. The Mini USB is a standard cable that was used a lot a few years ago, and is slightly larger than a micro USB. But, now it isn’t as widely used.
However, you can still find them on Amazon, at your local electronics store, and a range of other stores online. Depending on what country you live in will determine the best place to pick one up.
The main thing is to get one that’s long enough so that your computer can reach your 3d printer. For example, if you keep your 3d printer on the other side of your room you’ll want to get a much longer cable.
But, if you have a laptop you can get a shorter one, and put your laptop next to it. However, I don’t recommend that because your 3d printer moves around a lot, and it produces a bit of heat which might damage your computer.
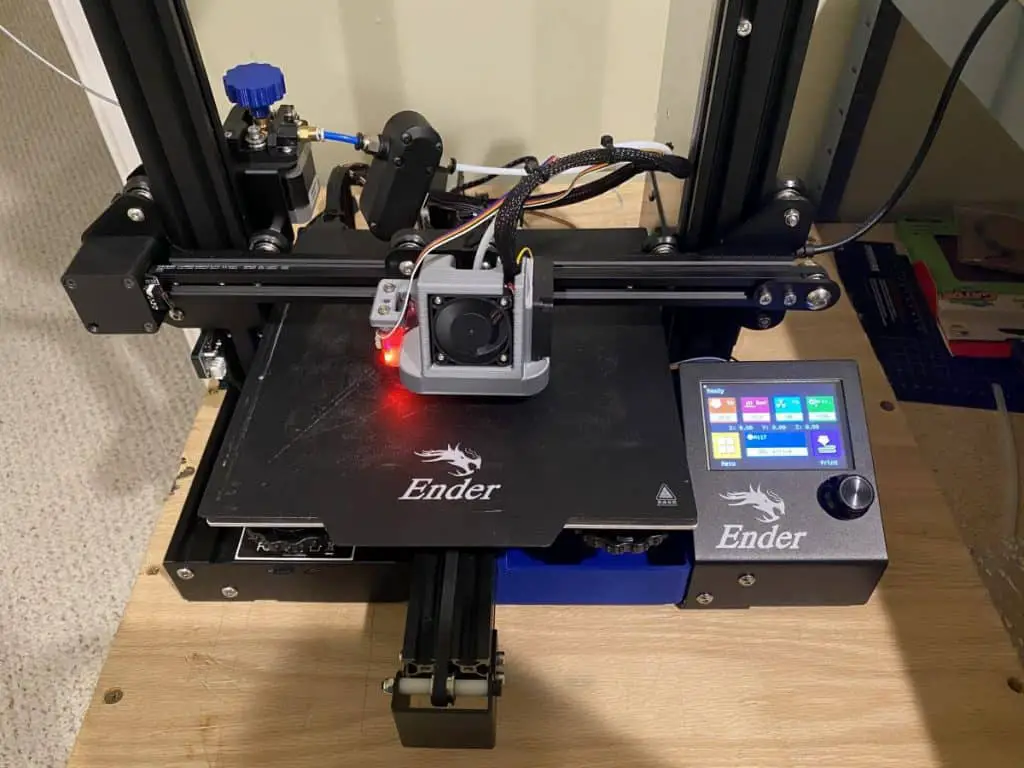
2. Connect It to Your Ender 3
This step is pretty straightforward – plug in the mini USB end to your Ender 3, and connect the USB end into your computer. When you plug it in your computer, you’ll get a pop up and it will make a noise to say that it’s detected your 3d printer.
It will usually say that it’s installing the drivers. Just let it do that for a bit.
3. Install a Slicer
Next you’ll want to install some software to send prints to your Ender 3 for printing. A good idea is to install the firmware from the official Creality website. Creality is the company that makes the Ender 3.
Find the list of downloads for each of the different Ender models here. They have software for all the models such as the Ender 3 Max, and the Ender 3 V2.
You’ll also need to get a slicing software. A slicing software is different to a program you use to design your prints. It processes the 3d print design file. As you may know, the most common file type for 3d print design is an STL.
The most popular slicing software by far is Cura because out of the box it supports a wide range of 3d printers. It’s also completely free. You can download it here.
You can also get pre-made prints on a website like Thingiverse that has a tonne of interesting things you can print. And the best part is you can download them for free. Once you’ve downloaded them you can open them in Cura.
4. Add Your 3d Printer to Cura
There’s a setting you need to add to Cura to begin printing, which is to add your printer. There’s a drop-down box at the top that you click and select ‘Add Printer’. Then select the printer that it auto-detects. The drop-down menu will say ‘Ender 3 xx”.
You can have multiple 3d printers configured in Cura. And if you do make sure you select the right 3d printer before printing using that drop-down menu.
5. Print
Now that it’s all connected you can print pretty much straight away. You simply need to open the design file in Cura. By selecting ‘Open File’ or the folder icon.
It will open up the design and show it on your screen. Then click down the bottom right corner and instead of exporting to an SD card you’ll have an option that will say print.
From there it will start printing. Just be aware that there is a range of issues that can occur because you’re printing on a computer. And there are a few things to be aware of beforehand so the print doesn’t stop halfway through.
Major Issues That Can Occur When 3d Printing With Your Computer
If you begin printing and anything happens on your computer the print will stop. You won’t be able to resume it again without ruining your print. So you want to do a few steps so that the printing doesn’t get interrupted. These are:
Disable Sleep Mode
If your computer goes to sleep while it’s printing, it will stop your print. This can be really annoying especially for prints that take many hours to finish. Therefore, you want to disable sleep mode so that it’s always on.
Each computer is different so the best way to find out how to do this is by doing a Google search for ‘how to turn off sleep mode in Windows 10’. Or, whatever operating system you’re using.
Don’t Plug in Other Devices
If you plug in another device like your phone it can open up a window that can pause your print. So, don’t plug anything in while it’s printing.
Disable Background Programs
If you have any other programs in the background running such as Steam – for gaming. Or, have a messaging app open, the pop-ups can pause your print. You want to – where possible – close any other programs while it’s printing otherwise it can pause your print.
Use A Battery Backup
Lastly, I recommend having your computer, and 3d printer, connected to a battery backup to protect you from short power outages. You can get a consumer battery backup for pretty cheap and it can end up paying for itself over time by reducing the amount of wasted filament. Here is a great one for the price on Amazon “CyberPower EC850LCD Ecologic Battery Backup”.

A good way to think about it is that when you’re using your computer to do a 3d print it’s only job is to print the 3d print. And you SHOULDN’T use it for anything else until the print is complete.
Related Questions
Where else can I get STL files from? – There are many other sites that have STLs available. Some sites offer them for free and others charge for them. Here are four alternatives to Thingiverse.
Do I need a powerful computer? – The short answer is no, any relatively modern computer will work just fine. I wrote an article that covers this topic in more detail that you can read here “What Computer Do I Need for a 3D Printer?“.
Related Articles
- How to Print a File from Thingiverse (The Easy Way!)
- Guide to Install a BLTOUCH on a Creality 32-bit Mainboard
- Creality 32-Bit Mainboard Firmware Upgrade Guide
- Create a Temperature Tower Using Cura – The Easy Way
- Cura Profiles
Recap
Here’s a quick summary of everything I’ve covered in this article:
To connect your Ender 3 to your computer you want to plug it in using a micro USB cable.
Then you want to install the firmware from the official Ender website. Then you’ll need a slicing software like Cura. You will also need a print design file or STL. You can have a design you made yourself, or download some cool ones for free ones from sites like Thingiverse.
Then you want to configure Cura so that it has your 3d printer in it. After you want to open the file for your print design in Cura. Finally, you can print it by selecting the option at the bottom right of the screen.
Make sure you check out our YouTube channel, and if you would like any additional details or have any questions, please leave a comment below or join us on Discord. If you liked this article and want to read others click here.
Nice article sir.
Do you still need to keep the SD card inserted when using USB only for the settings it can you simply remove it for good?
Hi,
I would keep using/printing from the SD card unless you have a reason you cant. I don’t like printing over USB because if the computer hangs or reboots you will lose your print.
Thanks,
Rob