When someone buys a new piece of technology, the first thing they tend to do is plug it in and start using it. Updating things like the firmware tends to get ignored most of the time, but it shouldn’t. Updating the firmware can bring in new features and fix known bugs making it well worth doing the upgrade. That said, in some cases, the manufactures firmware may not be the best option.
Here are the steps to install custom Marlin firmware on a 32-bit Creality board.
- Install Visual Studio Code
- Download Marlin Firmware and Configuration Examples
- Copy Configuration Files to the Marlin Firmware Directory
- Update the platformio.ini File
- Update the Marlin Configuration
- Build the Firmware
- Copy the Firmware to an SD Card
- Install the Firmware on the Printer
*This process assumes you have a Creality 32-bit mainboard and plan to Marlin firmware on it. If you are looking to run the prebuilt Cerality firmware, you should follow this guide, “Creality 32-Bit Mainboard Firmware Upgrade Guide”.
** This process has been tested using the Creality 4.2.2 and 4.2.7 mainboard.
Why Move to the Marlin Firmware?
The Marlin firmware is has been around a while and has a large user community behind it, meaning you can get support and bugs fixed if needed. Also, it’s free, compatible with most with a wide range of mainboards, and has frequent updates.
You can also download a copy of Marlin I built with the required changes and use supplied configs as a starting point. The firmware is available to download from “3D Printscape Marlin Builds“.
Step-by-Step Firmware Upgrade Guide
Requirements
Required Hardware
- Creality printer with 4.2.2 or 4.2.7 mainboard
- Micro SD card *8GB or smaller
- SD Card Reader
- BLTouch
- Computer
*Links are to Amazon and for the products I use.
Required Software
Step-by-Step Guide
If you run into an issue or need assistance, join us on Discord.
Install Visual Studio Code
The first thing you need to do is download and install Visual Studio Code (VS Code). Assuming you are not doing anything out of the ordinary, the install process tends to be quick and easy.
Follow these steps to install VS Code
- Download VS Code for the operating system you are running.
- Run the VS Code installer using the default values provided
- Launch VS Code
Install Platform.io
Once you have VS Code installed, you will need to install the Platform.io plugin. To do this, you will want to click on Extensions on the left side menu and search for platform.io. You will see PlatformIO IDE come up in the search results. Click on that and then click install.
The install process will run in the background and update you with a notification at the bottom right of the VS Code user interface when it’s done. Once done, you will want to restart VS Code.
Download Marlin Firmware and Configuration Examples
Next, we will need to download the firmware we plan on using. There are two things we need to get from there, the firmware and the configuration example.
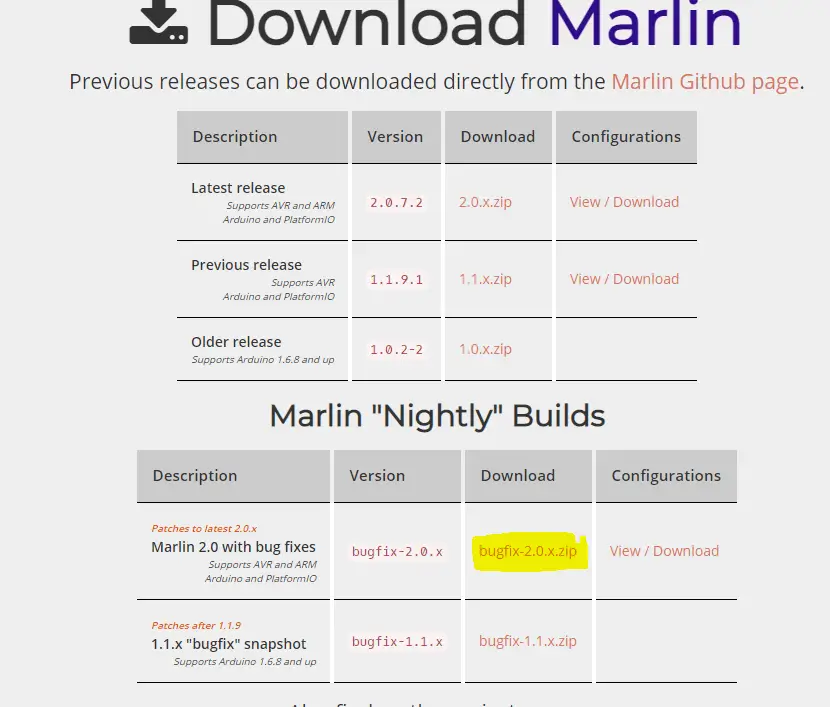
Firmware
To do that, go to the Marlin download site and download both bugfix-2.0.x.zip, shown below.
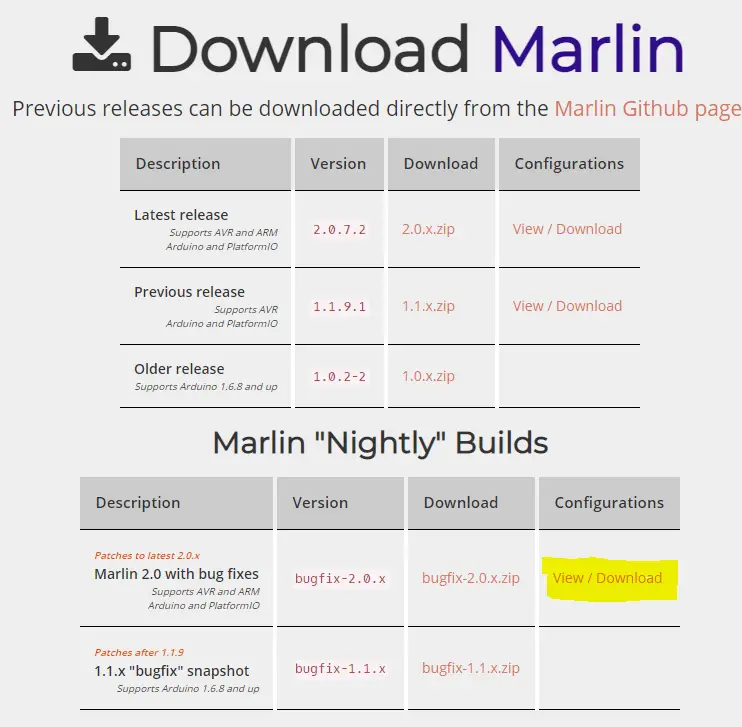
Configuration Examples
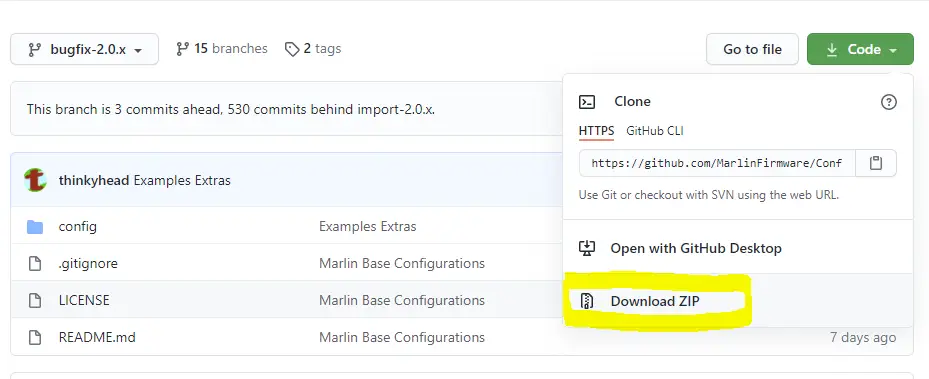
To get the example configurations, click on View/Download next to the firmware you just downloaded to get to the GitHub page. Then click on the green code button and click Download Zip.
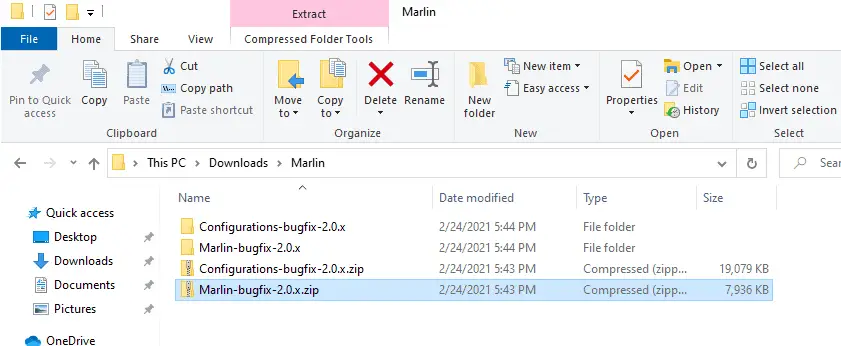
Unzip Files
Now that we have downloaded both packages we need, you will want to unzip them. You can unzip both files in the location they are in, but you will want to move the unzipped firmware to your desktop or somewhere closer to the root of the drive. The firmware needs to be close to the root of the drive to prevent any issue around the length of the file path.
Copy Configuration Files to the Marlin Firmware Directory
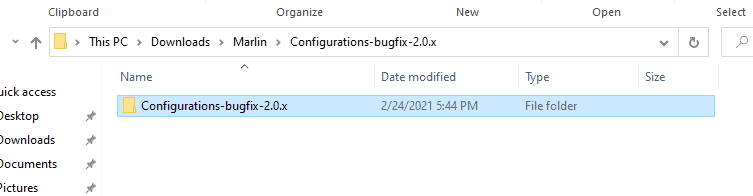
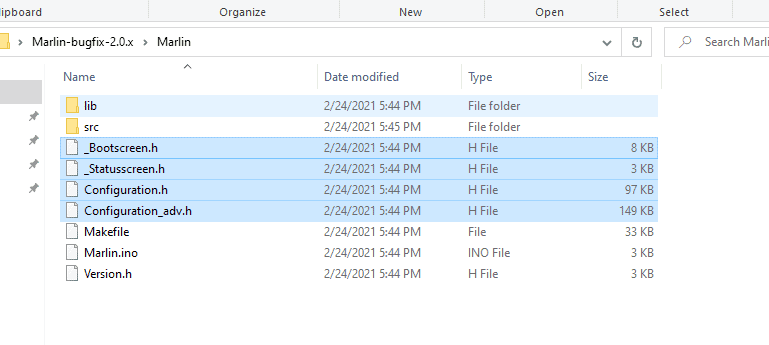
Now we will want to copy the example configs from the example directory to the Marlin folder in the firmware directory, in my case, “C:\Users\Owner\Desktop\Marlin-bugfix-2.0.x\Marlin”.
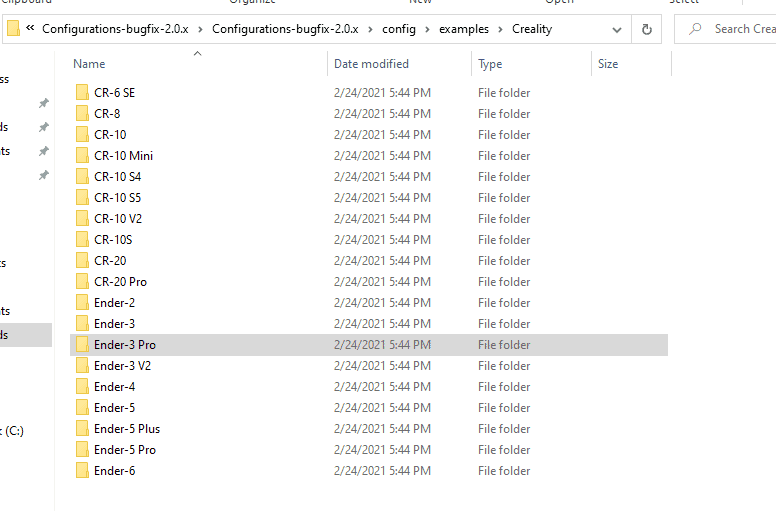
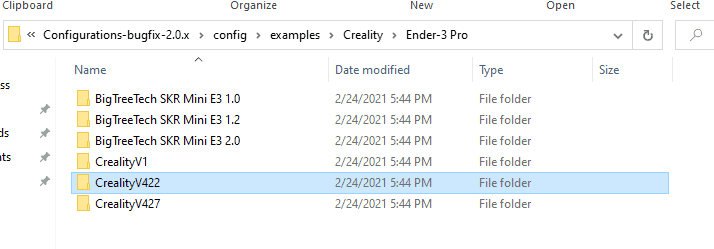
You will find the example configs in the Configurations-bugfix-2.0.x folder that you extracted. Once in that folder, you will want to get the examples for the printer you are working with. I have the Ender 3 Pro with the 4.2.2 board, so that’s what I will be looking for and can be found in the Creality folder. From there, I need to go into the folder for the board I’m using.
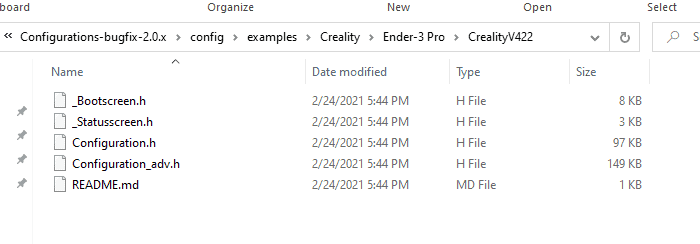
In that folder, you will find four config files ending with .h. You want to copy those files to the Marlin folder mentioned above, overwriting any files that already exist.
Update the platformio.ini File
Next, we will want to update the default_envs value in the platformio.ini file that is in the root directory of the firmware.Default Value New Value default_envs = mega2560 default_envs = STM32F103RET6_creality 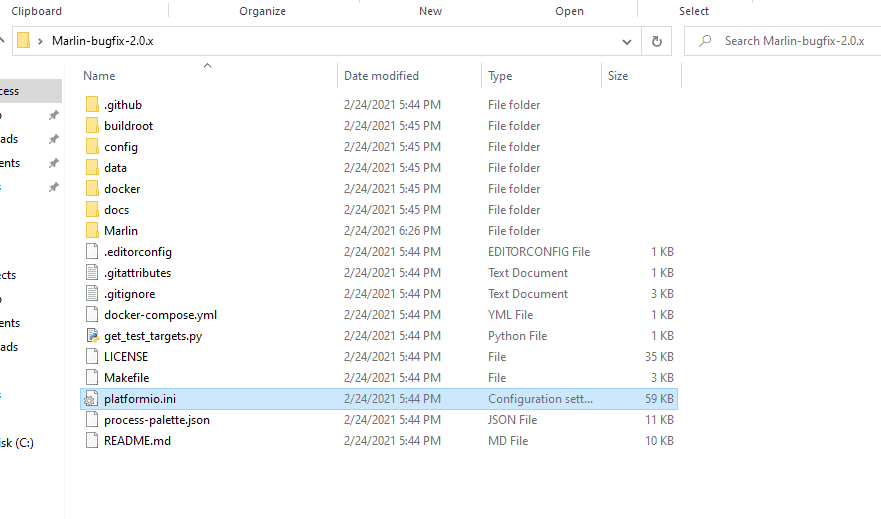
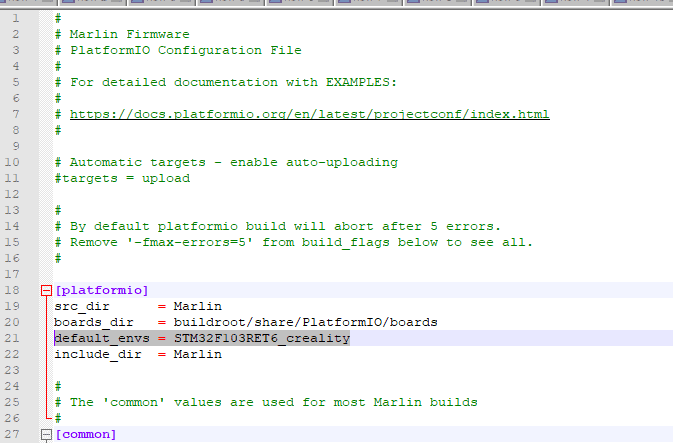
*** If your printer was purchased in 2022 you may have the RCT6 chip (or 256k). If you do, you will want to use STM32F103RC_creality. You can follow this video to see what chip you have.
Make sure to save the file after you make the change.
Update the Marlin Configuration
Load Firmware into VS Code
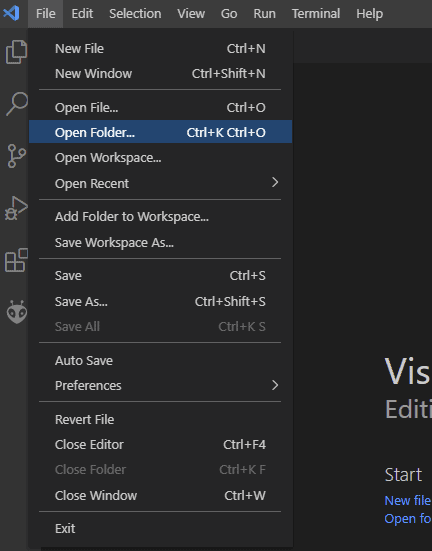
The next thing you will want to do is load the firmware into VS Code to make the necessary changes and build it. To do that, you will want to follow these steps.
- Open VS Code
- Go to File – Open Folder
- Browse to the firmware folder and click Select Folder
Recommended Changes
Now I will go over the changes you should make if regardless of the mods you are running. If you have the BLTouch, you will want to make these changes and the changes in the next section.
Configuration.h Changes
Path: Marlin\Configuration.hDefault Value New Value Notes #define CUSTOM_MACHINE_NAME “Ender-3 Pro V1.5” #define CUSTOM_MACHINE_NAME “CUSTOM VALUE HERE” Repalce “CUSTOM VALUE HERE” with what you want on the display. //#define S_CURVE_ACCELERATION #define S_CURVE_ACCELERATION //#define LEVEL_BED_CORNERS #define LEVEL_BED_CORNERS //#define INDIVIDUAL_AXIS_HOMING_MENU #define INDIVIDUAL_AXIS_HOMING_MENU #warning “Creality 4.2.2 boards may have A4988 or TMC2208_STANDALONE drivers. Check your board and make sure to select the correct DRIVER_TYPE!” //#warning “Creality 4.2.2 boards may have A4988 or TMC2208_STANDALONE drivers. Check your board and make sure to select the correct DRIVER_TYPE!” Verify the driver is correct, then comment out this line
*You should also make any additional changes you want/need to at his point.
Required Changes if Running a BLTouch
If you have the BLTouch, you will want to make these changes as well.
Configuration.h Changes
Path: Marlin\Configuration.hDefault Value New Value Notes #define Z_MIN_PROBE_ENDSTOP_INVERTING false #define Z_MIN_PROBE_ENDSTOP_INVERTING true Only needed if using a build before July 2021. You will get an error if using this on a later build. //#define BLTOUCH #define BLTOUCH #define NOZZLE_TO_PROBE_OFFSET { 10, 10, 0 } #define NOZZLE_TO_PROBE_OFFSET { X, Y, 0 } X & Y should be replaces with your offsets //#define AUTO_BED_LEVELING_BILINEAR #define AUTO_BED_LEVELING_BILINEAR //#define Z_SAFE_HOMING #define Z_SAFE_HOMING
If you have z-stop and bltouch probe both plugged in, make these changes as well.Default Value New Value #define Z_MIN_PROBE_USES_Z_MIN_ENDSTOP_PIN //#define Z_MIN_PROBE_USES_Z_MIN_ENDSTOP_PIN //#define USE_PROBE_FOR_Z_HOMING #define USE_PROBE_FOR_Z_HOMING
Configuration_adv.h Changes
Path: Marlin\Configuration_adv.hDefault Value New Value Notes //#define BLTOUCH_DELAY 500 #define BLTOUCH_DELAY 500 //#define BLTOUCH_FORCE_SW_MODE #define BLTOUCH_FORCE_SW_MODE //#define BLTOUCH_HS_MODE #define BLTOUCH_HS_MODE This is optional but will speed things up. //#define PROBE_OFFSET_WIZARD #define PROBE_OFFSET_WIZARD // #define PROBE_OFFSET_WIZARD_START_Z -4.0 #define PROBE_OFFSET_WIZARD_START_Z -4.0 //#define BABYSTEP_DISPLAY_TOTAL #define BABYSTEP_DISPLAY_TOTAL // #define BABYSTEP_ZPROBE_OFFSET #define BABYSTEP_ZPROBE_OFFSET
Build the Firmware
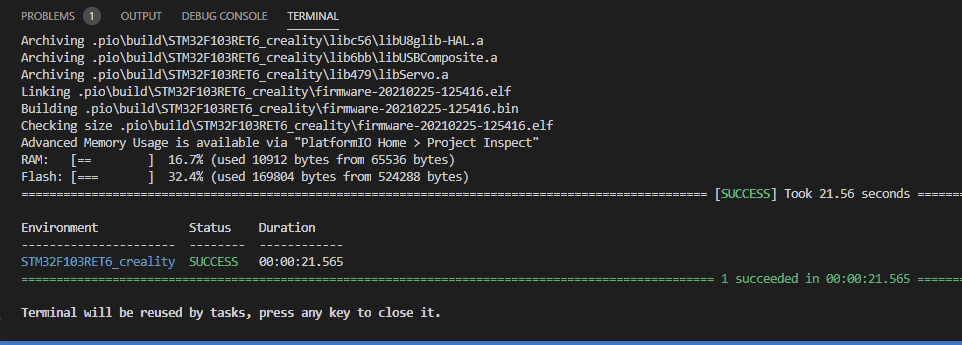
Once all your changes have been made, you will want to click on the checkmark in the bottom left of the VS Code user interface. That will kick off the build and shouldn’t take longer than a couple of minutes to complete. You should see success in the terminal window if everything worked. If it didn’t, you will be able to get the error from there to troubleshoot.
Copy the Firmware to an SD Card
Once the firmware has been successfully built, you will want to drag it to an empty SD card that is under 8GB or less.
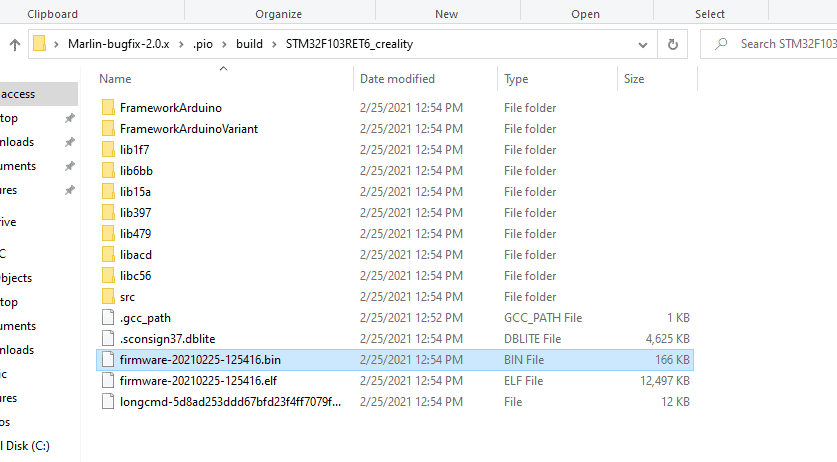
You can find the firmware under “firmware\.pio\build\STM32F103RET6_creality” , firmware should be replaced with the path where you have the firmware. In my case, the path is “C:\Users\Owner\Desktop\Marlin-bugfix-2.0.x\.pio\build\STM32F103RET6_creality”.
The file name will be firmware-date-randomnumber.bin, so firmware-20210225-125416.bin for me.
Install the Firmware on the Printer
This step sounds harder than it actually is. Assuming you copied the right file to an empty SD card, all you need to do is put the SD card in the printer and power it on. From there, the printer will pull the file and install it on the printer. The entire process should take less than 30 seconds. Once the printer boots into the standard interface, you can remove the SD card.
Related Questions
What if I have an 8-bit Creality mainboard? – You will need to install a bootloader on the printer, then push the firmware to it. I created a video covering the process of migrating to the TH3D firmware on an 8-bit board that you can see here.
What if I want to add a BLTouch? – I created a video covering the process from start to finish that you can see below or can take a look at the article that I wrote that covers the process “Guide to Install a BLTOUCH on a Creality 32-bit Mainboard” .
Do I need to recalibrate my e-steps after changing the firmware? – I would recommend doing so to make sure everything is working as expected. Here is a video and article covering the process “3D Printer E-step Calibration (Step-by-Step Guide)”.
Related Articles
- Creality 32-Bit Mainboard Firmware Upgrade Guide
- Create a Temperature Tower Using Cura – The Easy Way
- Cura Profiles
- 3D Printscape Marlin Builds
Recap
If you are looking at making modifications to your 3d printer, you will most likely need to run a custom firmware build. Moving to the Marlin firmware gives you a great community, more features, and the ability to customize the configuration to meet your needs. The process may look a little intimidating, but it’s really not that bad, and there are a lot of people able to help out if you run into issues.
Make sure you check out our YouTube channel, and if you would like any additional details or have any questions, please leave a comment below or join us on Discord. If you liked this article and want to read others click here.
Hi Rob,
Can you verify if the latest version of Marlin does not use: default_envs = STM32F103RET6_creality as it’s default value? When I tried to use it recently, the compile failed. It said that this was not a valid value and displayed a list of valid values. After doing some research on the internet, I found that STM32F103RE_creality was the new replacement. The article mentioned the 4.2.7 board so I did not know if it was valid for my 4.2.2 board. It compiled successfully with the new value.
Hi,
From what I can tell, last month Creality started shipping out the 4.2.2 boards with the 256k CPU. If your board is from before January 2022, you should be fine with STM32F103RE_creality. If it was purchased this year, I would look on the CPU to see if it says (RCT6) on it. If it does, use STM32F103RC_creality.
Hey Rob,
First of all, great site, your videos and articles have been of great help. I have an issue, I compiled the firmware of my Ender # Pro with the help of your article, I have a BLTouch and wanted to be able to enable M600 that’s why I compiled, now, when I home the printer the Z axis goes to the center of the plate, the probe deploys a couple of times and that’s it.
The print head stays at 10MM and it won’t move down, not even manually. It will go up if I move it but it just won’t move down.
Any ideas on what I may have missed?
Thanks!
Hi,
I would make sure you are using the right configuration example for your printer. I have seen that happen when the wrong one was used. I would also check to make sure the wiring on the BLTouch is right.
I am having the same issue… I was able to get it to home on other firmware but when I try to compile my own this same thing happens. Any chance you figured this one out?
Can you email me your configuration.h file? My email is admin@3dprintscape.com
Hello,
Thanks for serving!
I have the 10MM blues too. Have changed firmware with the same effect. Won’t keep the settings and I don’t understand how to get the Z setting correct.
Ender 3 (4.2.2), Marlin bugfix-2.0, Creality BLTouch 3.1, 5 wire to BL port
Printer worked well till I installed the BLTouch
Thanks for your consideration
Are you going through and setting the z offset and then saving it? If so, power cycle the printer and see if the offset values stayed.
Hi I am having a similar issue it homes X and Y then moves to centre resets the BL Touch then just stops the message Stopped appears on the screen, I have tried both 2.0.9.3 and bug fix both the same. Also when I install I get an EEPROM error tried to reset but does nothing have to Ignore in the end.
Hi,
It sounds like the wiring on the BLTouch is wrong. I see that you emailed me, I will reach out there to help troubleshoot.
Any luck with Rodrigo or RegGraham?
I am having the same issue with Marlin-bugfix-2.0.x. When attempting to home the Z axis, the probe raises up about 5+ mm so it can’t touch the bed. Its then extends and retracts the probe a few times and the whole system locks up with error M122.
I have tried:
– manually lowering z axis when off – no luck.
– Using Motion triggers to bring it lower when on – either doesn’t respond or stops at what it considers ‘0’
– Setting a Z-offset of -5mm and then 5mm. Both options oddly made the z access go up an additional 5mm before probing the air.
– Uncommenting USE_PROBE_FOR_Z_HOMING and MIN_SOFTWARE_ENDSTOP_Z. That didn’t seem to make any difference.
For the record, my Z stop switch is removed.
It seems like this issue is caused by different reasons each time. Can you try to connect the z stop and see if it behaves the same?
Hi Rob. Exact same issue for me as well. Ender 3 Pro, v4.2.2 MB (512k), using the Creality BLTouch kit with the 5pin cable. Did you ever figure out if there was a consistent cause for this issue?
Hi,
I haven’t, but would be curious if using the 256k version fixes the issue. Can you test that out?
Thanks,
Rob
Hi Rob, I haven’t flashed the 256k firmware yet but it dawned on me I should just test with the Creality firmware so I’ve flashed that and am still experiencing the same issue. So not a Marlin config issue. I’ve reached out to Creality support and will let you know what they come back with.
I found in Configuration the setting needed changing USE_PROBE_FOR_Z_HOMING needed uncommenting however I can’t motion down beyond 000.0 to set the Z-Offset using the probe Z-Offset still does not lower the head. Any ideas?
Hi,
You will want to comment out #define MIN_SOFTWARE_ENDSTOP_Z or disable the software endstops with M211 S0.
Hi, thank you so much for your guides they’ve been very helpful. I came over from youtube where I was watching a few of your vids. I followed this guide on how to compile Marlin FW after I went to install Creality firmware for a CR Touch and it made my screen go crazy. I got a stable version of Marlin on my Ender 3 Pro and it is working fine now but this was just a recover FW to reset after messing up my printer. I now am trying to add new firmware with the CR Touch changes and when I go to insert my SD card it is no longer updating my firmware. It wont take any new updates. I’ve tried a fresh compile. I’ve tried renaming the file to fresh names. I’ve tried multiple SD cards. I’ve partitioned larger SD cards to 4GB/FAT32 cards. I cannot get anything to take. Any idea how to update?
Hi,
If the SD card is good and formatted correctly, the file name is unique, and the printer still isn’t taking the firmware there may be an issue with the firmware. I would make sure the firmware is right for the printer.
I can’t delete my comment but I was able to fix my issue of Ender 3 Pro not taking firmware. I flashed the the creality firmware back on to my printer (broke my screen again) and then powered it back off and put the card with my compiled Marlin firmware on it back in and it updated the firmware that way. Just couldn’t go from Marlin to Marlin firmware for some reason.
Hi,
Thanks for the update. You should be able to go from Marlin to Marlin without an issue, but I’m glad you got it working.
This is just a note to say “thanks”. There are a lot of tutorials out there on how to do this, but yours is the most comprehensive and clear. It gives the confidence I needed to know I’m not going to brick the machine.
You’re Welcome. Thanks for the feedback.
Hi first, thank you for your guide! It helps a lot! But now i’m unable to update my firmware. I have an ender 3 PRO with a 4.2.2 board. I saw on my board that my chip is a STM32f103RCT6. In your guide you write “STM32F103RET6” in Default_envs. does i need to write same thing than you or i write “STM32F103RCT6” ?
Thanks again!
Hi,
Since you have the RCT6 chip (or 256k one they just started shipping in January 2022) you will want to use STM32F103RC_creality.
Thanks,
Rob
Hi Rob,
Great video and explaination! You’re one of the few that can really make everything clear and go step by step. Most of the other guides forget that there are people who are into 3D printing but have ZERO coding or electrical background.
I’ve been struggeling for months (yes months) to get my ender 3v1 4.2.2 to work with a BL Touch.
This video has gotten me the furthest. I’m at the point if i can’t make it work now I will completly quit the hobby as it is 99% of the time getting the bed leveling usue solved.
I followed all the instructions went through it multiple times and coppied everything. However it’s not working as it should. The offsets of probing with the blt are completely off in X,Z&Y.
My offsets are as followed : #define NOZZLE_TO_PROBE_OFFSET { 44, 16, 0 }
Z_MIN_PROBE_ENDSTOP_INVERTING is on False as the program dit not allow true.
When i level the bed , the probe is way off to the left away from the bed and even over the front of the bed.
It seems like the values I change do the opposite, i changed them to (-44,-16,0) now it’s barely tocuhing the bed and i get an error “to Far” .
Using the Z probe ofsset tool it says -2.8 so i stored this value. But whenever i start printing it prints like 5 CM in the air. Whilst it was printing I lowered Z offset to -12 ! And I noticed that its not even taking the measurements of the BLT into account.
So i Guess nothing is working….
I’ve tried other methods such as just taking the crealty software but the same isue arrises. The BLT measures and probes but when it prints it doesn’t seem to do anything with that info and just prints in the air or scrapes the bed….
I would sincerely appreciate your help,
Kind regards Sebastiaan
Hi,
First, thanks for the positive feedback :).
Based on what you are saying your offsets should be -44, -16, 0, though -16 does seem odd. My guess is it should be closer to -7 unless you have a custom fan duct cover that is moving it.
I think there may be something cached in the eerpom that needs to be cleared, I have seen this before. I recommend clearing your setting back to default, going through and making sure everything is tight (x-axis, y-axis, carriage, etc), then going back through and trying to set the z offsets again.
Thanks,
Rob
Apparently I’m an idiot. I followed this wonderful guide, but when I try to flash the new firmware, the screen on the ender 5 pro alternates between the marlin info and the ender logo. Any help would be appreciated.
Hi,
I haven’t seen that type of behavior before, it may be easier to troubleshoot on Discord, but I would start by building the firmware again after double-checking everything.
Thanks,
Rob
This was a great tutorial and reference guide for getting started with platform.io and customizing your 3D printer firmware.
I wanted to point you to this issue thread on Marlin’s GitHub.
There is a completely new CHIP that Creality is shipping and I think it’s worth noting to avoid confusion. They are still using the cheaper A4988 drivers it seems but now they have a GD version of the ARM chip that’s still 512 but is off brand silicon from the regular chip.
Might be a footnote or something on this article for those of us that have bought printers in Spring of 2022.
https://github.com/MarlinFirmware/Marlin/issues/23806
Hi,
Thanks for pointing this out. I have a video that covers this on my YouTube channel ( https://youtu.be/kUIPmVeY7ns ) and added it to my firmware page but I need to go through and update pages likes this as well.
Thanks,
Rob
What about the CL Touch on the Ender 3—same settings as the BL Touch?
Ya, they are the same thing to the printer.
Hey Rob!
Thanks, spending a lot of time watching to your videos! They rock!
Hey, do I need to have the z-stop in place at all to use the marlin firmware? My machine is a Ender 3 stock. just added a cr touch. updated using creality firmware, but now print freezes in middle of first layer…
Thanks again!
Hi,
Thanks for the feedback :). You will want to have the z stop connected.
Sorry to bug you, but could I trouble you to try your Guide again with the Marlin Bugfix 2.1.x firmware? Because I can’t get it to build.
I know my way around computers, but am not a Linux geek, nor do I “build” binaries, etc.
But I tried to follow your Guide to the letter.
I downloaded the latest VS Code. I copied the untouched Creality Ender 3 v2 example config files. I updated the platformio.ini for my RCT6 chip. The build fails, apparently with a python error at Line 532 or something like that.
Interestingly if I use the default configuration.h from the Bugfix 2.1.x firmware itself, the build completes – although no .bin is generated.
(Really, I’m hoping that Jacob updates his firmware for the Ender with this bugfix. But the Pull Request has been out for a while without apparent movement. github.com/Jyers/Marlin/pull/1993)
Thanks.
Actually, I’m thinking that your Guide is a little bit obsolete now that Marlin is using HAL.
So you might want to consider doing another like it, with the few changes needed, per
https://marlinfw.org/docs/basics/install_rearm.html
For example, now they want us to search the src/core/board.h file for our motherboard, and copy it to MOTHERBOARD “BOARD xxx” in configuration.h.
Then there’s a not so clear instruction to click on the mid-bottom left window in VSC to select the proper environment for the build. (It doesn’t appear obvious to me that the “window” next to the open “New Terminal” icon is a user selectable window.)
Small things like that, that trip up us newbies.
Tnx.
Hi,
This guide was made before Creality changed the chips being used and for Marlin 2.0. I have updated YouTube videos but will work on updating the written guides.
Hi there Rob,
I know this is an older guide, but I have a odd issue that I’m out of my depth with. I keep getting this error thrown whenever I try to build the firmware;
Error: Could not find the package with ‘platformio/toolchain-gccarmnoneeabi @ ~1.90201.0’ requirements for your system ‘linux_armv7l’
I am not experienced enough in vscode to figure this myself, and the online documentation that I found on this issue doesn’t have a sure solution. Would you have any idea?
Hi,
Based on a little research, it looks like you may need to install the ARM32 version. This post should help. https://community.platformio.org/t/error-getting-toolchain-gccarmnoneeabi-on-raspberry-pi-4-for-platform-atmelsam/23989