
A Z-offset determines how close the nozzle begins to the build surface after the printer homes or probes. When it is wrong, a first layer can be too high to bond, too low to flow cleanly, or inconsistent across the bed. This guide explains the Marlin Z-Offset Wizard workflow, how to use babystepping for the final adjustment, and when to stop changing settings and investigate a different first-layer problem.
Important: menu labels, available features, and the direction of an adjustment vary by firmware build, controller, and screen. Use the printer maker’s documentation for your exact machine. Do not install unfamiliar firmware only to gain a wizard; first confirm that the printer is supported and that you have a recovery plan.
What the Z-Offset Wizard changes
On a probe-equipped Marlin printer, the Z-offset describes the distance between the point where the probe triggers and the nozzle tip. The wizard gives you a controlled way to establish a starting value. It is not a replacement for a clean build plate, a sound first-layer profile, or a correctly mounted probe.
Babystepping is a separate live adjustment during a print. It is useful for dialing in the final first-layer squish after the wizard has produced a safe starting value. If the printer has no probe, or your firmware does not expose a Z-offset workflow, follow the machine’s normal leveling and nozzle-height procedure instead.
Before you adjust anything
Start with the conditions you use for the material you actually plan to print. Clean the build surface, make sure the nozzle is free of a blob that could affect the height, load the filament you will test with, and use the printer’s normal preheat or material settings. A value set cold can behave differently once the bed, nozzle, and mechanics are at operating temperature.
Also make sure the printer can home reliably before changing the offset. If homing fails, the probe is loose, the nozzle is visibly bent, or the bed is not secured, fix that issue first. Z-offset tuning cannot compensate for a mechanical or sensing fault.
Use the wizard for a safe starting value
1. Preheat the printer using the material profile you intend to test, following the printer’s normal safety guidance.
2. Home the printer so the firmware has a known reference point. Keep hands clear of the moving bed and toolhead.
3. If your Marlin build exposes it, open the Z-Offset or Probe Offset Wizard. The menu is commonly found under configuration or advanced settings, but the exact path varies.
4. Follow the on-screen movement prompts in the smallest useful increments. A sheet of ordinary paper can be a repeatable reference: the nozzle should create a light, even drag rather than pinching the paper or floating above it.
5. Finish the wizard and save the value only if your firmware and printer instructions indicate that it is safe to do so. Record the resulting number before continuing; it makes later troubleshooting much easier.
Verify with a first-layer test
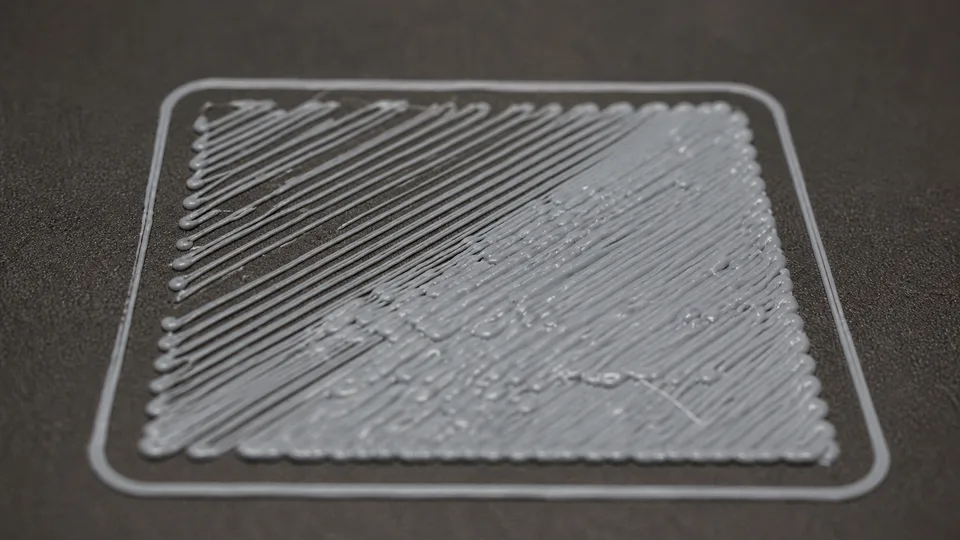
The paper check is only a starting point. Slice a small first-layer test with the same material and bed surface you use normally. Watch the first few lines rather than walking away: the pattern gives better evidence than trying to guess an offset number in a menu.
If your firmware offers Babystep Z, make very small live adjustments while the test is printing. The interface may use different positive and negative directions across printer families, so follow the result on the bed rather than copying a direction from another machine. Once the first layer is consistent, store the adjustment using the manufacturer’s procedure if the printer does not do that automatically.
Read the first layer before changing more settings
Nozzle too high
Lines may look rounded, separate from one another, or peel up with little effort. Verify the bed is clean and then make a small adjustment toward more contact using your printer’s controls.
Nozzle too low
Lines can look overly thin, rough, or pushed outward at their edges. The nozzle may drag through the material. Stop if the nozzle appears to scrape the surface, then move the adjustment toward less contact and inspect the build plate before continuing.
Uneven results across the bed
A single Z-offset cannot correct a warped surface, incomplete bed mesh, loose gantry, or a probe that is not repeating consistently. Re-run the printer’s leveling or mesh procedure and inspect the mechanics before repeatedly changing the offset.
When to redo the Z-offset
Recheck the value after changing the nozzle, probe mount, build surface thickness, major firmware configuration, or any part that changes the physical relationship between the probe and nozzle. A different filament does not automatically require a new offset, but its first-layer behavior can justify a small test and careful verification.
Avoid these dead ends
Do not keep changing Z-offset to solve under-extrusion, a dirty plate, a loose belt, a failing probe, or a slicer mistake. Do not use someone else’s exact value: the number is specific to the mounting geometry of one machine. And do not ignore a scraping nozzle simply because a paper test felt acceptable.
A reliable next-step sequence
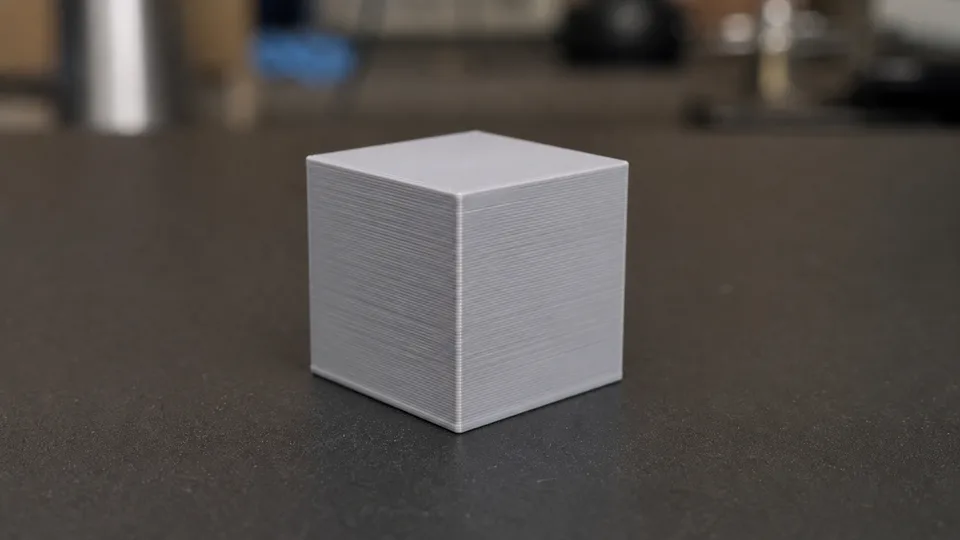
Once the first layer is consistent, move through calibration one variable at a time: verify temperature for the filament, check flow if extrusion still looks inconsistent, and only then tune quality settings.
For Cura users, use the Cura Profiles workflow instead of importing random machine settings.
Use the Flow Rate Calculator when the layer height is correct but extrusion still is not.
FAQ
Do I need to change Z-offset for every print?
Normally, no. Once the physical setup is stable, use a short first-layer check when you change a nozzle, surface, or probe arrangement. Do not treat a different offset as a routine slicer setting for every model.
Why does my Z-offset keep resetting?
Check whether your printer requires an explicit save-to-memory action and whether its firmware actually supports persistence. If a value will not save, consult the documentation for that exact controller and firmware rather than repeatedly entering it.
Is a BLTouch required to use this guide?
The Marlin wizard described here is for a probe-equipped setup. The first-layer observations still apply to other printers, but the procedure for setting height may be different. Use the manufacturer’s leveling instructions for a manual-leveling or non-probe machine.
Print quality workflow
Calibration & slicer settings
Build a reliable baseline before chasing individual settings: start with the printer, then tune material, flow, and slicer quality settings one controlled step at a time.
- 01Cura ProfilesStart with a sensible profile baseline before making material- or printer-specific adjustments.
- 02Z-Offset Wizard: Complete GuideYou are here
- 03Cura First Layer SettingsTune the settings that turn a good Z offset into a consistent first layer.
- 043D Printer E-Step Calibration: A Practical BaselineEstablish a supported hardware feed baseline before tuning a material-specific flow setting.
- 053D Printer Flow Rate Calibration: Measure Before You AdjustUse a repeatable wall measurement to make small, material-specific flow corrections.
- 06Cura Temperature Tower: Find a Better Starting TemperatureCompare one spool across a controlled temperature range before changing other slicer settings.
- 073D Printer Retraction Settings: Distance, Speed, and CalibrationTune distance and speed with a controlled test after material condition and temperature are stable.
- 08Cura Speed Settings: Balance Speed, Quality, and ReliabilitySeparate outer walls, infill, travel, first layers, and acceleration to find a reliable setting.
- 09Cura Jerk SettingsRefine motion behavior after the basics are stable and repeatable.
- 10How to Hide Z-Seam Imperfections in CuraUse finish-focused adjustments after calibration and material settings are working together.