The technology around 3d printers has changed significantly over the last several years, especially for the mainboard. The mainboard is the heart of a 3d printer and is responsible for controlling everything from bed movements to pushing filament through the extruder. Upgrading the mainboard can help you get the most out of your 3d printer, especially if you are running an 8-bit or non-silent board, and can typically be done in under 30 minutes without much effort.
Here are the steps to the SKR Mini on an Ender 3.
- Unplug the Printer
- Remove the existing mainboard
- Install the SKR Mini
- Update the Firmware
This list is a high level overview of the install process, keep reading for more detailed steps.
*The process is basically the same, minus the firmware, for any 3d printer that supports the board.
Step-by-Step Install Guide
Requirements
Required Hardware
*Links are to Amazon, and for the products I use.
- SKR Mini
- Micro SD card *8GB or smaller
- SD card reader
- Computer
Required Tools
*Links are to Amazon, and for the products I use.
Benefits of Installing an SKR Mini
The SKR Mini has many benefits, including:
- TMC2209 silent drivers
- Plug and play upgrades
- Including the BLTouch and touch screen display
- Power loss recovery
- Simple wiring
Step-by-Step Guide
Physical Install
Unplug the Printer
Before doing anything, you want to make sure you unplug the printer.
Remove the Housing Around the mainboard to get access
Next, you will want to remove the housing that is around the mainboard. On the Ender 3 Pro, there are four screws that need to be removed. One is on the top, and the other three are on the bottom. Once you have those out, you will want to disconnect the fan to get access to full access to the board.
Remove the existing mainboard
Now that you have access to the mainboard, you will want to disconnect all the adapters that are on top, leave the ones that are attached to the terminal in place for now.
Tips:
- Take pictures of the wiring to reference later if needed
- The adapters may have hot glue on them that should be removed first.
- Make sure you don’t have an SD card in the SD reader
Once the adapters have been removed, you will want to remove the four screws that are holding the board in place.
Once the board is out, you can remove the wires that are connected to the terminals. Make sue you make a note of what the wires are to make connecting the SKR Mini easier. Once everything is disconnected, you can set the old mainboard off to the side.
Install the SKR Mini
Now that the old board has been removed, we can start installing the SKR Mini. Follow the steps below to complete the install.
Install Heatsinks
The first thing you want to do is put the heatsinks on the TMC2209 drivers. To do this, you will want to remove the cover from the heatsink, stick it on the driver, then apply pressure to it for about 10 seconds to make sure it sticks.
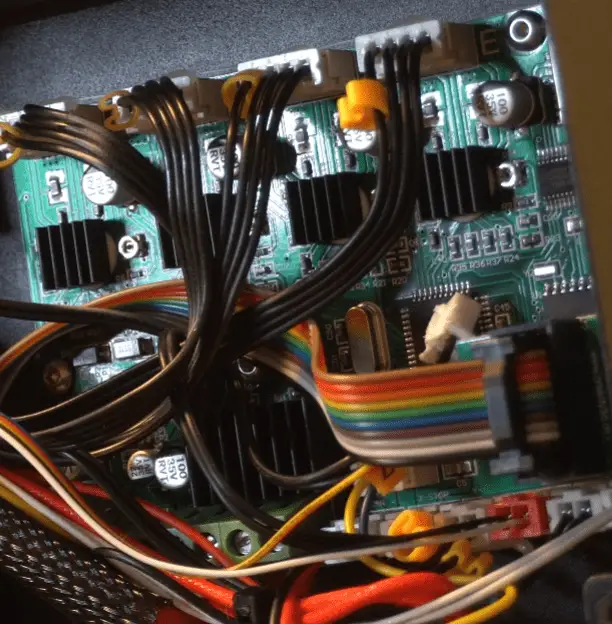
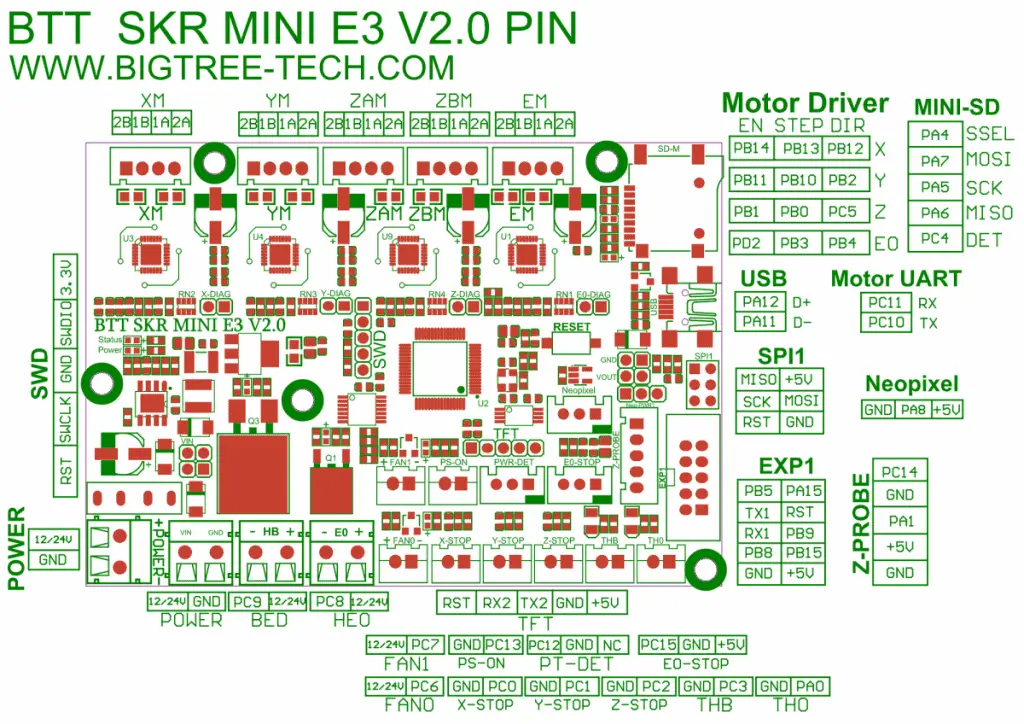
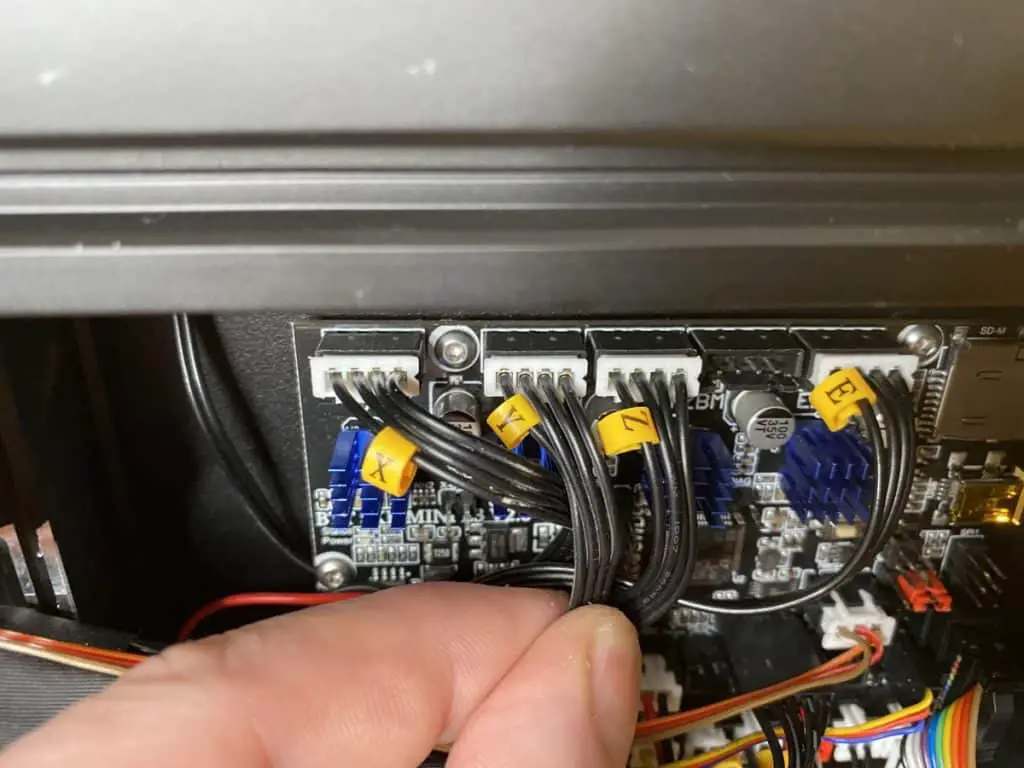
Wire the terminals
Next, you will want to connect the wires back to the terminals matching what was there before. The diagram below shows what should be connected and where.
Mount the board
Next, you will want to mount the mainboard to the printer. To do this, you will align the board with the mounting brackets and put the screws in. Be careful not to overtighten them, as you can damage the board.
Also, I have big hands and know it can be tricky to get the screws back in. My advice is to put the screw on the allen wrench then try to guide it in place that way. Tryin to put the screws in by hand then using the wrench to tighten them didn’t work for me.
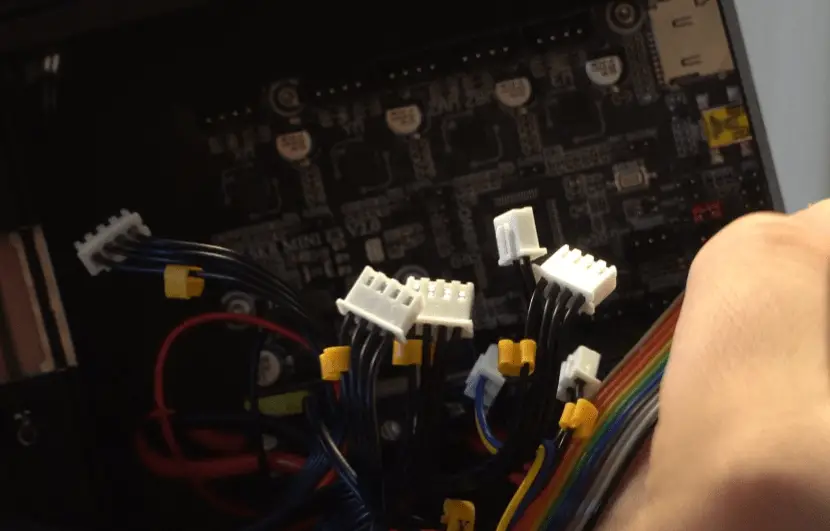
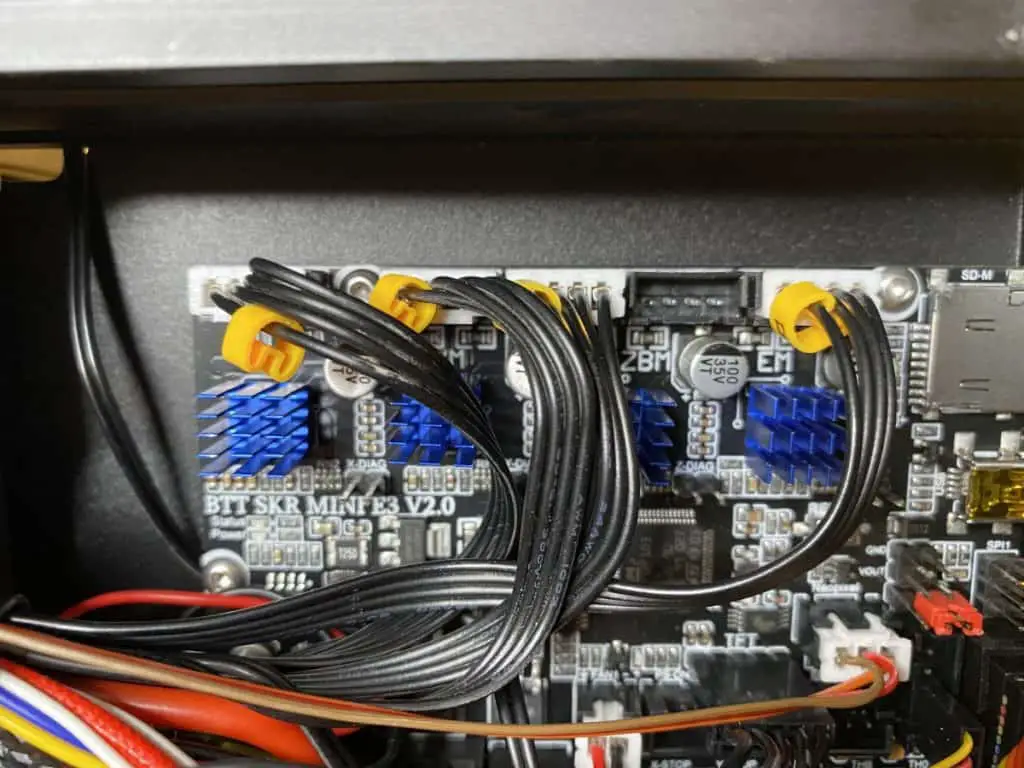
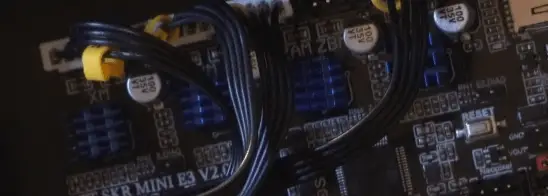
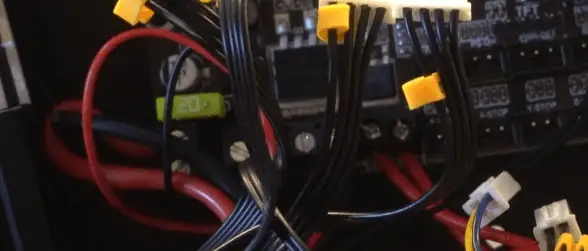
Connect Remaining Wires
Once the board is mounted, you can start connecting all the adapters. You want to make sure you plug everything in properly. Here is a diagram to assist.
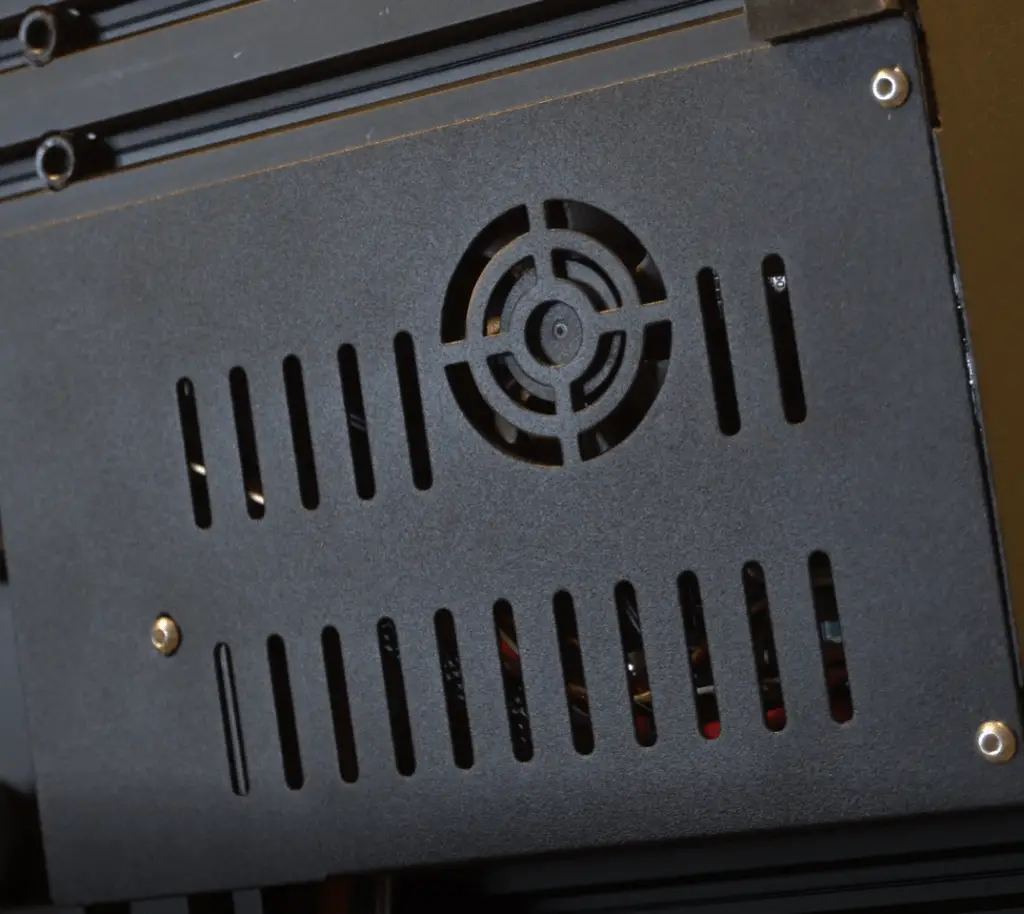
Put the mainboard cover back on
Once everything is connected, you will want to reattach the mainboard fan, as shown in the picture below, and put the cover back on.
Power on the printer and run an auto home to test everything
Update the Firmware
The SKR Mini will come with the firmware already on it, but I recommend grabbing the latest to get any new features, or bug fixes, that have been released. This process is easy and will only take a couple of minutes.
Download the Firmware
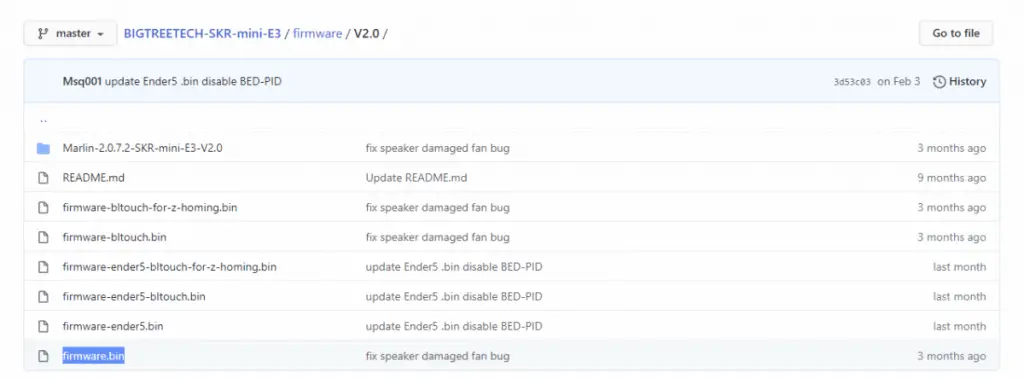
The first thing you will need to do is go to BIGTREETECH’s GitHub page and download the latest firmware. Assuming you don’t have a BLTouch, you will want to download the file named firmware.bin. If you have a BLTouch you will want to download the firmware-bltouch.bin or firmware-bltouch-for-z-homing.bin, depending on how you have it wired.
Copy the Firmware to an SD Card
Now that you have the firmware, you will want to copy it to an empty SD card that is 8GB or less. The firmware.bin file should be the only thing on the card.
Install the Firmware
This step sounds harder than it actually is. Assuming you copied the right file to a blank SD card, all you need to do is put the SD card in the printer and power it on. From there, the printer will pull the file and install it on the printer. The entire process should take less than 30 seconds. Once the printer boots into the standard interface, you can remove the SD card.
Related Questions
What if I have a BLTouch? – If you have a BLTouch, you will want to connect the 3-pin adapter to the BLTouch port on the SKR Mini, then the 2-pin adapter to either the z-stop or BLTouch port. There are pros/cons of each option, but both are supported. You will just need to download the right firmware from BIGTREETECH’s GitHub page based on the way you choose to wire it.
Other Recommendations? – I recommend that once you get your firmware updated, BLTouch installed, and z-offset set correctly, I recommend calibrating your e-steps and printing a Temperature Tower.
Related Articles
- NeoPixel LEDs on SKR Mini – Complete Install Guide
- Create a Temperature Tower Using Cura – The Easy Way
- BIGTREETECH Touchscreen Z-Offset Wizard – Complete Guide
- Cura Profiles
- 3D Printer Power Supply Silent Fan Upgrade – Install Guide!
Recap
Upgrading the mainboard in your 3d print provides isn’t difficult and offers a lot of benefits, especially if coming from an 8-bit or non-silent board. The upgrade isn’t too expensive and should take about 30 minutes to complete.
Make sure you check out our YouTube channel, and if you would like any additional details or have any questions, please leave a comment below or join us on Discord. If you liked this article and want to read others click here.