One of the loudest components on a 3d printer isn’t one you would typically think of and is not on all the time but gets kicked on by the power supply when needed. I’m talking about the fan in the power supply (PSU), and if you have a silent mainboard, it’s by far the loudest component on the printer.
If you have your printer in a remote area of your house, this may not be a big deal, but if you are like me with the printer in a common area, it can really annoy family members and guests. Fortunately, you can fix this by upgrading to a silent fan, and I will show you how.
Here are the steps to upgrade the fan in the power supply.
- Print Power Supply Cover
- Unplug the Printer
- Remove the Power Supply
- Remove the Power Supply Covers
- Mount the New Fan
- Wire Everything
- Put the Power Supply Covers Back On
- Mount the Power Supply
- Print Test Object
This list is a high-level overview of the install process; keep reading for more detailed steps.
* This guide has been tested on an Ender 3 Pro but would work on any 3d printer with a similar power supply.
** Warning: Make sure you are comfortable working around open circuit boards before doing this upgrade, and doing the upgrade will void the warranty on the PSU.
Why Should I Upgrade the Power Supply Fan?
I wanted to start with covering the actual number before getting into the install process. I took a decibel reading before and after doing the upgrade, and here are the results.
| Stock Fan Max | Silent Fan Max | Difference |
|---|---|---|
| 61.0 | 53.2 | 7.8 |
This may not sound look like a significant drop, but in practice, it went from being able to hear the fan kick on from the other side of the room to barely being able to hear the fan right next to it.
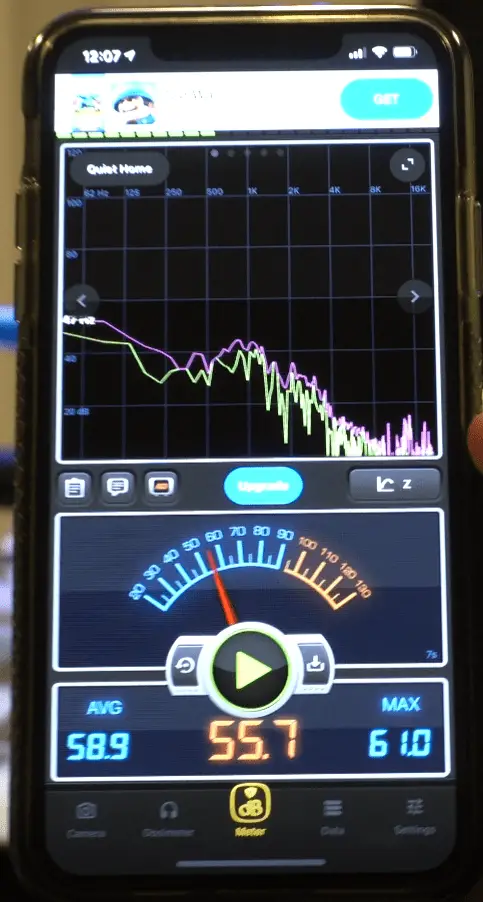
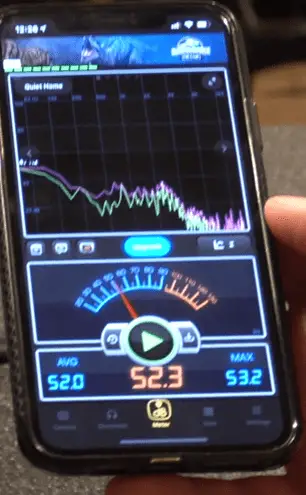
*The readings were taken at 18” from the printer using the Decibel X app on my phone.
Step-by-Step Guide to Installing a Silent Fan on Your 3d Printer Power Supply
Required Tools
*Links are to Amazon, and for the products I use.
- Ender 3 or similar printer
- Filament *Any Color
- 80mm Silent Fan
- Buck Converter *Optional if you have the Ender 3 Pro
- Allen Wrench Set
Step-by-Step Guide
Print Power Supply Cover
The first thing you want to do is print the PSU cover that will work with your printer. Here are the links to the STL files on Thingiverse.
* I have only tested the cover for the Ender 3 Pro.
** I printed this using my stand quality profile, available for download on my Cura Profiles page, and tree supports.
Unplug the Printer
Once you have your cover printed, you will want to unplug your printer. I called this out as a separate step because it’s important that the PSU be unplugged when working on it until you get to the point that you are adjusting the buck converter if using one.
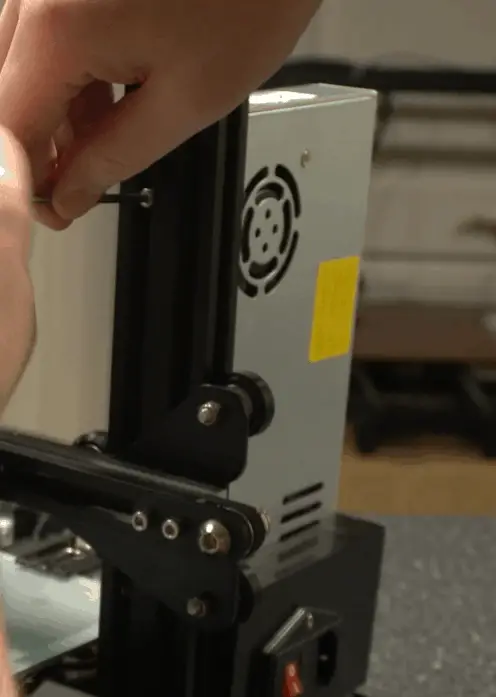
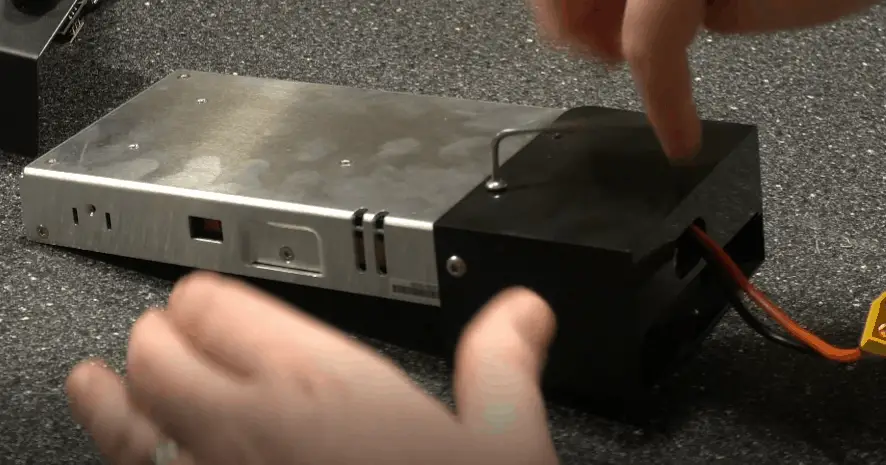
Remove the Power Supply
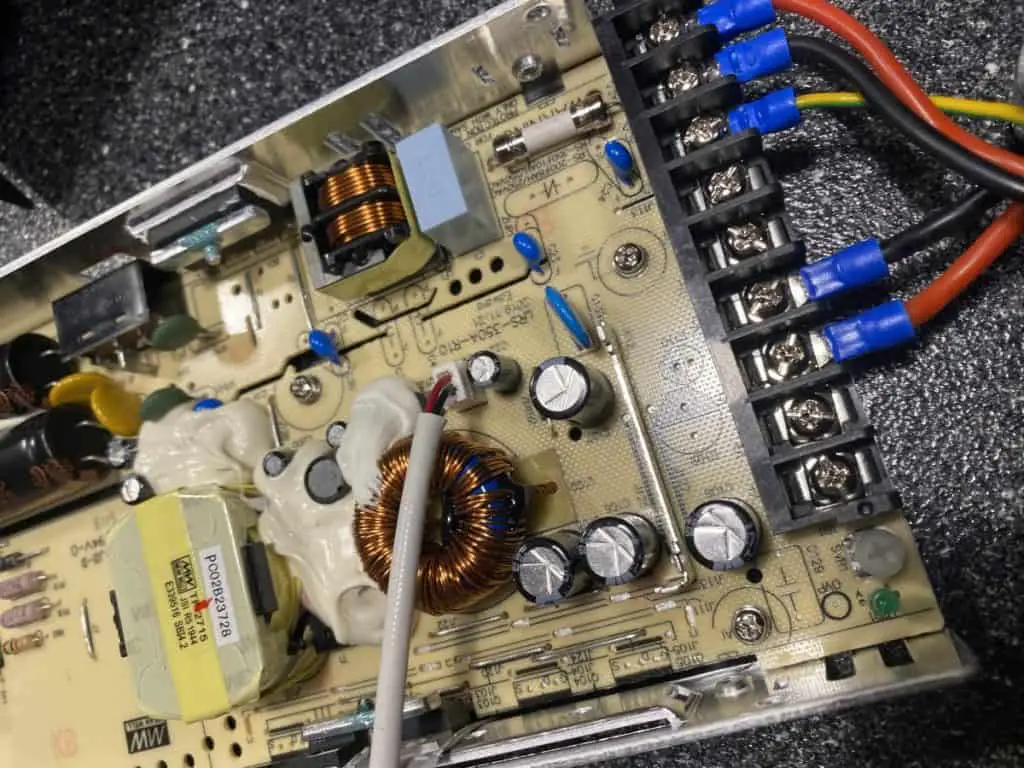
Once the power cable has been unplugged, you will want to unmount the power supply from the printer. To do this, you will disconnect the 2-wire adapter going from the power supply to the mainboard, then remove the screws holding the PSU in place. For the Ender 3, there are only two screws in the front of the rail holding it in place.
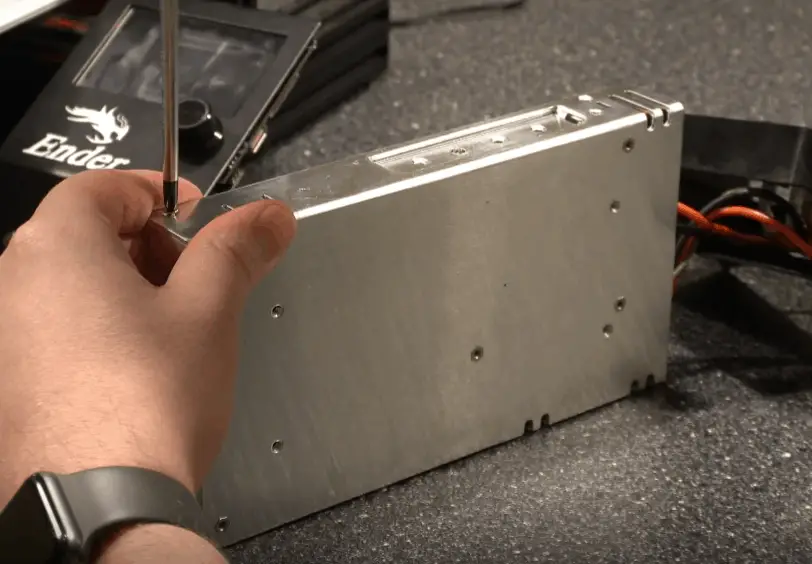
Remove the Power Supply Covers
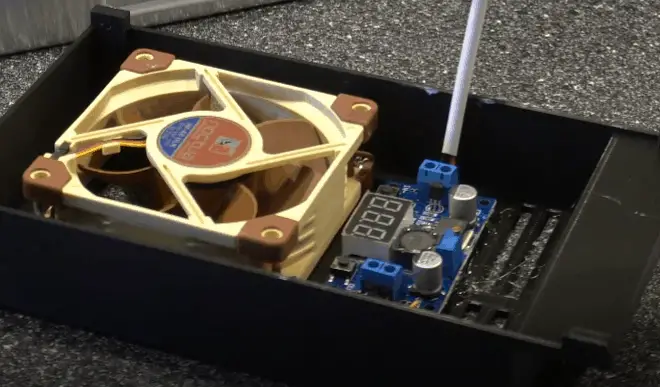
Now that the power supply is off, you will need to remove the covers to get to the fan. For the Ender 3, you will need to remove the black cover at the bottom first; this is held in place by two screws. Then you slide that down, without disconnecting any wires, to be able to remove the second cover. The second cover is secured by four screws, two on each side of the PSU. Examples are shown below.
Once the covers are off, you will be able to disconnect the 2-pin adapter from the circuit board for the stock fan.
*Warning: Make sure you are comfortable working around open circuit boards before doing this upgrade, and doing the upgrade will void the warranty on the PSU.
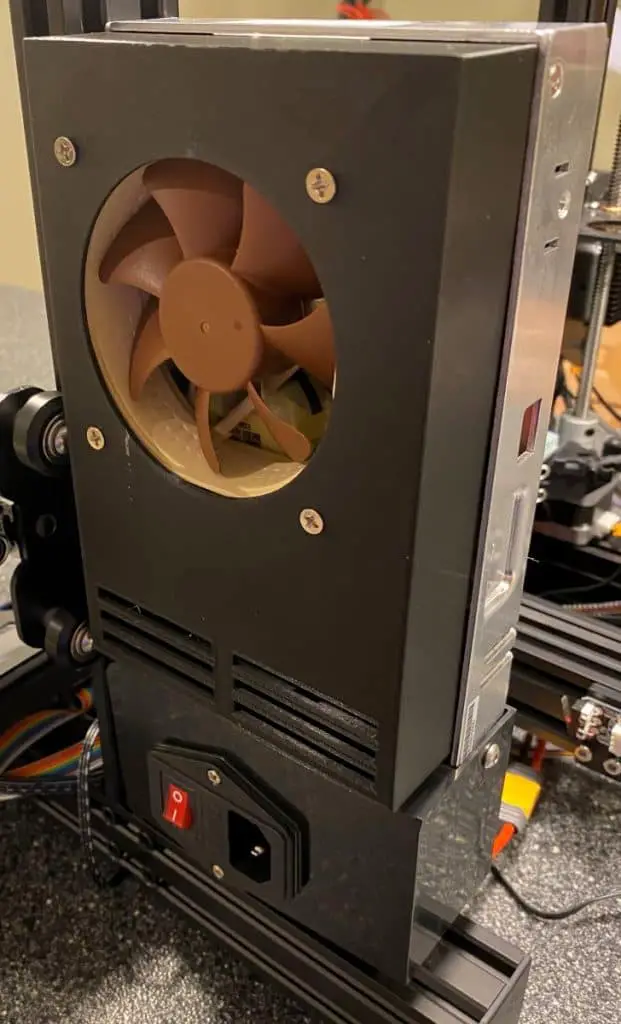
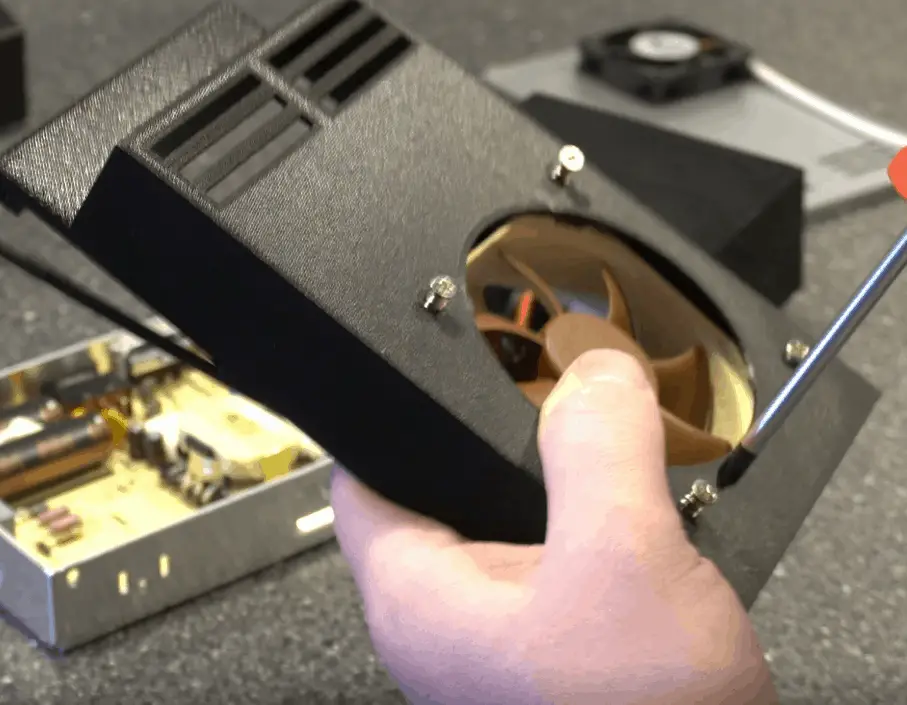
Mount the New Fan
Next, you will want to mount the new fan to the cover that you printed using the four screws provided with the fan. You want to make sure the fan is pushing air onto the circuit board, so make sure you pay attention to the airflow arrows on the side of the fan.
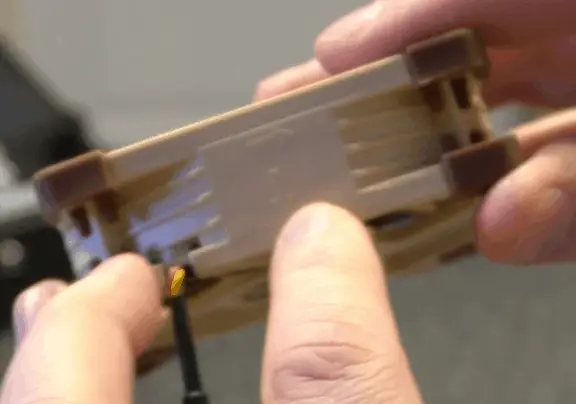
Wire Everything
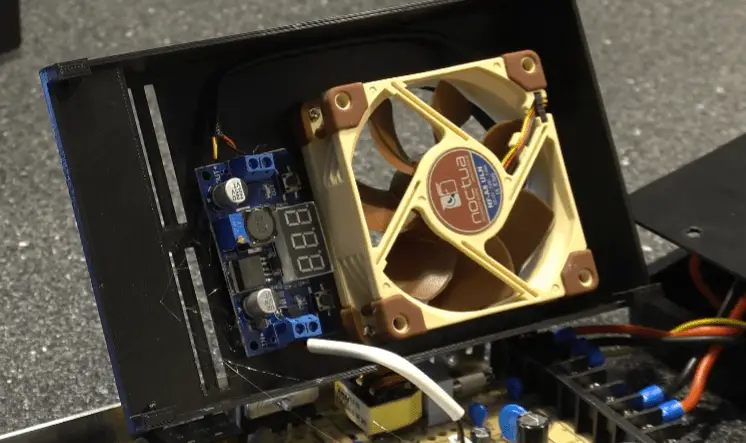
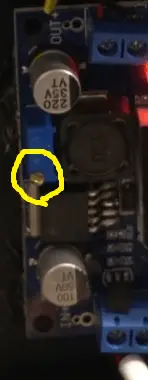
Once the fan is mounted, you will need to wire everything up. There are two ways to do the wiring, so I will cover both. You will need to decide if you are using a buck converter or not. To help you make this decision, look at the stock fan. If it shows 12v on it, then the buck converter is optional. If it shows 24v, then it’s required.
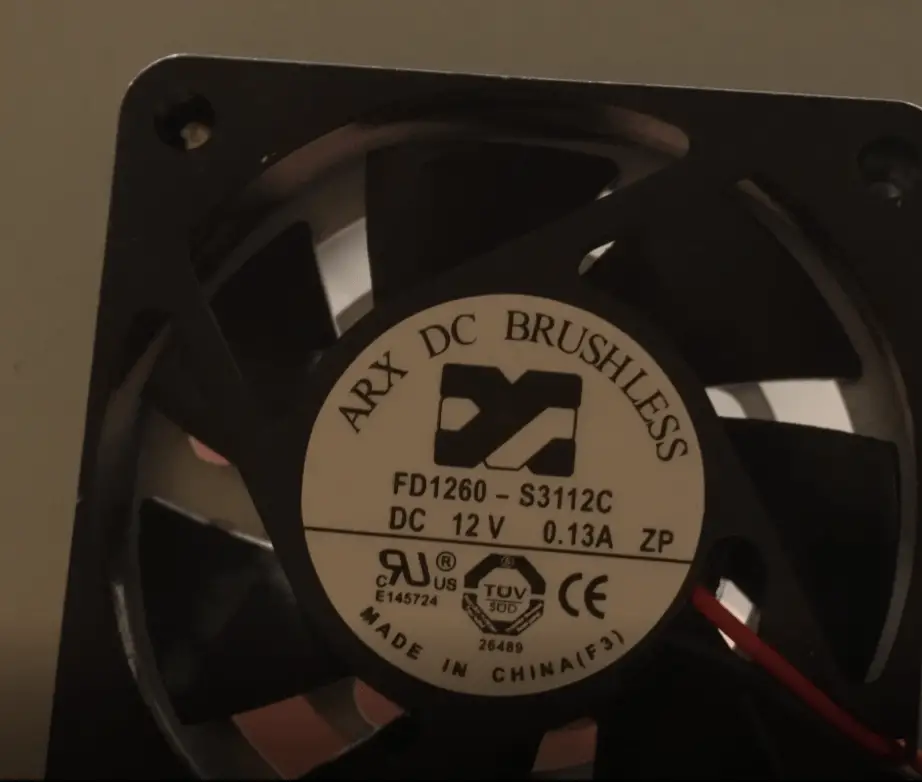
As you can see from the picture above, my stock fan was 12v. I still decided to use the buck converter to help people who need it out, but it was not required. If you are not comfortable working around circuits that are powered on, I recommend not using the buck converter, and if you have a 24v stock fan, you should skip this upgrade.
Process Without Buck Converted
If you are not using the buck converter, all you need to do is connect the red and black wires from the fan to the red and black wires on the 2-pin adapter. I recommend cutting both wires and connecting them with solder and heat shrinking tube or but connectors. Once that’s done, you can connect the 2-pin adapter back to the PSU circuit board.
Process With Buck Converter
If you end up using the buck converter, I recommend using the one with the terminals and led voltage display, like these from Amazon. It makes it so you don’t need to do any soldering or use a voltage meter to dial everything in.
Wire the Converter
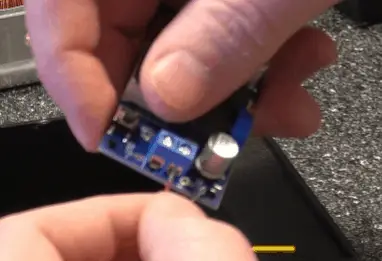
The first thing you will want to do is cut the cable going to the stock fan about an inch from the fan, then cut the insolation tube down another inch. Once that’s done, you will want to strip both of the wires and connect them to the “in” side of the buck converter. The red wire should connect to the positive terminal, and the black one should connect to the negative terminal.
Now we will need to do the same thing for the fan. You will want to cut the 3-pin adapter off the fan cable about an inch from the adapter. Then you will want to cut the insolation tube down about an inch or so, then strip the black and red wires. The yellow wire will not be used. Next, you will connect the red wire to the positive terminal and the black to the negative terminal on the “out” side of the buck converter.
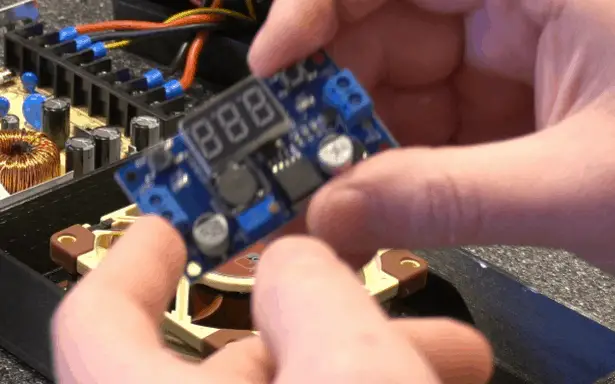
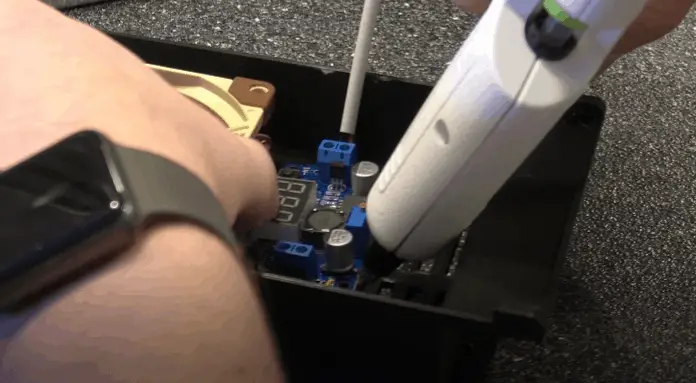
Mount the Converter
Once everything has been wired, you will want to mount the buck converter below the fan using hot glue. You will want to make sure you use enough glue to hold it firmly in place.
Adjust the Voltage on the Buck Converter
*Warning be very careful to only touch the in/out button and adjustment knob on the buck converter. Do not touch anything else.
This is where it gets a little tricky. You won’t be able to make the adjustments if the power supply isn’t sending any power to the fan. You will want to connect the power supply to the printer and power, then turn the printer on. From there, you want to kick up the temperature on the bed and nozzle and wait for the power supply fan to kick on.
Once the fan is running, and the led is showing the voltage, push the little button on the “out” side that says out. This will make sure you are getting the output reading. Then you can adjust the dial until the output reading shows between 11.5-12v. Once there, you can turn the printer back off and unplug the power supply.
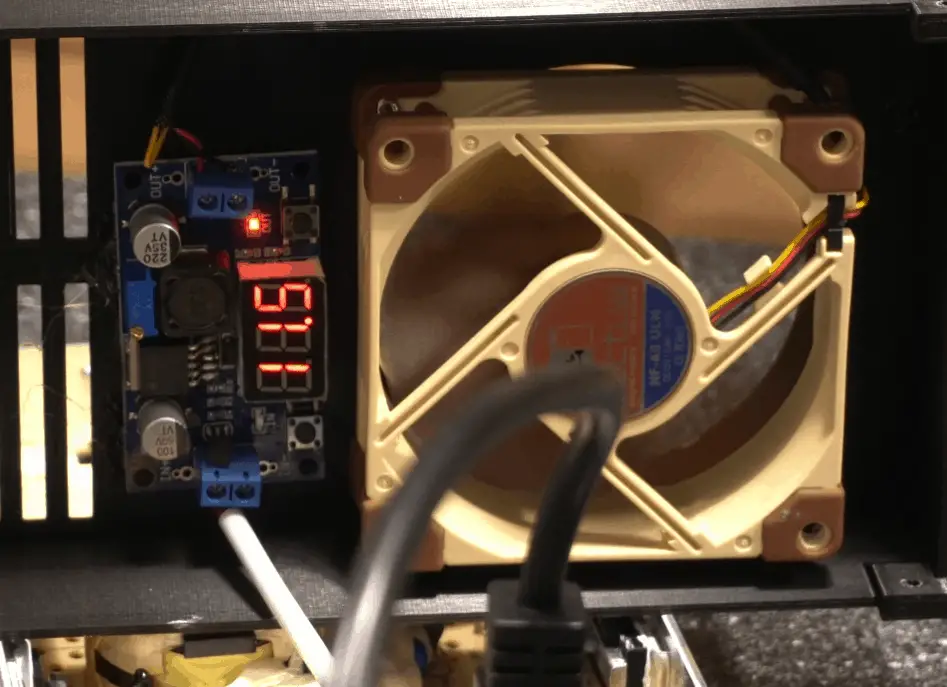
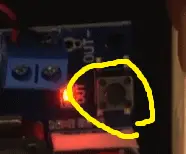
**Warning be very careful to only touch the in/out button and adjustment knob on the buck converter. Do not touch anything else.
Put the Power Supply Covers Back On
Not that everything has been wired up, you will want to put the covers back on. The new cover should be mounted the same way as the old one, so you will just need to put the screws back in the same place. Once the new cover is screwed in, you can put the black cover back.
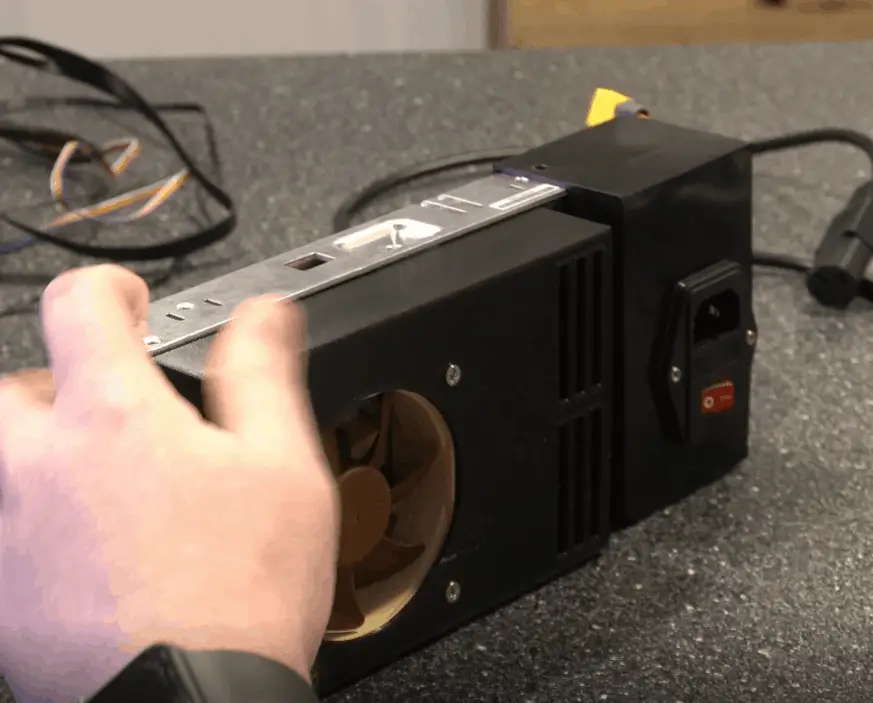
Mount the Power Supply
With the covers back on, you can proceed to mount the PSU back on the printer. For the Ender 3, that will be done using the two screws that go through the front rail. Once that’s mounted, you will want to connect the 2-pin adapter from the power supply to the mainboard adapter.
Print Test Object
After everything is put back together, I recommend running a small test preint to make sure everything is working as expected. Keep in mind that the fan will only turn on when needed.
Related Questions
What if I don’t want to open the power supply? – There is a cover that can be mounted on the outside that helps to dampen some of the noise. It’s nowhere near as effective as the silent fan, but it’s better than stock. Here is an example from Thingiverse.
What if I don’t have a silent board? – If you don’t have a silent board, I recommend upgrading to one before doing this upgrade. Here is an article I wrote on installing an SKR Mini, which is a very popular silent board “SKR Mini Install – Complete Guide”.
Related Articles
- Creality 32-Bit Mainboard Firmware Upgrade Guide
- Create a Temperature Tower Using Cura – The Easy Way
- Cura Profiles
- SKR Mini Install – Complete Guide
Recap
Replacing the PSU fan with a silent fan will make a huge difference when it comes to the overall noise caused by your 3d printer. In my test, I was able to drop the max decibel reading by 7.8dB, which is substantial. That said, this upgrade isn’t for everyone, so if you are not comfortable opening up the power supply, I recommend just install a vent on the outside of the PSU fan to dampen some of the sound.
Make sure you check out our YouTube channel, and if you would like any additional details or have any questions, please leave a comment below or join us on Discord. If you liked this article and want to read others click here.