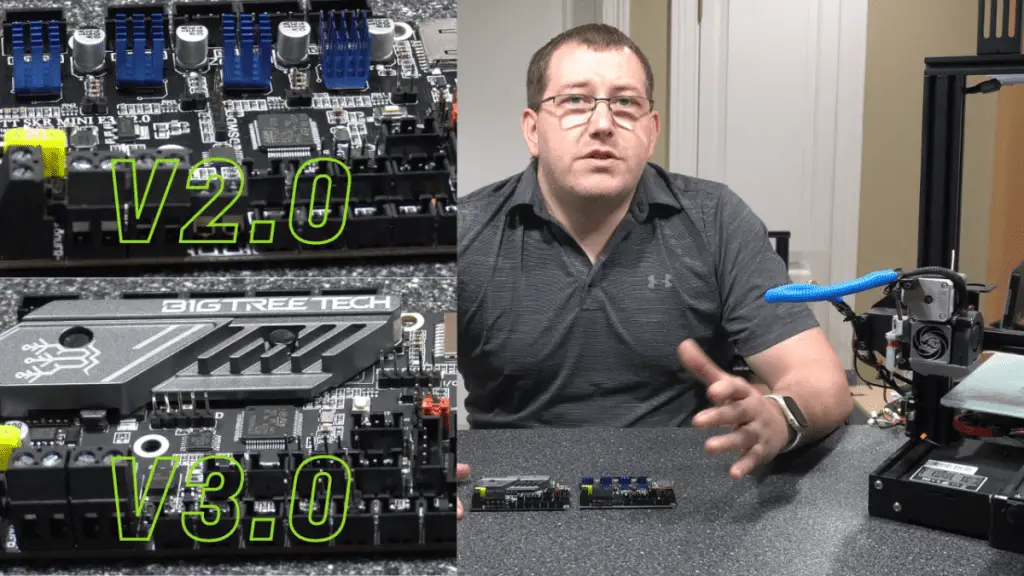
The new SKR Mini e3 v3 is a tremendous upgrade for any stock Ender 3 printer, or really most Creality printers. The first and most noticeable difference is the massive heat sink that covers all four stepper drivers. Previous versions of the SKR don’t have any problems overheating during regular operation. However, with this amount of passive cooling, you’ll be able to push the drivers further than before.
Before you can benefit from this board, you’ll need to download the correct firmware, transfer it to an SD card and upload it to your printer. So I’ll walk through the steps for the standard firmware setup and then go through a custom Marlin firmware build.
BTT Firmware Update
Here’s a link to BIGTREETECH’s Github page to get started. This is where you’ll find all the firmware and hardware information for their boards. The link above is specific to all versions of the SKR Mini e3.
Once you’ve clicked on the link above, press the “Code” button and click on “download zip”
This will download the firmware for all versions, however, we’ll select v3 once it’s downloaded.
(You can download the v3 firmware by itself, however, I’ve had some instances where the file was problematic when doing it that way. When I download everything in the zip, the files don’t give me hassles later.)
Now extract the contents of the zip folder. Go into the folder and then to “firmware”, V3.0, “Marlin”.
Now copy the file named “firmware-ender3-bltouch.bin” and paste it to your SD card.
Rename the file on the SD card to “firmware.bin” (Typically, you want to have a unique name to avoid any errors, but with the SKR board it’s not an issue)
Make sure there’s nothing else on the SD card.
Remove the SD card from the computer and put it into the printer.
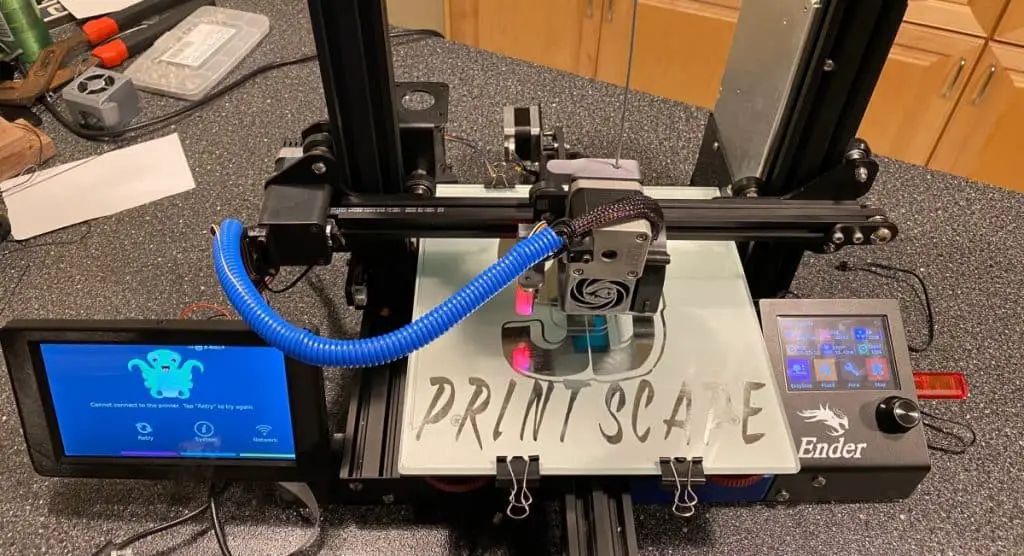
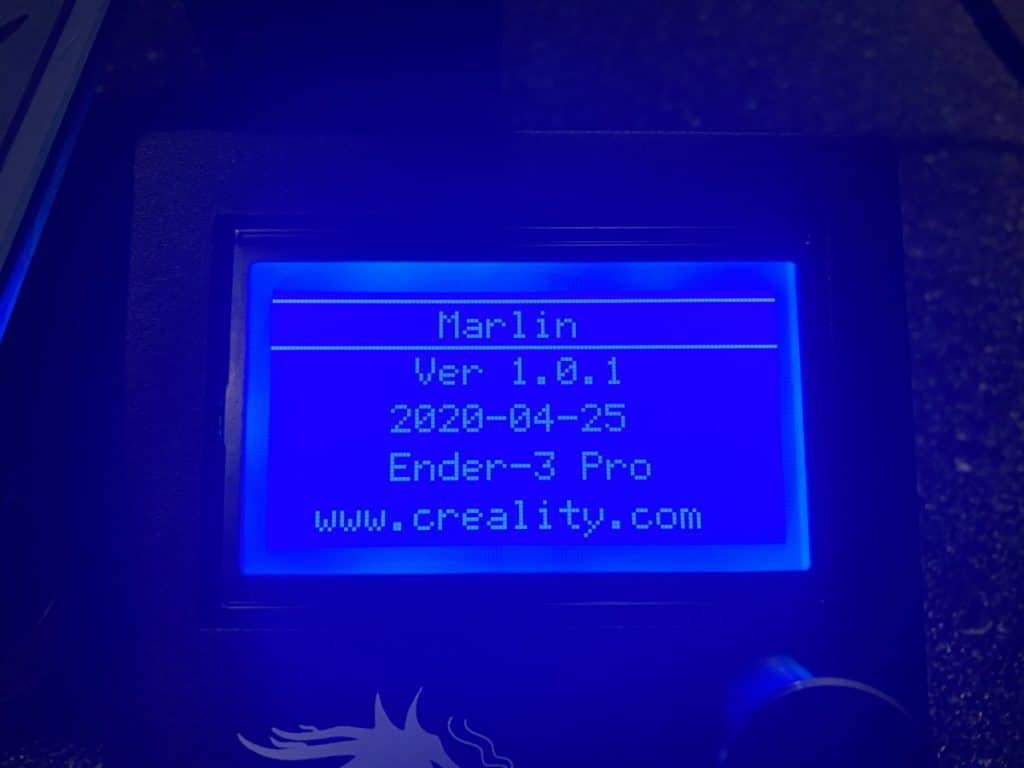
Switch the printer on and it will update the firmware automatically. You should see this on the about screen and you might also notice BLTouch options pop up on the menu if you didn’t have them before.
After everything is on the printer, remove the SD card. Of course, you can delete the file now that it’s uploaded to the printer.
Important Info
The SD card should be 8GB or less or you may run into issues.
It must also be formatted as FAT32.
Marlin Firmware Update
To get started with Marlin firmware, you’ll need to download Visual Studio Code. Download the appropriate version for your operating system and run the installation file. You’ll have to accept the agreement and then install everything on default.
After the installation is complete, launch Visual Studio Code and get ready to install some plugins. You need these plugins no matter which board you’re working with.
Click on “extensions” on the left side menu. Use the search bar to find PlatformIO IDE, select it, and click on the install button.
Now search and install an extension called Auto Build Marlin plugin. After these plugins have been installed, you should have C/C++ installed automatically.
If you get errors related to path issues or specific path type errors, you can install the Python plugin. (The one with over 60 million downloads) This can fix a lot of those path-type errors. Even though it’s not directly related to the two plugins, it does other things in the system to fix those issues as a side effect of installing it. After all of this, restart VS Code.
Now you need to download the Marlin firmware. You can get the latest stable release or go for the newest nightly release. I usually just go with the nightly option.
After the download completes, click on “View download” and then download the entire code by clicking on the “Code” button and then on “Download ZIP”
Once the ZIP files have been downloaded, move them to a dedicated folder close to the root of the drive. For example, C:\firmware\skrv3. You need to do this because if the path is too long, you might get “file not found” errors.
Now extract the “Marlin bugfix” folder. Open the extracted folder and move the contents back one folder to C:\firmware\skrv3 and rename it to “Marlin”. (So the extracted folder should be next to the ZIP folders)
Extract the configurations-bugfix folder. Now copy the files in the following location: config\examples\creality\ender-3 pro\BigTreeTech SKR Mini E3 3.0
Paste these files into this location you created earlier. (Replace the existing files) C:\Firmware\skrv3\marlin\marlin
All this will give us our base configuration and starting point.
Configuration Examples for the v3
The file path for these examples is skrv3\Configuration-bugfix\Configuration-bugfix\config\examples\Creality
If you look inside the Creality folder, you’ll see all the printer models listed in the folders. The main three printer models that have config examples are the Ender 3, Ender 3 Pro, and Ender 3 V2. The other printers like CR10 don’t have these config examples available yet.
So for now, you’ll have to modify one of those existing config examples to work with the other printers. I suggest you start with the Ender 3 Pro example and then make changes accordingly. The board and connections are going to be the same in all cases. So you’ll only have to change size values and other things of that nature.
Open the firmware with VS Code
- Go into VS Code and click on “Explorer” on the top left and then go to “Open folder”
- Select the first marlin folder in this route: C:\firmware\skrv3\Marlin (Don’t go into the second Marlin folder)
To ensure you’re in the correct folder, check for a file named “platformio” inside it. If you select the wrong folder, the build button won’t show up.
Test Build
I suggest running a test build before changing anything. If there are any problems, you’ll know it’s not because of something you changed.
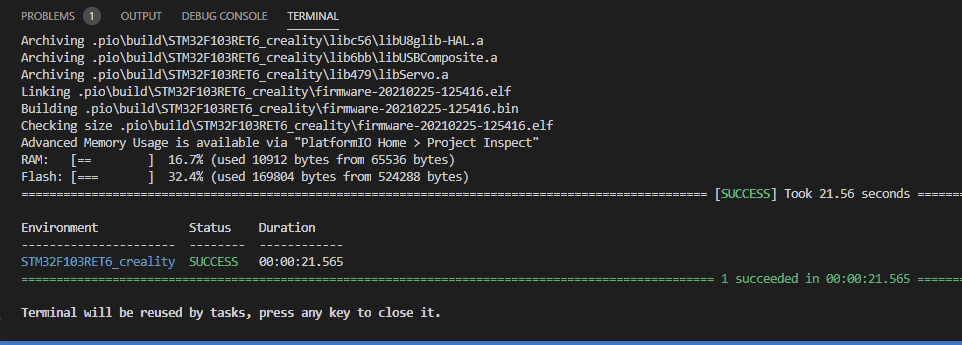
Go to the Auto Build Marlin plugin at the bottom right side menu and click on the “Show ABM Panel”. In the panel on the right side, click on the first “build” button at the bottom in the environments section.
Once it’s built, click on the folder just below and it will take you to the firmware.bin file location.
Sometimes it may not build successfully on the first attempt. If that happens, just click on build again and it will probably work. If it doesn’t, delete everything in the “.pio folder” and then build again.
Custom Marlin Firmware Build
Now it’s time to make some changes to the firmware. For future reference, uncomment means taking out the // from the begging of the code and making it active. Commenting means inserting // at the beginning of the code to make it inactive.
BL-Touch and CR-Touch
Whether I refer to BL or CR Touch, to the board, they’re the same thing. So don’t worry about which one you have.
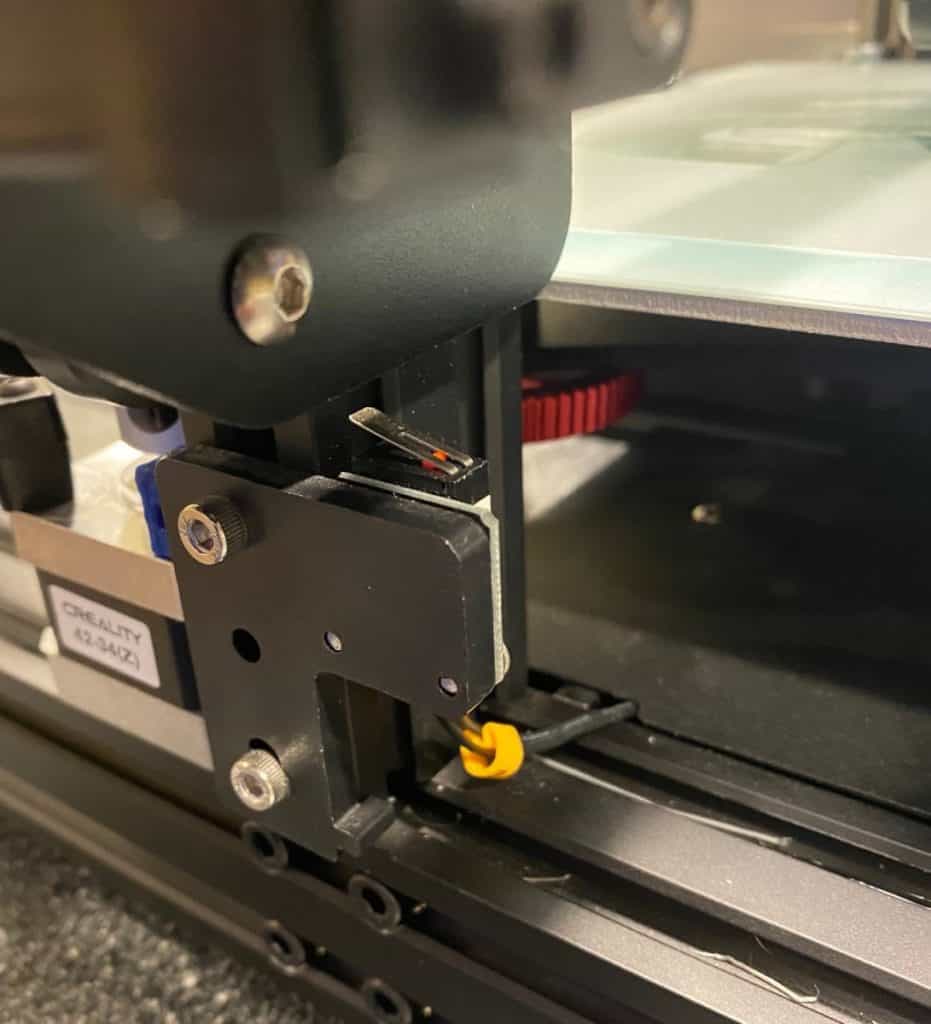
Also, your Z Stop must be connected before you follow these steps.
- Go into explorer and expand Marlin in the menu.
- Select the configuration.h file.
- Press CTR+F to bring up the search bar.
From here, you need to search for everything we’re going to modify. Namely:
z_min_probe
Comment this line out: “define Z_MIN_PROBE_USERS_Z_MIN_ENDSTOP_PIN”by adding // at the begging of the line. (This instance of “z_min_probe” is around line 1266) If you have the BLTouch/CRTouch connected to the bltouch port and the z stop still connected.
Now go down a few lines and uncomment “define USE_PROBE_FOR_Z_HOMING” by removing the //.
bltouch
Uncomment the line: “#define BLTOUCH”, by removing the //. (around line 1323)
Scroll down to where you enter the nozzle-to-probe-offsets for x and y (around line 1475)
Change the config examples to -44, -7, -0 I set the Z to 0 because I set the Z offset in the printer instead of here in the firmware.
auto_bed_leveling_bilinear
Uncomment this line: #define auto_bed_leveling_bilinear
(It should be around line 1865)
Uncomment: “#define MESH_BED_LEVELING”
(Two lines down from the previous)
z_safe_homing
Uncomment: “#define Z_SAFE_HOMING”
(Around line 2069)
eeprom_init
Uncomment: “#define EEPROM_INIT_NOW”
(This line of code clears the EEPROM on the first boot after a new build to reduce errors)
min_software_endstop_z
The last thing to comment out is “#define MIN_SOFTWARE_ENDSTOP_Z”
(If you don’t, you won’t be able to adjust your z-offset below zero and you’ll have to disable it using a g-code command instead)
Optional firmware changes
You may or may not need to change these depending on your setup or preference.
x_bed_size
If you want to change the bed size, search for X_BED_SIZE and change the figures to what you have. (This is around line 1686)
grid_max_points_x
Change GRID_MAX_POINTS_X value to 3. This is the typical size that’s defined with an Ender 3. A value of 3 will cause the sensor to probe 3X3 times for a total of 9. A value of 5 will produce 25 probes. If you have a warped plate, you can leave it on 5 but otherwise, it’s not really needed.
Configuration Advanced File
Click on the Configuration_adv.h file and search for the following:
probe_offset_wizard
Uncomment the line: #define PROBE_OFFSET_WIZARD
(This makes it easier to set the offset with a BL-Touch)
show_sd
Uncomment: #define SHOW_SD_PERCENT so that you can see the percentage complete bar.
show_remaining_time
Uncomment: #define SHOW_REMAINING_TIME
(To show the remaining time in addition to the progress bar)
Build the Firmware
- Click on the Marlin plugin and go to the ABM panel.
- Clean the previous build to remove previous build files in the .pio folder.
- Click on the Build button.
- Click on the result to go to the file path.
- Copy the firmware.bin file to an SD card no large than 8GB and formatted as FAT32.
- Insert the card into the printer and power it up.
- The firmware will upload automatically and you can verify the version in the “about” section.
SKR Mini e3 v3 vs v2
Both of these boards perform extremely well, but obviously, the v3 has better raw specifications because it’s newer.
At the moment it looks like the v3 is slightly cheaper than the v2, but not by much. Here’s the latest pricing on amazon.com: SKR Mini e3 v3 / SKR Mini e3 v2
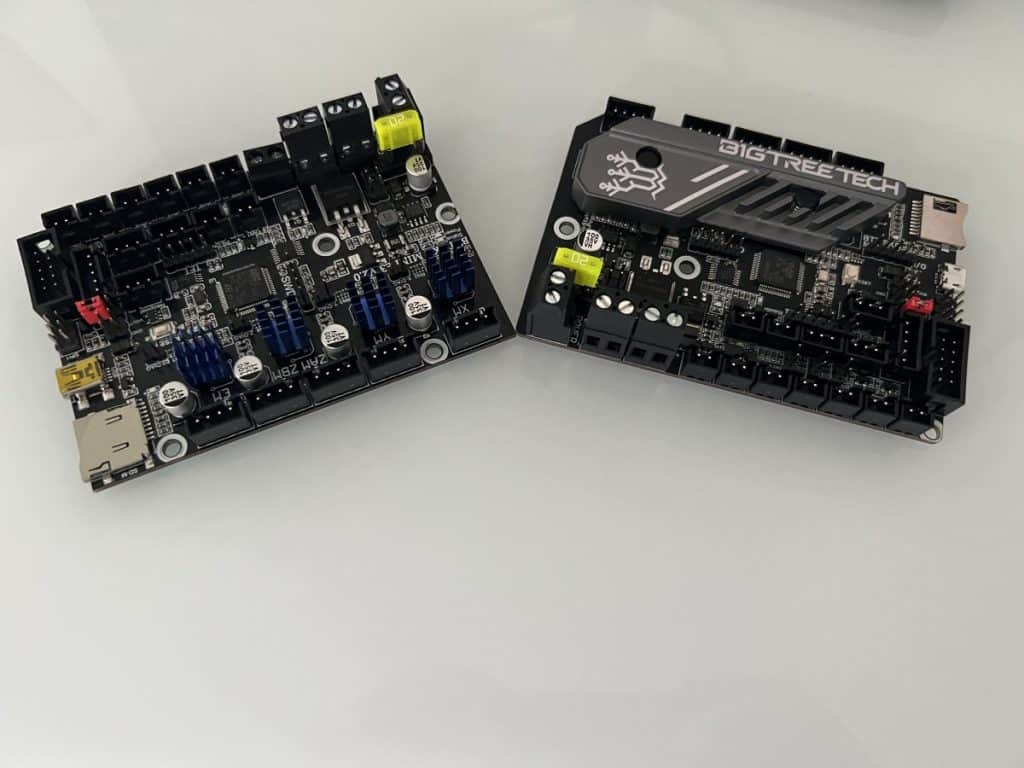
Both boards use TMC2209 drivers, and if you’ve read my article on stepper drivers, you’ll know that these are one of the best options available. They’re reliable and make the motors incredibly quiet. The stepper motor connections are the same as the v2.
BIGTREETECH upgraded the mini USB port to a micro USB port, so you’ll probably never struggle to find a cable, although I would prefer Type-C. Hopefully, they’ll bring those out soon.
Both boards have EEPROM so that you can save everything to the chip instead of an SD card. The v3 has a 512K chip, and the v2 has a 256K chip. So you’ll be able to compile some heavy stuff in the firmware without worrying about space with the v3. But either way, there shouldn’t be any problems in most use cases, even with 256K.
You now have three fan ports you can control individually compared to two on the v2. Most 3D printers have three fans, the board, blower, and hotend fan. So one port for each is very convenient for running them at different speeds.
This new version also has 3.3V and 5V options for the SPI output. V2 only has a 5V option.
The only advantage the v2 has over the v3 is the fact that the firmware is a bit more stable and supports more printers. But that’s only because people have had more time to work on the v2 and the v3 will come out on top in the long term.
Here are videos for both sections of this article.
SKR Mini e3 v3 BTT Firmware
SKR Mini e3 v3 Marlin Firmware
Related Articles
- SKR Mini Install – Complete Guide
- NeoPixel LEDs on SKR Mini – Complete Install Guide
- Create a Temperature Tower Using Cura – The Easy Way
- BIGTREETECH Touchscreen Z-Offset Wizard – Complete Guide
- 3D Printer Power Supply Silent Fan Upgrade – Install Guide!
Make sure you check out our YouTube channel, and if you would like any additional details or have any questions, please leave a comment below or join us on Discord. If you liked this article and want to read others click here.
This guide helped me get my CR-10 mini up and running with the v3 board, but I am having 1 issue I can’t figure out. When I did my ABL I noticed that my X and Y movements would slow to a crawl for the last 10-20 mm of movement. This also seems to happen during the print process.
What config example did you use as a starting point? Im wondering if it has something to do with that. Also, if you can join the discord server this will be easier to troubleshoot.