Learning through trial and error is very effective, but if you can avoid the errors by doing a bit of extra research, you’ll save yourself time and money.
Here are some of the most basic mistakes beginners tend to make when first 3D printing.
Incorrect Bed Leveling
Incorrect bed leveling in 3D printing can lead to several problems that affect the quality of your prints. Here are a few examples:
Poor first-layer adhesion
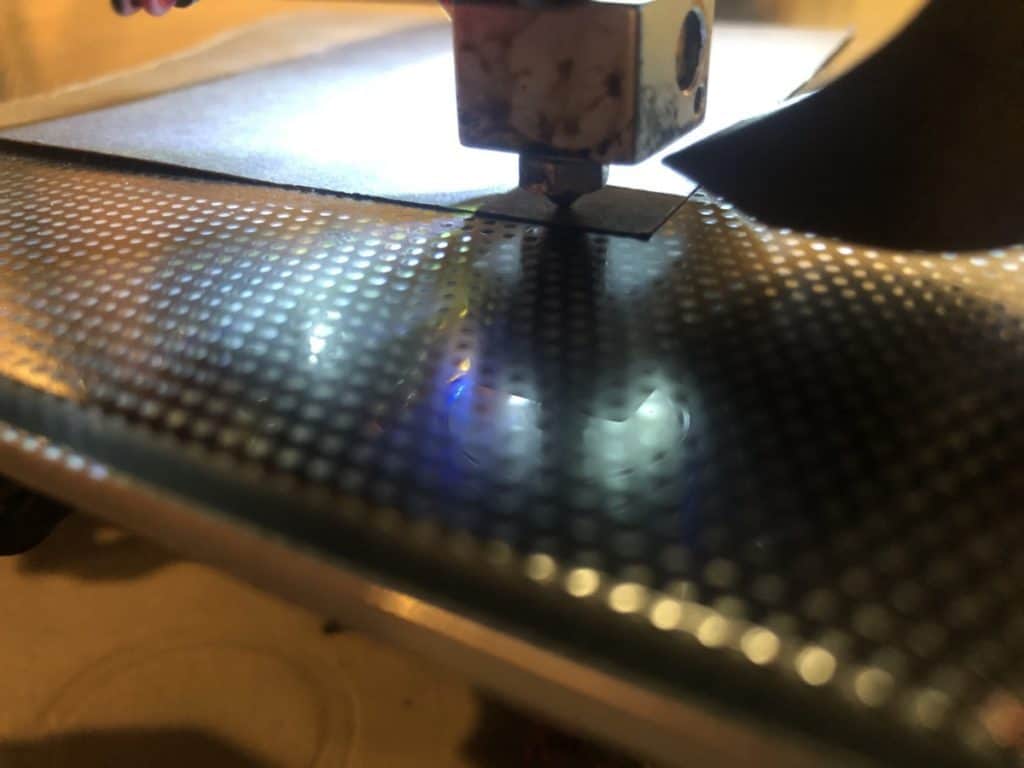
When the bed is not leveled properly, the nozzle may be too far from or too close to the bed during the first layer of the print. If the nozzle is too far, the filament may not adhere well to the bed, resulting in poor adhesion and the print may detach or warp. On the other hand, if the nozzle is too close, the filament may be squished, causing it to spread too much or clog the nozzle, leading to an uneven or failed print.
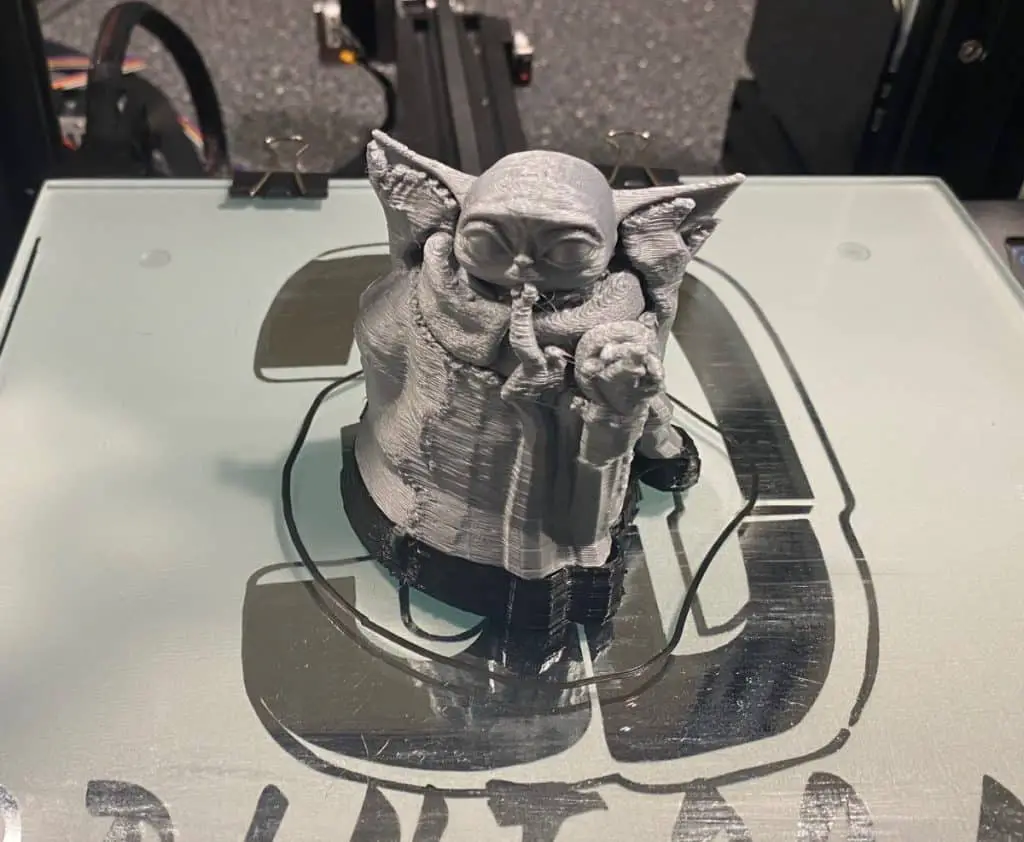
When the first layer gets squashed down and the part protrudes around the base, it’s a sign of an uneven bed. This is also known as “elephant’s foot”.
Uneven prints
Incorrect bed leveling can cause uneven layer heights across the print bed. If certain areas of the bed are higher or lower than others, the nozzle may extrude filament at inconsistent distances from the bed. This will result in a print with uneven layer heights, making the final object look distorted or deformed.
Nozzle collisions or dragging
If the bed is not properly leveled and the nozzle is too close to the bed, it can cause the nozzle to collide with the bed or drag on the surface during printing. This collision can damage the nozzle or the bed, potentially causing costly repairs. Additionally, the dragging of the nozzle can disrupt the print and lead to poor print quality.
Failed prints
Incorrect bed leveling significantly increases the chances of failed prints. Without proper adhesion and consistent nozzle-to-bed distance, prints may detach, warp, or become misaligned during the printing process. Failed prints not only waste time and materials but can also be frustrating if you’re eager to see successful results.
Difficulty in removing prints
If the bed is not properly leveled, removing prints from the bed can become a challenging task. Prints that adhere too strongly to the bed due to poor leveling may require excessive force to detach, potentially damaging the print or the bed surface.
Solution
To level your bed properly and learn more about auto-leveling, read this article.
Using Low-Quality Filament
Using low-quality or incompatible filaments for your printer can result in various issues like clogs, failed prints, or weak structures.
Low-quality filaments may have inconsistent diameters, poor tolerances, or impurities that can cause extrusion problems. These issues lead to clogs in the printer nozzle, uneven filament flow, and unreliable printing results.
Some filaments require specific printing conditions or hardware capabilities. For example, certain filaments, like flexible materials or high-temperature filaments, may require specialized extruders or heated beds. Using incompatible filaments without the necessary equipment or settings can result in failed prints or even damage to the printer.
Solutions
Before purchasing filaments, take the time to research and understand the different types available. Consider factors such as filament material (e.g., PLA, ABS, PETG), filament diameter (usually 1.75mm or 2.85mm), and specific characteristics (e.g., flexibility, temperature resistance).
There are hundreds of different filament types available so refer to the manufacturer’s guidelines or recommendations for your 3D printer model. They often provide a list of compatible filaments and specific printing settings to achieve the best results. Following these guidelines will help ensure compatibility and optimal performance.
Look for user reviews and experiences with different filaments, particularly from the 3D printing community or forums. These firsthand accounts can provide valuable insights into the quality, performance, and compatibility of various filaments.
If possible, get filament samples or small spools from different manufacturers or brands. This allows you to test and experiment with the filament’s performance and print quality before committing to a larger quantity.
Even with compatible filaments, it’s important to fine-tune your printer settings for optimal results. Adjust parameters such as temperature, print speed, and cooling settings to match the specific filament you’re using. This process may involve some trial and error to achieve the desired print quality.
While it can be tempting to opt for cheaper filaments, investing in higher-quality filaments can significantly improve your printing experience. Quality filaments generally have more consistent diameters, fewer impurities, and better tolerances, resulting in smoother extrusion and more reliable prints.

Insufficient Support Structures
If you don’t create enough support structures, the prints could come out distorted, collapse, or have poor surface quality. Here is a more detailed explanation of this issue along with solutions.
Support structures are additional printed elements that provide temporary support to overhanging or complex sections of a model during the printing process. These structures prevent sagging, warping, or collapsing of unsupported areas, ensuring that the print maintains its intended shape and stability.
Without adequate support structures, overhangs or complex geometries may fail to print properly. Overhanging sections may droop, resulting in poor surface quality, inaccurate dimensions, or even complete print failure. In extreme cases, unsupported areas may collapse or cause the print to detach from the print bed.
Solutions
Most slicing software used for 3D printing offers the option to generate support structures automatically based on predefined settings. To ensure proper support, you need to enable support generation in the slicing software before exporting the print file. This allows the software to analyze the model and generate support structures where needed.
Different slicing software provides various options to control the generation and configuration of support structures. Explore these settings to optimize the support structure parameters for your specific print. This includes adjusting the density of supports, the distance between the supports and the model, and the angle at which supports connect to the model.
In some cases, automatic support generation may not provide optimal results. For complex models, you may need to manually place support structures in specific areas. This requires understanding the geometry of the model and identifying areas that require support. Manually placing supports can provide greater control and accuracy.

Disadvantages of supports
While support structures are essential, they can also impact the surface quality of the final print. Excessive supports or supports in visible areas can leave marks or require post-processing to remove them. Strike a balance between providing adequate support and minimizing the impact on visible surfaces.
Once the print is complete, you need to remove the support structures. Use appropriate tools such as pliers, tweezers, or support removal tools to carefully remove the supports without damaging the printed object. Post-process the print if necessary to smooth out any marks left by the supports.
Incorrect Print Settings
Basic print settings can be tricky to grasp at the beginning of your 3D printing journey. So here’s some general advice about the most basic settings.
Temperature settings
Each filament type has a recommended temperature range for optimal printing. Using incorrect temperatures can lead to issues such as poor layer adhesion, under extrusion, or overheating. Consult the filament manufacturer’s guidelines or documentation to determine the recommended temperature range for the specific filament you are using.
Solution
Adjust the temperature settings in your 3D printer’s software or interface to match the recommended range for the filament. Begin with the lower end of the range and gradually increase or decrease the temperature based on the print results. Conduct test prints and observe the quality to fine-tune the temperature settings for optimal performance.
Print speed
Print speed refers to how quickly the printer moves the print head during the printing process. Using incorrect print speeds can result in issues such as poor surface quality, stringing, or inaccuracies in the print. Different filaments may have different optimal print speeds.
Solution
Adjust the print speed settings in your slicer software or printer interface accordingly. Experiment with different speeds to find the optimal balance between print quality and print time. Slower speeds generally result in higher-quality prints but may take longer to complete.
Layer height
Layer height refers to the thickness of each printed layer. Using incorrect layer heights can affect the overall print quality and accuracy. Different filament types and printing resolutions require specific layer heights for optimal results.
Solution
Refer to the filament manufacturer’s guidelines or documentation for the recommended layer height range. Adjust the layer height settings in your slicing software accordingly. Experiment with different layer heights while considering the desired print quality and time. Finer layer heights typically produce higher-quality prints but may take longer to complete.
Calibration and experimentation
Achieving the optimal print settings may require calibration and experimentation. This includes adjusting parameters such as flow rate, retraction settings, cooling fan speed, and infill density. These settings can significantly impact print quality, strength, and dimensional accuracy.
Solution
Conduct test prints and make incremental adjustments to the various settings to achieve the desired results. Keep a record of the changes made and their impact on print quality. This iterative process of calibration and experimentation will help you fine-tune the print settings for different filaments and models.
Insufficient Cooling
Insufficient cooling in 3D printing can lead to issues such as overheating, stringing, or warping of prints. It is important to ensure that the printer’s cooling system is functioning properly and consider using additional cooling fans if necessary. Here is a more detailed explanation of this issue and some solutions:
Importance of cooling
Cooling plays a vital role in the 3D printing process, especially during the printing of each layer. Proper cooling helps solidify the printed layers quickly, preventing excessive heat buildup. Inadequate cooling can result in various problems, including overheating, stringing, or warping.
Overheating
Insufficient cooling can cause the printed layers to remain too hot, leading to issues like filament drooping or deforming. This can result in poor print quality, loss of details, or even print failure.
Solution
Ensure that the printer’s cooling system, such as the cooling fan, is functioning properly. Check that the fan is spinning freely and blowing air directly onto the printed layers. Clean any dust or debris that may be obstructing the airflow. If necessary, adjust the fan speed settings in the printer’s software or interface to ensure adequate cooling during the print.
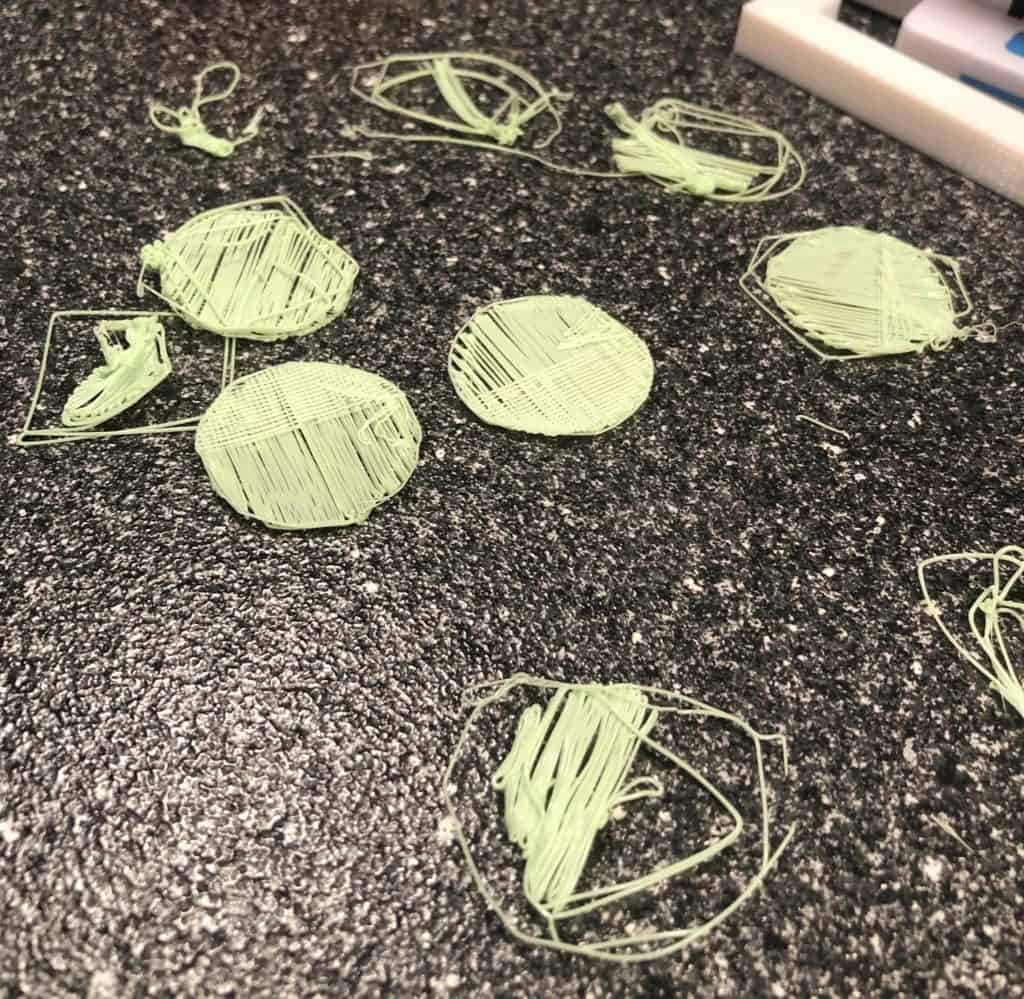
Stringing
Stringing refers to the unwanted thin strands of filament that appear between separate printed parts or sections. Insufficient cooling can cause the filament to remain molten or semi-molten, leading to stringing issues.
Solution
Increase the cooling during the printing process by adjusting the cooling fan speed or adding additional cooling fans. Experiment with different fan settings to find the optimal cooling level that reduces stringing without compromising the overall print quality. Additionally, adjusting retraction settings in the slicer software can help minimize stringing by pulling the filament back when it’s not being extruded.
Warping
Inadequate cooling can contribute to warping, which occurs when the printed object curls or lifts off the print bed during the cooling process. This is particularly common with materials like ABS, which tend to shrink and contract as they cool.
Solution
Ensure proper cooling of the printed object by using an enclosure or draft shields to minimize temperature fluctuations. Consider using a heated bed or using adhesive aids, such as glue sticks or specialized bed adhesives, to improve adhesion. Additionally, experimenting with different bed and ambient temperatures can help mitigate warping issues.
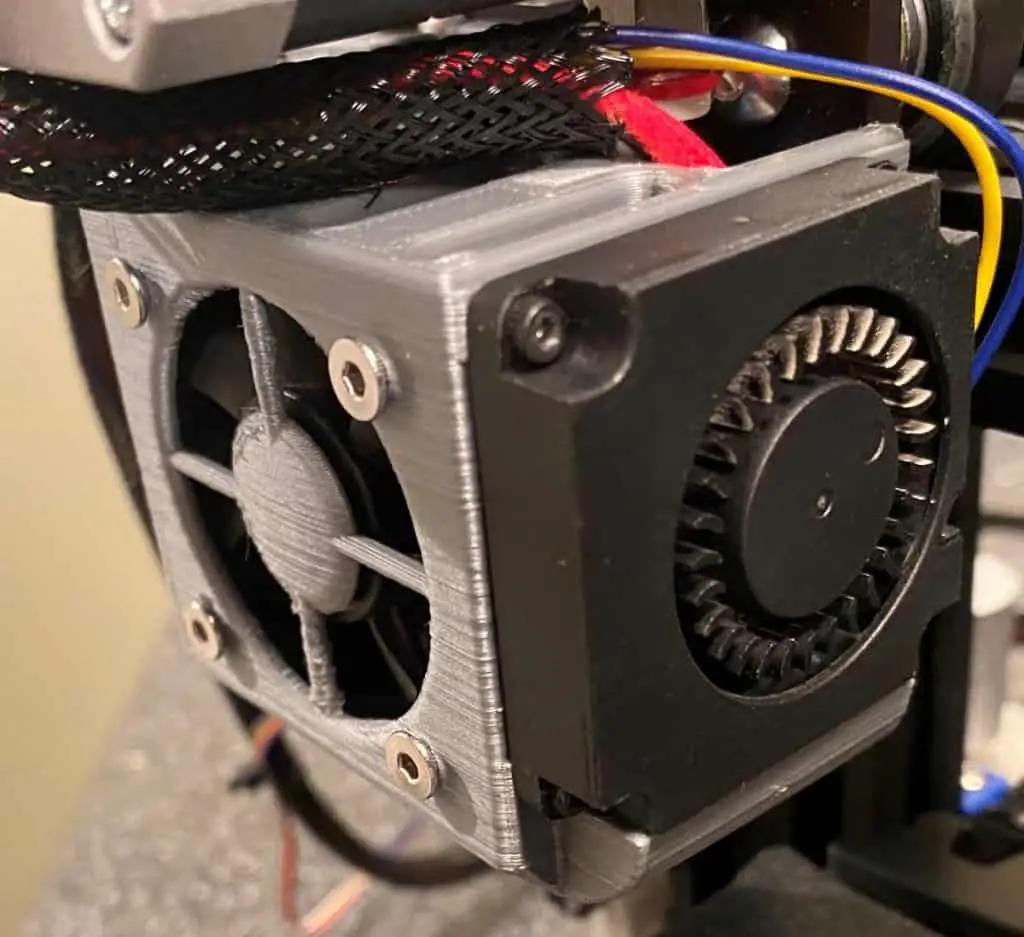
Additional cooling fans
Depending on the complexity of your prints and the materials used, it may be beneficial to add extra cooling fans. These fans can be positioned strategically to target specific areas of the print and improve cooling efficiency.
Solution
Evaluate the print quality and identify areas that require better cooling. Install additional cooling fans in those locations, ensuring that they are properly mounted and directed toward the desired areas. Some 3D printers have provisions for adding extra fans, while others may require modifications or aftermarket cooling solutions.
Related Articles
- How Do I Get Rid Of Layer Lines In 3D Printing?
- Cura First Layer Settings
- What Is the Best First Layer Height?
- Cura Speed – Everything You Need to Know!
- Cura Brim Build Plate Adhesion – Everything You Need to Know!
- Cura Hacks – My Picks!
Make sure you check out our YouTube channel, and if you would like any additional details or have any questions, please leave a comment below. If you liked this article and want to read others click here.