Chromebook’s have been around for many years, and the ChromeOS user interface is very simple and nice to use. Cura has download and installation instructions for Mac, Linux, and Windows computers but their official website doesn’t explain if you can install Cura on a Chromebook. So, I looked into whether it’s possible and today I’ll explain whether Cura will work on a Chromebook.
Cura does work on a Chromebook. To install and run it you use the Linux download file from the official Ultimaker Cura website. Then you need to enable Linux, and GPU acceleration in the settings on your Chromebook. After that, you can install the AppImage file and run Cura.
You may have Linux and GPU acceleration already enabled on your Chromebook which means you simply need to run a few commands in the terminal to install and use Cura. However, if you haven’t there are a few steps involved in doing it. So, below I will explain how to do everything you need to do on a Chromebook to run Cura in step-by-step detail that anyone can understand.
How To Run Cura on a Chromebook
To run Cura you need to input some commands in the terminal. To access the terminal to run the commands you first need to enable Linux. Here are instructions for how to do that. Afterward, I’ll provide each of the subsequent steps to install and use Cura on your Chromebook.
1. Set up the ability to run Linux on your Chromebook
To access the settings click on the clock icon at the bottom right of your screen and then click on the cog-wheel icon. This will open the settings. On the top left of this window is an icon with three horizontal lines. Click that and it will bring up the additional settings as a menu on the left of the window.
One of the options in this menu is ‘Advanced’, click on that and it will open up some additional settings. An option in this menu is ‘Developers’ click on that to open the developer options. The option at the top will be ‘Linux development environment (beta)’ and to the right of it will be an option to turn it on.
When you click that it will open up an installation wizard that will guide you through installing it, it will also download a bunch of files it needs. It usually takes a few minutes to complete the installation process. After that, you need to enable GPU acceleration.
2. Enable GPU acceleration to make Cura run smoothly
As you may be aware, a Chromebook is not made to play games, and a gaming PC is much better suited for this purpose. A Chromebook can run various games and they can run quite well provided GPU acceleration is enabled. This is done by running some commands in the terminal. Which will now be enabled because of what you did in step 1.
Type the following into a chrome browser:
chrome://flags/#crostini-gpu-support
This will bring up the setting where you can enable Crostini GPU support which is required to enable GPU acceleration. After that, you need to input some commands in the console. Here’s a video that shows what they are and what they should look like as you do it. But, the relevant parts start at 2 minutes and 35 seconds so skip to that part of the video and follow the instructions he describes:
3. Run the AppImage for Cura to install and run it
To install and run Cura you first need to download the install file for Linux from the official Cura website. The page to do that can be accessed by clicking here. Click on the blue download button and select Linux. This will download the AppImage file.
Once it downloads go to the file and rename it to something with a shorter name. This will make it easier to type when you write the commands into the terminal. For example, if it was me I would rename it to ‘Cura-install’ or something like that. It’s not important what you rename it to exactly, it simply makes it easier to type into the terminal. Then you should copy it to a folder that is easy to find. For example, you could create a new folder called ‘Cura’ and copy it into that.
When running the below commands in the terminal you need to have the folder that the Cura install file is in selected in the terminal. Depending on where you’ve installed it, you may need to change the directory that comes up by default using the ‘cd’ command.
It would be a bit long to explain it in this article. So, refer to this article from on the official Ubuntu website that explains how to change the directory, as well as, some other helpful background info about using the terminal.
Now, the next thing you need to do is edit the permissions so that the AppImage file will execute. By default AppImage files won’t run when you double click them. This is the same on all computers. So, you need to edit the permissions.
The command to do that in the terminal is ‘chmod a+x’ then a space and the filename. For example, if the filename is ‘Cura-install.AppImage’ you would type:
chmod a+x Cura-install.AppImage
Then hit enter. If nothing happens it means it worked without any errors and you can now run it.
Bear in mind that everything you type is case-sensitive.
Then to run the Cura install file you type in the terminal:
./Cura-install.AppImage
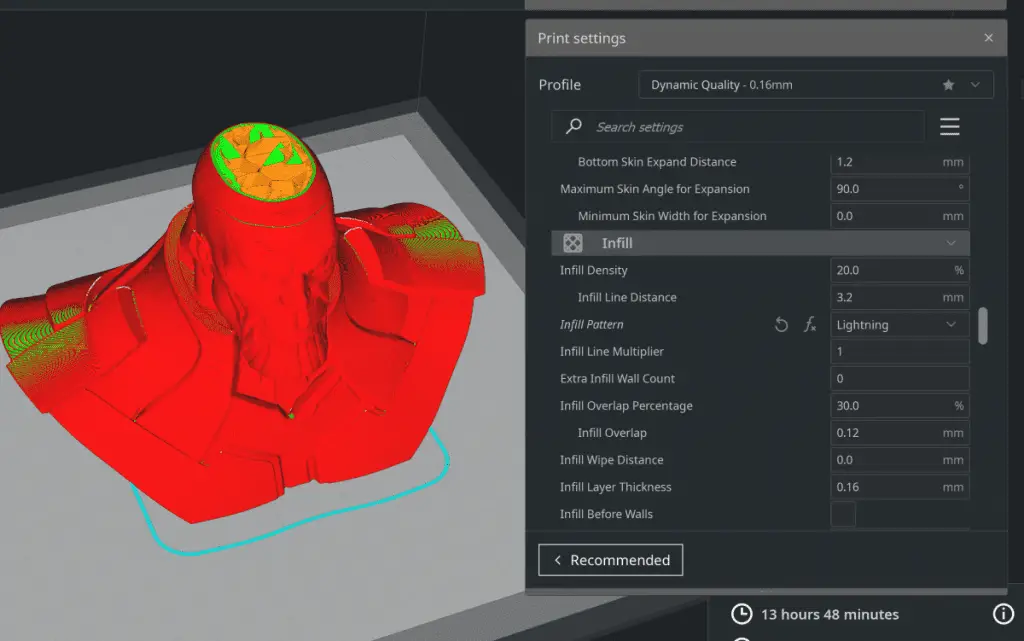
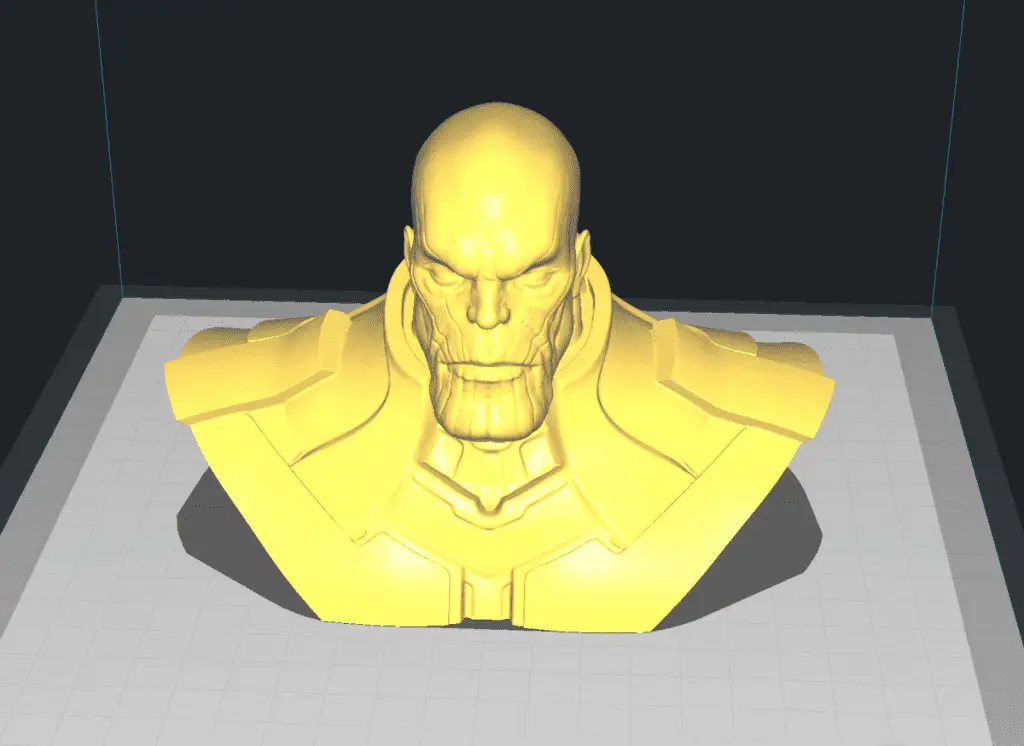
Or whatever you’ve named the install file. The ./ is a command that means ‘run this’. Once you do that it will take a while to load and then the install wizard for Cura will come up. You can then follow the prompts to install it and then open it. Congratulations!
How Do You Get Linux on a Chromebook?
Linux is required to install Cura. It can be a bit odd to learn that Linux can be installed and run at the same time as Chrome OS. But, this is definitely the case, and here’s how to get Linux on a Chromebook.
Linux can be installed by clicking on the launcher on the bottom left of the screen and then searching for ‘terminal’. The terminal app will show up then click on it. When you do that it will prompt you to install Linux by opening up a Linux installation wizard.
It can also be installed from Settings > Advanced > Developers > then enable Linux development environment (beta)’. Either method works. It takes about 5 minutes for it to download the files it needs and install them.
How Do You Install Cura on a Chromebook?
Installing Cura on a Chromebook is a bit different to on a Mac, or a Windows computer. But, is very similar to installing it on a Linux computer. Here’s the process to do summarized.
First, install Linux, download the Cura install file for Linux from the official Cura website. The download file is an .AppImage file which doesn’t run by default. So you first need to edit the permissions of the file in the terminal to run it. Then you run the file using the terminal to install it.
The exact commands and a few settings you should change on your Chromebook to make it run smoothly are explained at the top of this article. For the full step-by-step instruction scroll to the top and start from step 1 which is ‘Set up the ability to run Linux on your Chromebook’. Follow that step and each subsequent step to install Cura on a Chromebook.
Related Articles
- Create a Temperature Tower Using Cura – The Easy Way
- Cura Profiles
- What OS Does Cura Run On?
- Can Cura Run on a Raspberry Pi?
- Can You Run OctoPrint on a Mac?
- Do 3D Printers Use a Lot of Power? (The Numbers Inside)
Make sure you check out our YouTube channel, and if you would like any additional details or have any questions, please leave a comment below. If you liked this article and want to read others click here.