There are a few reasons you’d want to change filament mid-print. Swapping out to a new spool or changing colors are two of the main reasons, but you may want to change material as well.
To change filament mid-print, pause the print with the printer LCD controls, load the new filament, prep it, purge it, and resume the print. You can also set the slicer to pause the job at a specific layer or height for you to swap the filament out.
There are some things you should do in preparation for a filament swap, so I’ll go through those first. Then we’ll look at the steps of manual and automated filament changing. Last, there are a few common errors that may occur. I’ll list them out and give advice on them at the end of the article.

How To Prepare For Changing Filament Mid-Print
It’s helpful to see which layer the printer is on to know when to perform the swap. To get the layer number on your printer’s LCD, follow these steps:
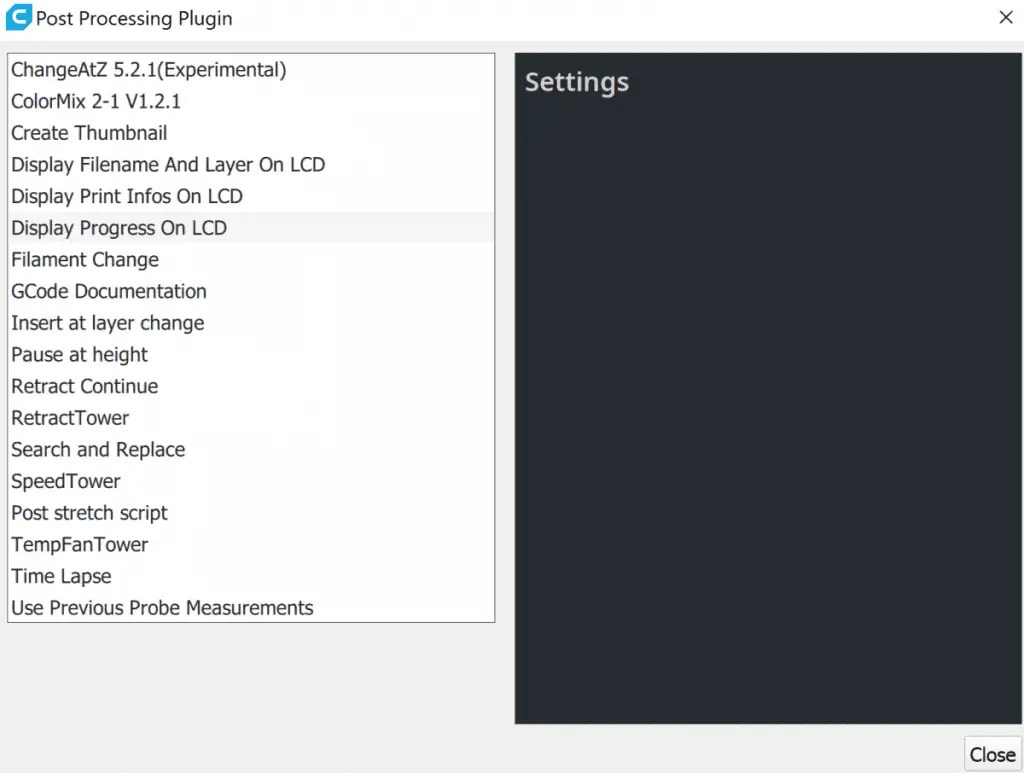
- Go to the “Extensions” menu at the top.
- Hover over “Post Processing” and select “Modify G-Code”
- Click on the “Add a script” button.
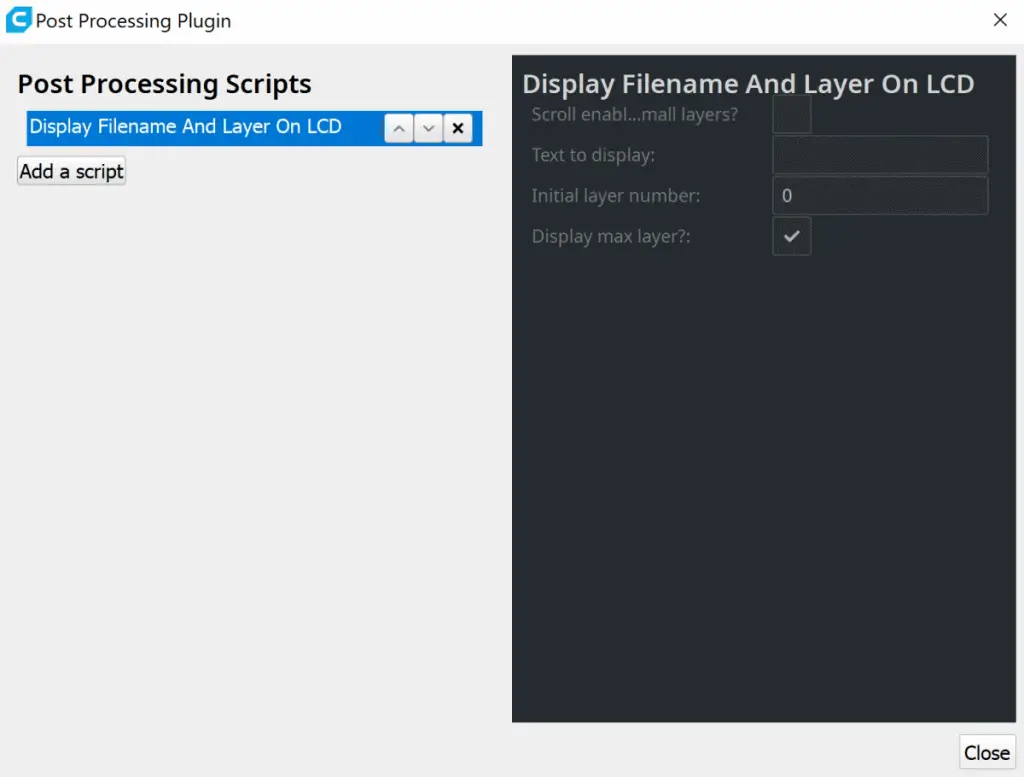
- Select “Display File Name and Layer on LCD”
- Make sure the initial layer number is set to 0.
Now you’ll be able to see which layer the printer is on by checking the LCD.
Manual Filament Change
This is when you pause the printer on the LCD controls, load the new filament, and resume the print. Normally, this type of filament change is done when the current spool is finished. These are the steps on an Ender 3 Pro.
- Select “controls” on your printer LCD.
- Then choose “pause print” to move the nozzle to its home position.
- Before you load the filament, go to “prepare”, and preheat the hot end.
- Feed the new filament into the extruder until you see it coming out the nozzle. This not only preps the new filament, it also purges any old filament from the nozzle.
- Now, “resume” the print. The printer will purge some plastic out of the nozzle. Remove the purged filament with tweezers and then select “continue”
This is the usual method of swapping filament out when the current spool is depleted.
Automated Filament Change
This type of filament change is best for changing colors or materials mid-print. An automated filament change involves setting the slicing software to pause at a specific layer for you to swap the filament out. So if you want to make the base of the model a different color, you can. If you want to change between materials to make the bottom heavier than the top, use this method.
This is how it’s done in Cura, and many other slicers are similar.
First, slice and preview the model to see where you need to swap the filament, either check the layer number or height. Once you have this information, make a note of it and follow these steps:
- Go to the “Extensions” menu at the top.
- Hover over “Post Processing” and select “Modify G-Code”
- Click on the “Add a script” button.
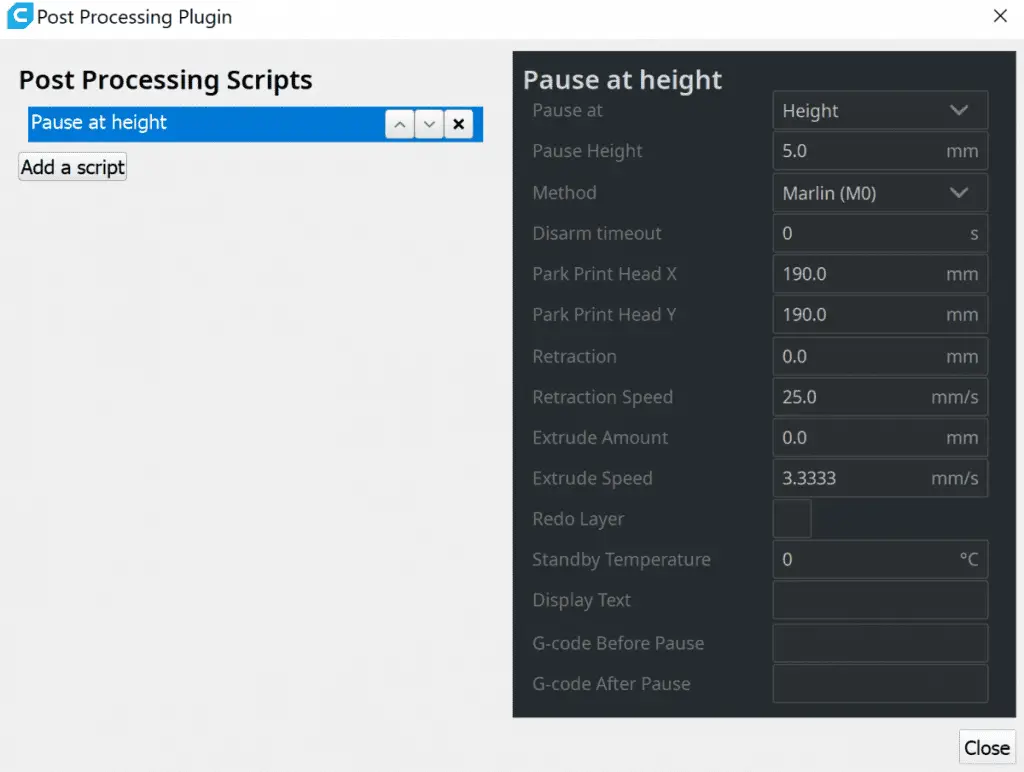
- Select “Pause at height” from the script options.
- If you know the height at which you want to pause at, you can select “Height” but most people will probably choose a specific layer to pause at, so I’ll go with “Layer No.”
- For the Pause Layer value, input the layer you’d like it to pause at.
- You can leave “Disarm Timeout” at 0.
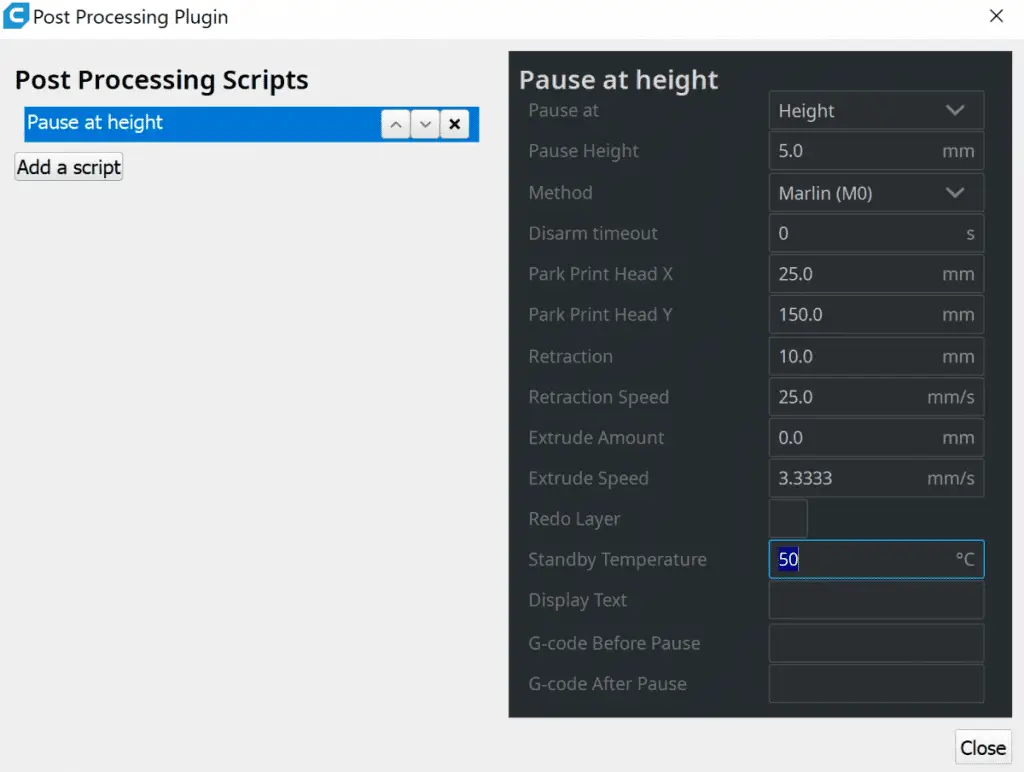
- The two park settings instruct the nozzle head where to move when the print is paused. I like to set “Park Print Head X” to 25 and “Park Print Head Y” to 150.
- The “Retraction” can be around 10mm and the “Retraction Speed” can be around 25mm/s.
- The “Extrude Amount” is how much filament will be purged, it might not be necessary if you swapped out the filament perfectly, but I like to add around 25mm just for a buffer to make sure everything comes out right.
- Leave the “Extrude Speed” at 3.3333.
- You can print the last layer again if you adjust the “Redo Layer” value, but I haven’t needed to do that before.
- The “Standby Temperature” is for you to set if you know you won’t be around when the printer pauses. I usually just set it to 50°C
- You can leave “Display Text” blank as well as the before and after G-Codes.
- Close the window and re-slice the project to account for the new settings.
That’s it, the printer will pause as per your instructions. In this way, you can also swap between colors multiple times in a single print, just add a script for every layer you’d like to change colors at.
Here is a video I created covering the full process from start to finish.
What If The Filament Runs Out During A Print?
If your printer doesn’t have a filament sensor, the nozzle will carry on moving around until it’s completed the job, even though it’s not pushing any plastic out. If this happens, you won’t be able to go back to where it left off and the entire job will be a waste.
If you print a lot of things while you’re at work or while you’re sleeping, it’s best to invest in a filament sensor like these ones on Amazon. The BIGTREETECH smart filament sensors are reliable and popular amongst 3D printing artists.
Advice For Changing Filament Mid-Print
Here are a few problems to look out for and how to avoid them.
Defects on the part
It’s important to be gentle with the printer while you’re replacing the filament because things can go out of alignment so easily. If you push down too hard on the filament while loading it in, you could put the Z-axis a millimeter or two out of alignment. Even a slight bump can mess with the X and Y axes as well. Never do any adjustments to the printer while it’s paused or you may end up with mismatched print layers.
Poor bed adhesion after filament swap
This is a problem that usually occurs when the printer is paused for a long time. If you don’t set the temperature to maintain itself while paused, the part can detach from the bed or warp while the bed cools. Try to be quick with the filament change and set the temperature to maintain itself during the pause.
Part not sticking at the filament change layer
If you’re not getting proper adhesion between the filament-change-layers, you can increase the temperature to get it to stick to the previous layers better.
Blob of plastic between prints
Filament can ooze out the nozzle when the printer is paused. If you’re doing a manual filament swap, pull the filament out of the extruder as soon as you pause the job. This will remove the filament that normally oozes out.
Also, make sure to remove the purged filament hanging from the nozzle before resuming the print.
Related Articles
- 3D Printer Enclosure – Do I Actually Need One?
- Create a Temperature Tower Using Cura – The Easy Way
- Cura Profiles
- 3D Printer Filament Storage Options
- All About 3D Printer Plastic
- Can a 3D Printer Print Anything?
In Summary
Changing filament mid-print is really easy, and it opens up creativity options by giving you the opportunity to add various colors and materials into one part. Swapping an empty spool out with a new one is basic, but if you’re looking to add some flare to your 3D models, you’ll definitely be more precise with the automated method.
A filament sensor is good to have because it can save your print sometimes. It’s a small upgrade that can pay for itself later down the road.
The primary problems with filament swapping during a print are layer adhesion, layer shifting, and extra filament extrusion. So follow the advice above to avoid all of them.
Make sure you check out our YouTube channel, and if you would like any additional details or have any questions, please leave a comment below or join us on Discord. If you liked this article and want to read others click here.