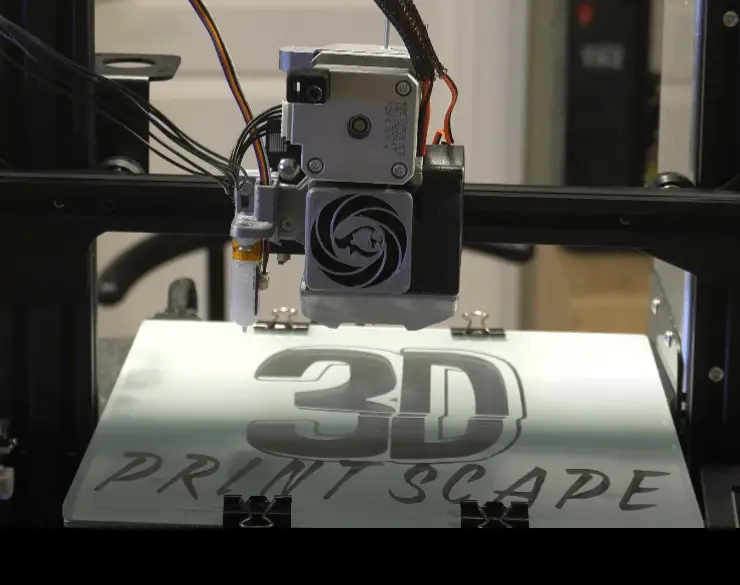
Finding a balance between print speed and quality can be challenging, especially considering that every part is different, so what works for some parts won’t work for others.
The faster you print 3D parts, the lower the quality will be. Printing slower results in high-quality parts with fewer defects. You need to find a balance between speed and quality based on the hardware and material you’re using. You’ll also need to adjust other settings accordingly.
When printing parts at high speeds, the odds for failure go up dramatically. Print errors like “layer lifting” can occur more often because the base layers don’t get a chance to stick to the bed by the time the next layer comes speeding around.
Insufficient heat transfer into the plastic is highly likely because the filament is moving through the heating block so quickly.
Material stripping is also more likely on higher print speeds. These are just a few problems that may arise because of high print speeds.
So there’s a lot you need to know about before cranking your 3D printer up to what the manufacturer promises. The true maximum speeds your printer can handle depends on the stability of your printer, print material, extruder, and many other factors I cover in this article.
The Stability of Your Printer
When you’re printing at high speeds, the sudden acceleration and direction changes will cause your printer to wobble if it’s not bolted down. If the table isn’t very steady on the ground, there will be unwanted wobble as well. Wobble causes defects like ghosting where there are some layers that don’t match up properly with the others.
The lower the bench, the less likely it is to wobble, so set the printer up on a lower desk if you have the option.
Bolt it down
Bolt your printer to the bench to decrease unwanted movement. Make sure to bolt it to a heavy, sturdy, balanced table. If you don’t have a very stable bench to print on, setting the printer up on the floor might be a better option for you. If you can bolt it onto the floor, even better.
But bolting onto the floor isn’t necessary if you follow the print speed recommendations in this article. Printing at speeds of 100 to 200 times the nozzle bore diameter shouldn’t require you to bolt the printer down, but I would still do so if it’s on a desk because it’s so easy.
Rubber footing
If you can’t bolt your printer down, adding rubber feet like these on amazon can also help to stabilize your printer to a certain extent. They grip onto the surface better than a plastic and metal frame. There are many screw sizes available, so if your frame already has threading at the bottom, just get the correct size bolt thread and screw them in. Even if the frame has no thread, you should be able to glue these (available on Amazon) to the bottom of your printer without a problem.
Acceleration Settings
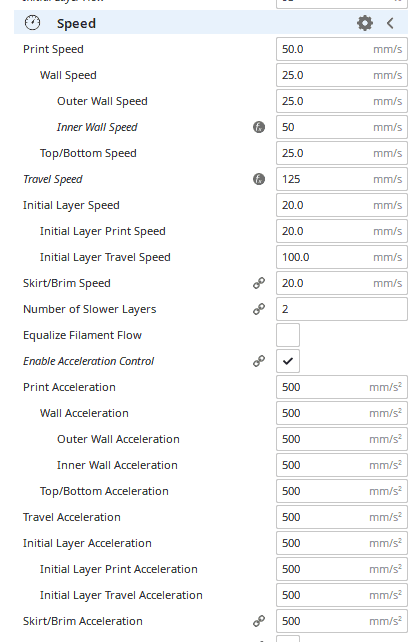
Acceleration values determine how fast the printer will speed up after changing directions. Acceleration is used to prevent abrupt changes in velocity to reduce printer wobble. This is one of the main reasons changing the print speed alone doesn’t directly change the print time in proportion.
If you need to print a part in the quickest time possible, increase your acceleration in proportion with your print speed values. For example, if you go from 40mm/s to 80mm/s on the print speed, you can increase the acceleration from 500mm/s to 1000mm/s to match up to the acceleration.
Increasing the acceleration will create more velocity on the X and Y plane, but if your printer is stable enough, it will handle it. If you notice much more wobble after increasing the acceleration, lower it again until you find a balance between optimum speed that produces minimum wobble.
The lower the acceleration, the more stable the printer will be at the cost of a longer print time.
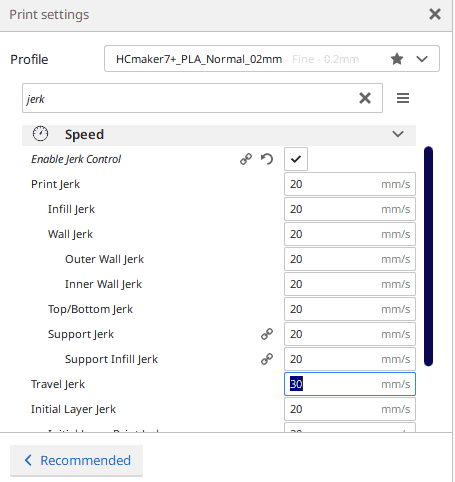
Jerk Settings
Jerk in 3D printing refers to the minimum speed at which acceleration will be used. So if there is a short line that prints under 8mm/s, acceleration won’t be used if the jerk value is set to 8mm/s. This is because lines that are very short won’t give the printer enough time to get to the set print speed, so acceleration control isn’t necessary.
A 7 to 8mm/s Jerk Speed should be fine in most instances. If you’re printing an extremely small part, you can reduce the jerk value to decrease wobble when the printer is laying down short lines.
Print Material
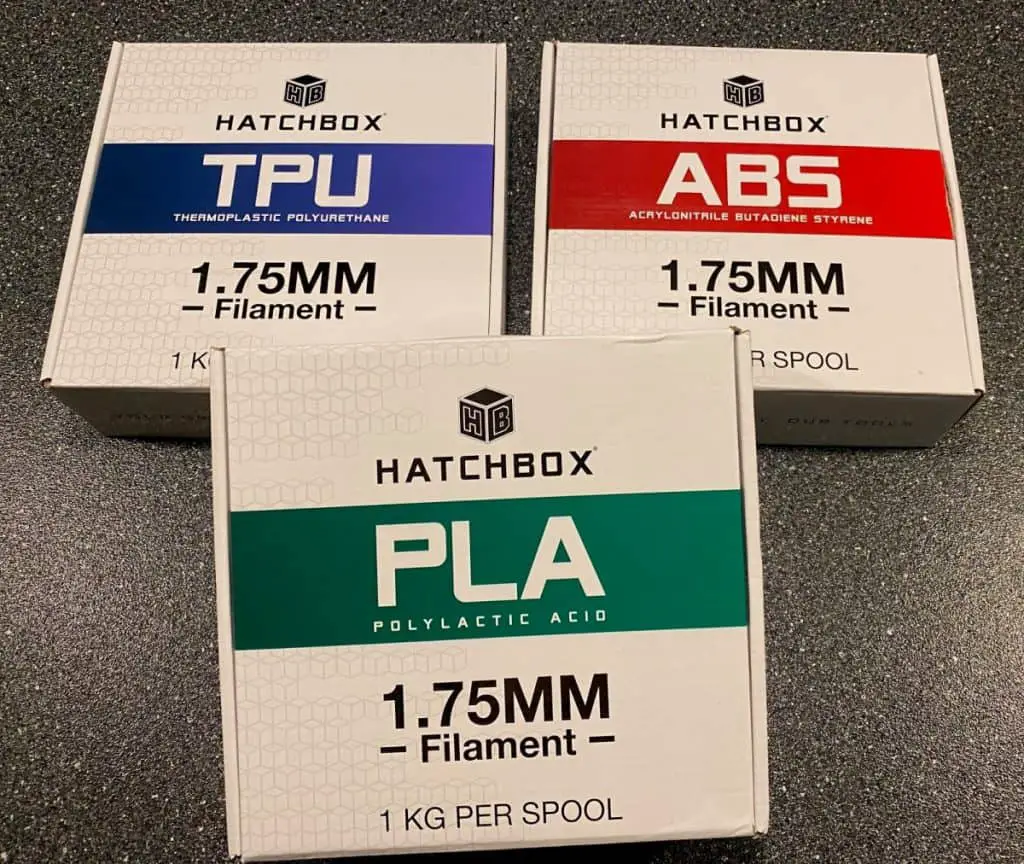
The print material affects the print speed because different materials have different melting points and other characteristics.
I like to print PLA anywhere from 40 to 100mm/s, sometimes I’ll lower the speed to 30mm/s if it’s a part with loads of direction changes and requires a high level of detail.
Low-quality filament also decreases your ability to print fast because it doesn’t melt as efficiently as higher quality filament. Low grade filaments often have foreign materials in them that shouldn’t be there, so you have to adjust your settings according to how well the filament reacts.
Some inferior filaments have been reported to have tiny metal balls inside which will mess with the extrusion and melting speeds.
Extruder Capabilities
A good entry level extruder, like the one on an Ender 3, can usually handle up to 200mm/s. But you’ll have to adjust some other settings accordingly to achieve anywhere near those speeds.
For your extruder to get more filament out quickly, you’ll have to increase the print temperature. 200°C is usually very common for print speeds between 40 and 100mm/s but once you start going to 150mm/s or more, temperatures need to be raised in order to melt the plastic fast enough to keep up.
Keep in mind that increasing your print speeds will cause the filament to be heated for a shorter amount of time and even if the temperature is set to 250°C, the filament may only get to 200°C because of how fast it’s moving through the heating block. So you’ll have to experiment to find the sweet spot for the specific model you’re printing.
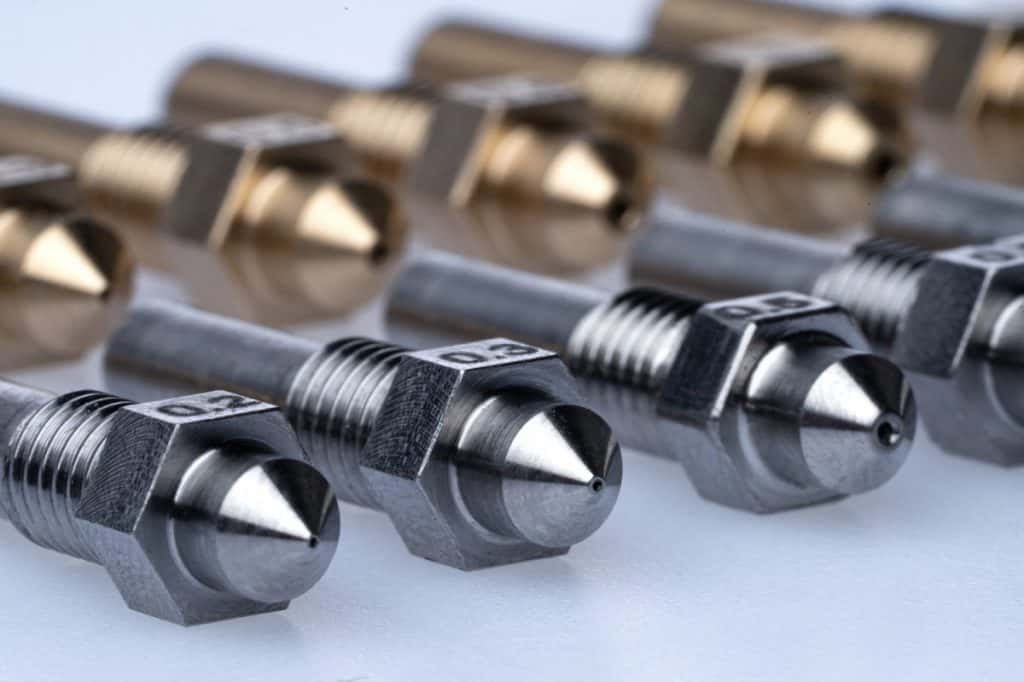
Nozzle Bore Size
The nozzle bore size determines the maximum speed because you can only get a certain amount of plastic through that opening depending on how big it is.
So the smaller the nozzle, the lower the speed you can print at because the filament needs time to get through the tiny hole. The bigger the opening, the higher the speed you’ll be able to print at.
As a general rule of thumb, you could print at speeds of 100 times the nozzle bore size for excellent quality. So with the most popular nozzle bore diameter of 0.4mm, I like to print at around 40mm/s to get accurate detailing. If I’m printing something that isn’t very geometrically complicated, 200 times the bore size, or 80mm/s, is still pretty stable.
Size And Geometry Of The 3D Model
The size and geometry of the 3D part you’re printing is arguably one of the most important factors when determining the print speed. Small, detailed parts require a lower printing speed to prevent wobble while larger basic designs can be printed much quicker without moving the printer around too much.
The more directional changes the model has, the lower speed you should print it at. A standard cube has precisely 4 directional changes on the x and y axes and can therefore be printed at top speeds with little problem.
A detailed model like this Christmas Village on thinginverse has hundreds of directional changes on certain layers and requires slower printing speeds to prevent wobbling and other problems that go with fast printing.
Related Articles
- Create a Temperature Tower Using Cura – The Easy Way
- Cura Profiles
- What Is The Best Primer For 3d Prints?
- Best PLA Glue – The Answer Inside!
- 3D Printer Nozzles (Detailed Overview)
Conclusion
Ideally, the speed at which you print shouldn’t move the printer around at all. If your printer is set up on a sturdy surface like a heavy work bench or floor, you shouldn’t have any problem printing at speeds of 30 to 60mm/s without any problems. With rubber feet to increase the printer’s grip on the surface, you should be able to print up to at least 100mm/s.
If you plan to print at speeds higher than 100mm/s, I highly recommend bolting your printer down to the surface, as this is the best way to stabilize it.
If you notice your printer wobbling around too much while printing at high speeds, lower the acceleration and jerk values to decrease the unwanted movements, just keep in mind that the part will take longer to print with these values lowered.
High-quality filaments melt easier than cheap filaments, so if you’re planning to print as fast as possible, purchase reputable materials.
If you notice some under extrusion occurring at high print speeds, you may need to increase your extruder temperature to keep up with the print speed.
Printing large 3D models at high speeds is better achieved with nozzles that have bigger bore sizes. But larger nozzle diameters also result in lower quality in terms of detailing, also referred to as a lower resolution.
For the general 3D printing hobbyist that uses a 0.4mm nozzle size, stick to speeds of 40mm/s to 100mm/s depending on the size and shape of the part.
Make sure you check out our YouTube channel, and if you would like any additional details or have any questions, please leave a comment below or join us on Discord. If you liked this article and want to read others click here.