Installing OctoPi is a simple process and this guide also has some lesser-known tips and tricks to optimize your setup.
Download and install Raspberry Pi Imager. Use the Imager to select Other Specific Purpose OS, 3D printing, OctoPi, and choose the stable version. Open advanced options to configure WiFi and password. Install the OctoPi image to the SD card, insert it into your Pi, and boot up.
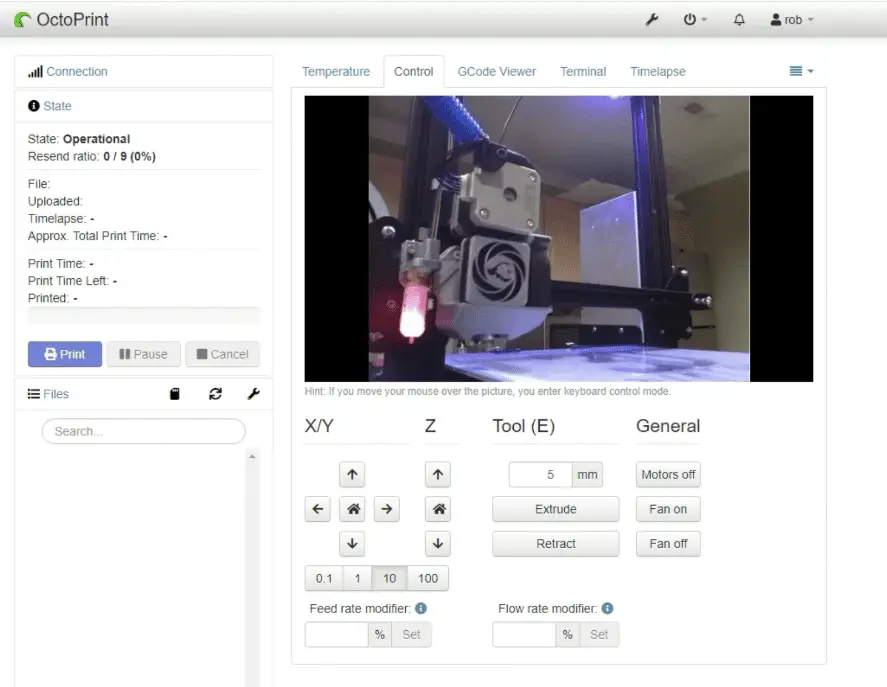
Then you’ll be able to access OctoPrint via http://octopi.local or your Pi’s IP address. But that’s a simplified version of the setup, and you’ll need more detailed information to get everything done properly. Let’s begin with the hardware requirements.
Hardware Required
Before you begin, make sure you have the following items:
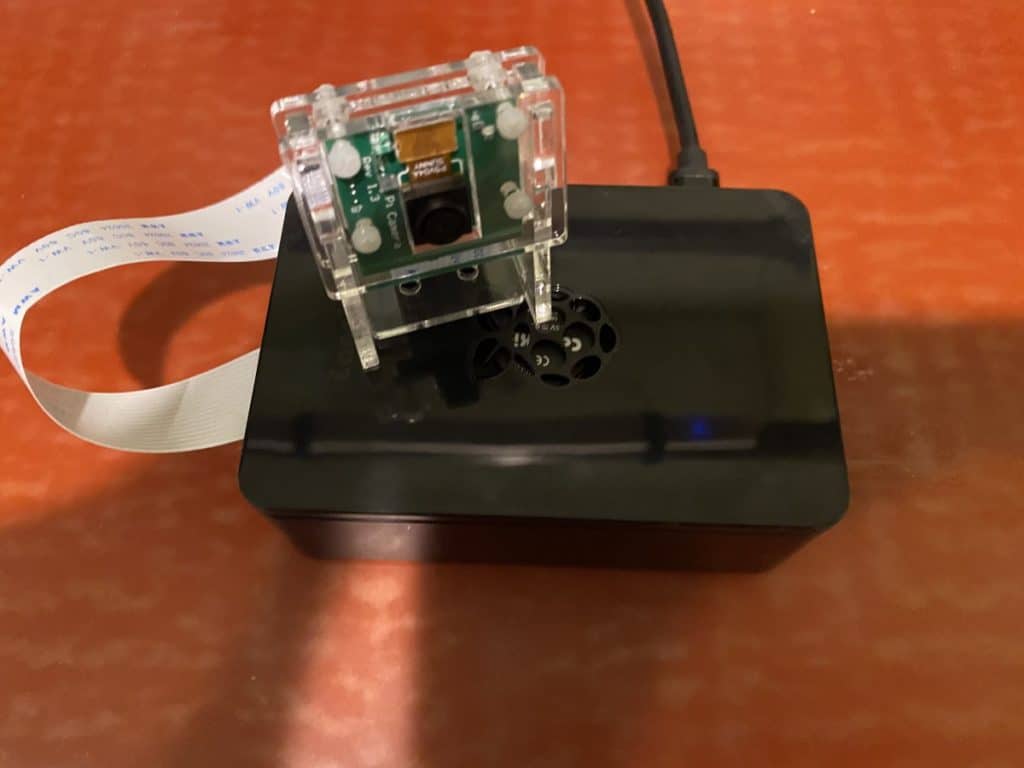
- Raspberry Pi (3B, 3B+, 4B, Zero 2, or newer recommended).
- MicroSD card (16GB or larger recommended).
- Power supply for the Raspberry Pi.
- Computer with an SD card reader.
*Links are to the items on Amazon.
Choosing the Right Raspberry Pi
OctoPi can run on almost any Raspberry Pi, but I suggest you use versions 3B, 3B+, 4B, Zero 2, or a better one for optimal performance. OctoPrint warns against using other models, including the Zero and Zero W as you will experience problems with those due to the lack of RAM and network performance.
Download OctoPi
- Download and install the Raspberry Pi Imager on your computer.
- In Raspberry Pi Imager, go to “Choose OS” and select “Other Specific Purpose OS” > “3D printing” > “OctoPi,” then choose the “stable” version of OctoPi.
- Open advanced options by clicking the gear button or using the keyboard shortcut ctrl+shift+x. Configure your WiFi settings (SSID, password, and WiFi country).
- Change the system password in “Set username and password” to create a new password for the system user “pi” (not for OctoPrint login but for SSH access).
- Optionally, change the timezone in “Set locale settings” and the hostname in “Set hostname.”
- Install the OctoPi image to your SD card, plug it into your Raspberry Pi, and boot it up. Don’t format the SD card after installation, even if prompted.
- Access OctoPrint through your browser using http://octopi.local or the chosen hostname (if bonjour is supported) or http://<your pi’s IP address>. HTTPS is available with a self-signed certificate.
Install with Etcher
You can do all of the above by using Etcher to get the OctoPi image onto the memory card.
- Download and install Etcher for your OS from the official website.
- Download OctoPi from github.com.
- Check inside the zipped folder for the OctoPi image.
- Open Etcher, select the SD card and OctoPi image, and then click “Flash”.
Setting Up Wi-Fi
- After flashing the SD card, re-insert it into your computer if it was ejected.
- Open the SD card’s directory (usually named “boot”).
- Locate the file “octopi-wpa-supplicant.txt” and open it in a text editor. (Notepad for Windows or TextEdit for macOS with “Plain Text Format” and “Smart Quotes” unchecked)
- For WPA/WPA2 secured Wi-Fi networks, remove the ‘#’ from the four lines in the first network block.
- Enter your Wi-Fi network name (SSID) in the “SSID” line and your Wi-Fi password in the “psk” line, keeping the quotation marks.
- To add multiple networks, copy and paste the network block and fill in the details for each additional network.
- Near the bottom, enter your country code (e.g., UK is already filled).
- Save the file and eject the SD card.
For troubleshooting, refer to the official OctoPrint Wi-Fi setup FAQ.
Connect to OctoPrint
To boot up your Raspberry Pi and connect to it via SSH, follow these steps:
- Insert the microSD card with OctoPi into your Raspberry Pi.
- Connect your Raspberry Pi to a power source (e.g., using a USB power adapter).
- Wait for the Raspberry Pi to boot up. This process may take a minute or two.
- Once the Raspberry Pi is powered up and running, open an SSH client on your computer (e.g., Terminal on macOS or PuTTY on Windows).
- Now, look for the IP address of your Raspberry Pi on your local network. Use your router’s admin interface to scan the local network for connected devices if you can’t find it.
CSS Code
Enter the following command in your SSH client to connect to your Raspberry Pi via SSH:
ssh pi@your_pi_ip_address
(Replace your_pi_ip_address with the actual IP address of your Raspberry Pi.)
You should get a prompt to enter the password for the user “pi.” By default, the password is “raspberry” (without quotes). The password won’t be visible when you enter it for security reasons but just hit enter after you type it in.
Now you should be successfully connected to your Raspberry Pi via SSH.
Keep your Raspberry Pi connected to the same network as your computer for SSH to work correctly. If you want to access your Raspberry Pi from outside your local network, you might need to set up port forwarding on your router.
Secure Your OctoPrint Setup
Change Default Password
The first step is to change the default username and password for the OctoPrint interface. Use a strong and unique password to prevent getting hacked.
Use a Firewall
Set up a firewall on your Raspberry Pi to control incoming and outgoing network traffic. Limit access to only your ports and services.
Disable Remote Access
If you don’t need remote access to your OctoPrint interface, disable it or use a VPN to access it securely from outside your home network.
Disable Anonymous Access
In OctoPrint settings, disable anonymous access to prevent unauthorized users from accessing your printer.
Keep OctoPrint Updated
Regularly update OctoPrint to the latest version. Updates often include security patches and bug fixes that help protect against known vulnerabilities.
Secure Your Network
Ensure that your home network is secure with a strong Wi-Fi password and encryption. Use WPA2 or WPA3 encryption to prevent unauthorized access to your network.
Backup Regularly
Back up your OctoPrint configuration regularly. In case of any issues, you can restore your settings and preferences easily.
Review OctoPrint Plugins
Be cautious when installing third-party plugins. Only use reputable plugins from trusted sources and keep them updated.
Limit Network Access
If possible, set up your OctoPrint on a separate network or subnet to isolate it from your main devices.
Additional Plugins and Customizations
OctoPrint offers a vast plugin ecosystem that allows you to extend its functionality further. Here are a few of the most popular ones:
Print Time Genius
This plugin provides advanced estimates for the time remaining to complete a 3D print. It takes into account factors like acceleration, deceleration, and real-time printing speed, resulting in more accurate print time predictions.
Octolapse
Octolapse is a plugin that creates stunning time-lapse videos of your 3D prints. It captures snapshots at certain print stages and compiles them into a time-lapse video to give you a visual representation of the entire printing process.
Filament Manager
The Filament Manager plugin helps you manage your 3D printer’s filament consumption. It allows you to keep track of different filament types, and their remaining quantities, and even set up notifications to alert you when you’re running low on a particular filament.
Telegram Notifications
This plugin enables OctoPrint to send notifications and status updates to your Telegram messaging app. It can notify you when a print is completed, if there are any errors or warnings during printing, or when the printer requires attention.
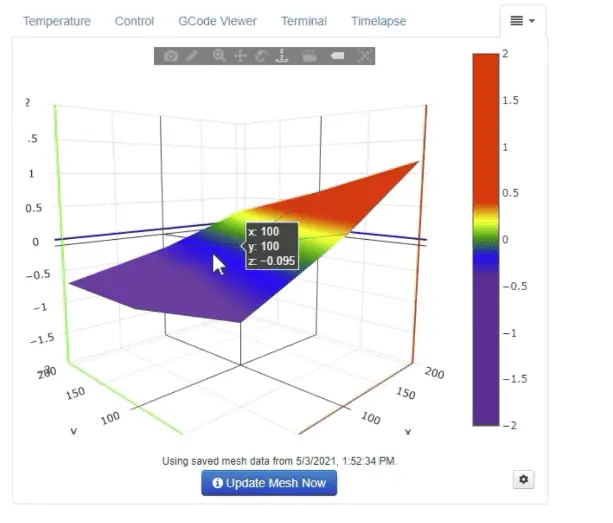
Bed Level Visualizer
Getting your build plate level is critical if you want to have an excellent first layer or good prints in general. Using auto bed leveling options like the BLTouch can help significantly, but it can only do so much, and it puts extra load on the stepper motors and drivers. This plugin provides a visual of your bed to help get it as level as possible.
I also made a video that covers the full install process that you can see here.
Is OctoPrint Compatible With All 3D Printers?
OctoPrint is compatible with a wide range of 3D printers, but I always recommend checking the OctoPrint documentation or community forums for specific compatibility information.
Can I Use OctoPrint Without An Internet Connection?
OctoPrint can be used without an internet connection as long as your Raspberry Pi and 3D printer are connected to the same local network. But certain features like remote access and plugin updates may require an internet connection.
How Long Does OctoPi Take To Boot?
The first time you boot the OctoPi up, it can take up to 10 minutes because it needs to set the operating system up. After that, it should boot up in under a minute every time.
What Is The Default Password For OctoPi?
The default username is pi and the default password is raspberry.
Can I Install OctoPrint Without Using OctoPi?
You can manually install OctoPrint on a Raspberry Pi without using OctoPi. But using OctoPi simplifies the installation process by providing a pre-configured image with OctoPrint already installed.
Can I access OctoPrint From My Smartphone Or Tablet?
OctoPrint has a web interface so you can access and control it from any device with a web browser.
Related Articles
- Install Octoprint on Linux – Complete Guide!
- OctoPrint Bed Level Visualizer – Complete Setup Guide!
- Can You Run OctoPrint on a Mac?
In Summary
Installing OctoPi on a Raspberry Pi for an OctoPrint setup is a simple process. The essential steps include downloading and installing Raspberry Pi Imager, configuring WiFi and password, and booting up the Raspberry Pi. Once set up, you can access OctoPrint through your browser using the provided links.
Remember to choose the right Raspberry Pi model for optimal performance and secure your OctoPrint setup by updating regularly, and using a firewall for network security.
Plugins like Print Time Genius, Octolapse, Filament Manager, and Telegram Notifications are available to enhance the experience.
Make sure you check out our YouTube channel, and if you would like any additional details or have any questions, please leave a comment below. If you liked this article and want to read others click here.