Cura is one of the most popular 3D printing slicers. But, many apps and programs can have a glitch from time to time and not open. In this article, I will explain step by step how to fix Cura so that it works as it should when it won’t open.
As a general rule, restart your computer first. If it’s still not opening after your restart your computer then uninstall and reinstall Cura. Before doing that, you should do a backup of all of your settings by copying the configuration. Details on where it’s located are explained below.
Another good option is to force close it from the Task Manager, however, this is less likely to be an issue. Below, I will provide step-by-step instructions for how to do each of the troubleshooting steps.
How To Get Cura To Open When It’s Not Working
The first you should try is restarting your computer. When computers have been on for a long time without being restarted they can have issues. Also, certain programs can have a glitch, and restarting your computer will close them and reopen them again.
It’s a good idea to create a backup for your settings in Cura. Ordinarily, this can be done from inside Cura. But, since you can’t open it you need to do it manually by copying a specific folder. The backups for all of your Cura profiles are stored in the folder:
C:\Users\*YOUR USERNAME*\AppData\Roaming\cura
Your username is the username you use to log in to Windows. If you haven’t set up a user account for Windows it will be called ‘owner’, or ‘public’. To access this folder press the start key on your keyboard or click the Windows icon on the bottom left-hand side of the screen. From the start menu, one of the options is ‘This PC’. Click on that to open up the drives on your computer.
The default drive that you installed Cura to is the C: drive. But, it’s also where temporary application data like the Cura settings are stored. Here’s another way to find this folder if you’re not sure what drive it’s on. Or, you can find it in ‘Windows Explorer’.
To open Windows Explorer, open the start menu. Then type in Windows Explorer. An option will come up that says Windows Explorer, click on that. And do a search for ‘Roaming’, or ‘Cura’. It takes some time for it to search.
But, once some options come up look for the folder that has the path the same as above. It may be stored on a different drive such as a D: drive or E: drive. For example, instead of:
C:\Users\John\AppData\Roaming\cura
It might say:
D:\Users\Dave\AppData\Roaming\cura
Copy the entire folder Cura by right-clicking it and selecting copy. Then paste it to your desktop, or to somewhere else that’s easy to find again. From there you’re now ready to uninstall Cura and reinstall. But, first here are a few things you should do because they have a good chance to fix the issue. And have the potential to stop Cura from opening, even after you’ve reinstalled it.

Update graphics card driver & check for Windows update
A known issue with computers is that the drivers need to be up to date. As well as, any pending Windows updates. One program such as Cura will be one version. But, the version of your graphics drivers or Windows is another. This will cause a mismatch. And can cause a program not to open.
So, making sure your graphics drivers and Windows are up to date is a simple but very effective thing to try to solve this issue. To update your graphics drivers open up the ‘Device Manager’. To do that:
1. Open the start menu and type in ‘device manager’. Then select the option that says ‘Device Manager’. It will show a list of all of the components on your computer. Such as the motherboard, speakers, RAM, and graphics card.
2. The graphics card is hidden in the ‘Display Drivers’ which is in the list. When you click ‘Display Drivers’ it will open and your graphics card will be listed there.
3. Right-click on the graphics card that shows up and select ‘Check for updates’.
4. Select check the internet for a driver. It will then check if your driver is the latest version and download the latest version if required.
To check for a Windows update, or to install a Windows update that is pending open the start menu. Then type on your keyboard ‘settings’. This will bring up the settings app in the start menu. Click on it, which will open up another window. In this window, there are multiple options. Select ‘Update and Security’ and the ‘Windows update’.
Any pending updates will show there. If there aren’t any listed there select ‘check for updates’. It will check the internet to see if there are any pending updates if there are it will download it, and then prompt your to install it.
Attempt to force close Cura – it can be already running
It’s common for Windows to not open a program if it’s already open in the background but has frozen. It will sit in the open programs even though it’s not open anywhere on your computer. A restart will typically fix this because it closes all the programs. However, Cura can be set to open on startup and freeze. Or, you opened it after a restart and it froze.
To force close Cura, use the Task Manager. When in the Task Manager, look for Cura in the list of processes, and then press ‘End Task’, which is a button at the bottom of the Task Manager Window.
But, it’s possible it won’t be there if this isn’t the issue that’s causing Cura not to open. If it’s not there don’t worry about it, and skip further below where it says how to uninstall and reinstall Cura. Here’s a video that shows exactly how to do it.
Provided Cura was running in the background, and you closed it, then reopen Cura again. This can be done by double-clicking the Cura icon, or by clicking it from the list of programs in your Windows Start menu.
Uninstall and reinstall Cura
Uninstalling Cura and reinstalling it will create a fresh version of Cura. The files in your Cura installation may have become corrupted. Doing a fresh install of Cura will wipe all of these files. Although, it’s rare for this to happen if your Cura isn’t opening there’s a good chance this will fix the issue.
The main thing is to make sure that you’ve created a backup of your user profiles by making a copy of the user profiles folder, explained at the start of this article. Provided you’ve done that you won’t lose anything by uninstalling and reinstalling Cure.
To uninstall Cura go to the Start menu and type in ‘add remove programs’. The Add/Remove Programs app will show in the start menu, click on it to open it. When this loads up it will populate a list of all of the programs installed on your computer. Find Cura, and then click the ‘Add/Remove’ button.
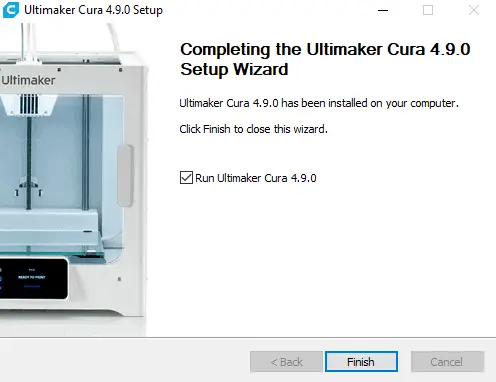
This will initiate the uninstall wizard and open up a new window. Follow the instructions in this window by clicking ‘next’ and each option that comes up. After it has been completely uninstalled, download the latest version of Cura. It can be downloaded from this page on the official Cura website.
You already likely have a copy of the install file in your downloads folder. But, it’s a good idea to download the latest version from the Cura website. Then double click on the downloaded file to start the installation.
How to install your settings after you have reinstalled Cura
To install all your previous settings copy the folder you previously saved, as explained above. Copy and paste it back into the location where it was previously. Which is:
C:\Users\*YOUR USERNAME*\AppData\Roaming
The folder should be named Cura for it to work. So if you’ve renamed it, then rename the folder to Cura before copying it into the ‘Roaming’ folder. Next time you open Cura, all of your previous profiles and settings will be loaded.
If it still won’t open after reinstalling it
It’s possible after doing all of the steps above that it still won’t open. Or, it might open and you get a specific error message. The good news is Cura has a very large community and community forum. A good option is to ask the question in the Cura forums. There are people on there that are experts on Cura. There are a range of different minor tweaks and things you can try. They are less likely to work than the steps above, overall.
But, since you’ve already done the big and easy things you can do, these minor tweaks make a lot of sense to do. Pose the question in the Cura forums, and do the different things people suggest. Often, they will get you to copy and paste the contents of a specific file, so they can diagnose what the issue is. The forum on the official Cura website where you can ask your question is here.
How To Reset Cura
You may have been using Cura for some time, and it’s become a bit bloated with settings, plugins, and profiles. When this is the case resetting Cura completely can be a good way to go, after you’ve tinkered with it enough that you know your way around it really well. So, here’s how to reset Cura.
In general, Cura can be reset by uninstalling it and installing it again. Another way is to delete the entire folder on your computer located at C:\Users\ ‘YourUsername’\AppData\Roaming\Cura, with Cura closed, then reopen Cura again.
That specific folder stores all of your settings. When you delete it, it will put everything back to the default. When you open Cura it will do the same setup wizard it did when you first installed Cura. Where it will ask you to select what 3D printer you have.
Can You Save Cura Settings
There are various very precise settings in Cura. These apply to your 3D printer, and they take some time to set up and get right. Therefore, it’s important to save them, or create a backup, so here’s whether it’s possible to save Cura settings.
As a general rule, it’s possible to save Cura settings. They can be saved to the Cura cloud, where they will be kept on a Cura database. To do that select the option at the top of Cura that says ‘Extensions’, then click on ‘Cura backups’. After that do the steps below.
Select ‘Manage backups. From there you will have the option to create a backup for your Cura account. If you didn’t set this up already – in most cases you will – create a new account.
It will say create a new account there, and you can follow the steps to create an account. After your account has been created it will show you as logged in. And then there will be an option there to create a backup for your account.
Where Does Cura Store Settings
It takes some time to tweak all the settings for Cura. Therefore, it’s a good idea to back them up so that they don’t get totally wiped if your computer dies, or you need to reinstall Cura. This is where Cura settings are stored.
As a general rule, Cura stores the settings in the folder C:\Users\ ‘Yourusername’\AppData\Roaming\Cura. If you copy this folder and paste it to your desktop this will back up Cura. Cura settings can also be backed up to the cloud in the Cura interface.
To back them up to the cloud click on ‘Extensions’ at the top of the Cura interface > Cura backups> Manage backups. This will give you the option to back them. These are saved to your user profile that you created when you installed Cura.

Related Articles
- Is Cura a CAD Software?
- Can You Design in Cura?
- Create a Temperature Tower Using Cura – The Easy Way
- Cura Profiles
- What OS Does Cura Run On?
Make sure you check out our YouTube channel, and if you would like any additional details or have any questions, please leave a comment below. If you liked this article and want to read others click here.