There are plenty of people that build 2D plotters to create artwork on a variety of materials. Paper, wood, plastic, and glass, to name a few. With so many artistic pens available, you can really get creative with the help of the precise movements of your 3D printer. You could even take engraving to a level far beyond human capabilities.
2D Plotting or drawing with a 3D printer involves attaching a pen near the nozzle of your 3D printer. With the pen attached, gcode can be loaded for the printer to start drawing. Generating the gcode can be done with Inkscape and a couple of plugins. All of which are free to download.
You can draw your own designs in Inkscape and convert them into gcode for your printer to plot. You can also import any image and turn that into gcode for printing. But you’ll have to have the plugins to generate the gcode. Diagonal lines can be drawn to give the picture depth and contrast. We’ll explain how to do all of this and more.
Why Do 2D Drawings With 3D Printers?
At first glance, it might seem as if turning your 3D printer into a 2D plotter is rather counterintuitive, a step back in technology. Here are just a few use cases for 2D plotters that aren’t possible with normal printers.
Create artwork.
Using special pens with sparkling gel or even a whiteout pen on a dark paper can produce some unique results. If you’re not sure what kind of artwork is possible, have a look at #plottertwitter to see.
To make high-quality cards.
Want to go “old school” and make some greeting, invitational, or congratulatory cards? Get those glitter gel pens out of the draw. Once you’ve set up the software with the instructions on what to print, it will do the job much quicker than you can.
Printing the detail for each card will usually take less than a minute. So even if you’re sending out invites to 50 people, (maybe to an 80s themed party) it will probably take less than an hour, faster and more accurately than you can.
You can draw on materials other than paper.
If you want to draw on transparent plastic so that you can overlay it onto something else, this will work well. Attach your marker to the 3D printer and secure the clear plastic to the bed.
Perfect Engravings.
In the same way that you can add an ink pen for drawing, you can add pen style engravers to engrave steel or other materials with mechanical precision. Considering you can’t erase an engraving when you make a mistake, this type of accuracy can be quite useful. Just do a test print on a piece of spare steel to make sure the settings are correct.
For people who don’t have a normal printer.
Maybe you don’t have a traditional ink or laser jet printer. Or maybe it can only support A4 paper when you need to print on A3. Technically, a 3D printer will take longer to get the job done, but the results will look very different and you can do a lot more with it, as detailed above.
How To Draw In 2D With 3D Printer
There are plenty of ways to set your 3D printer up as a 2D plotter. This is one of the easiest by far.
What you’ll need:
- 3D Printer.
- A ball-point pen or sharpie. (Later on you can experiment with other types of pens)
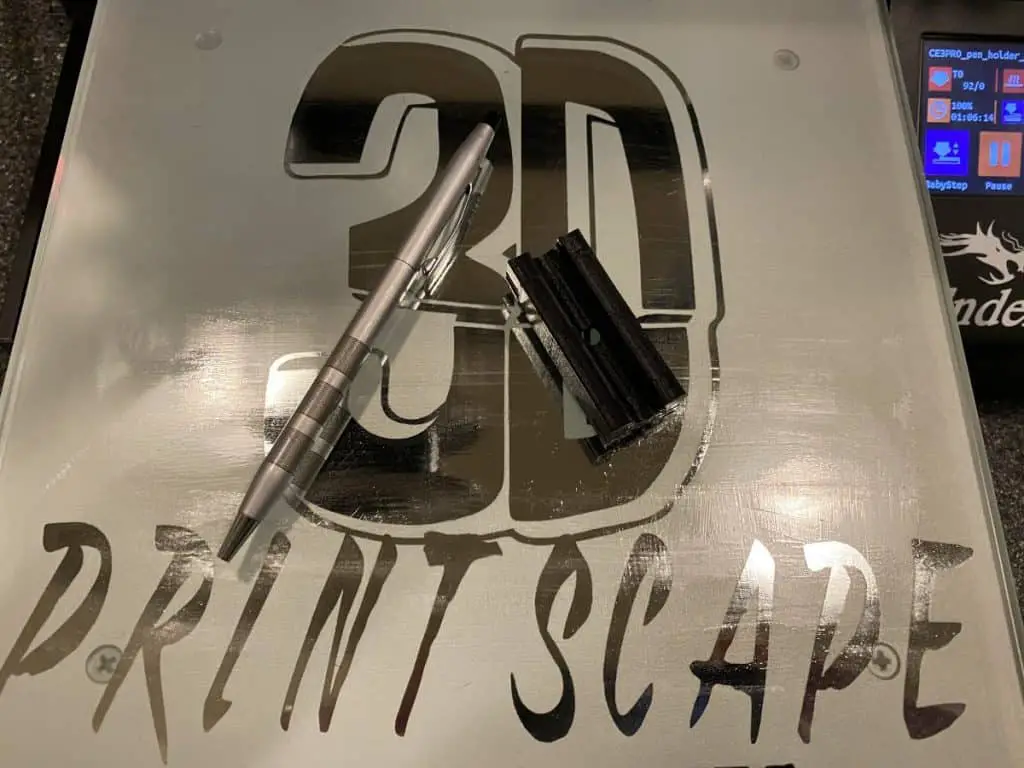
- A pen mount. Here is a design on thingiverse.com.
- Cable ties to secure the pen mount.
- Rubber band to hold the pen in the mount.
- Paper to draw on.
- Inkscape app. (Free) Download here.
- KM-Laser gcode plugin here. (For hatsch infill)
- Jtech plugin here. (To generate gcode)

Hardware section
- Make sure G2/G3 arc support is enabled in Marlin.
- Check your printer bed to make sure it’s level. (Here’s a leveling tutorial on YouTube)
- Download this pen mount design and print it.
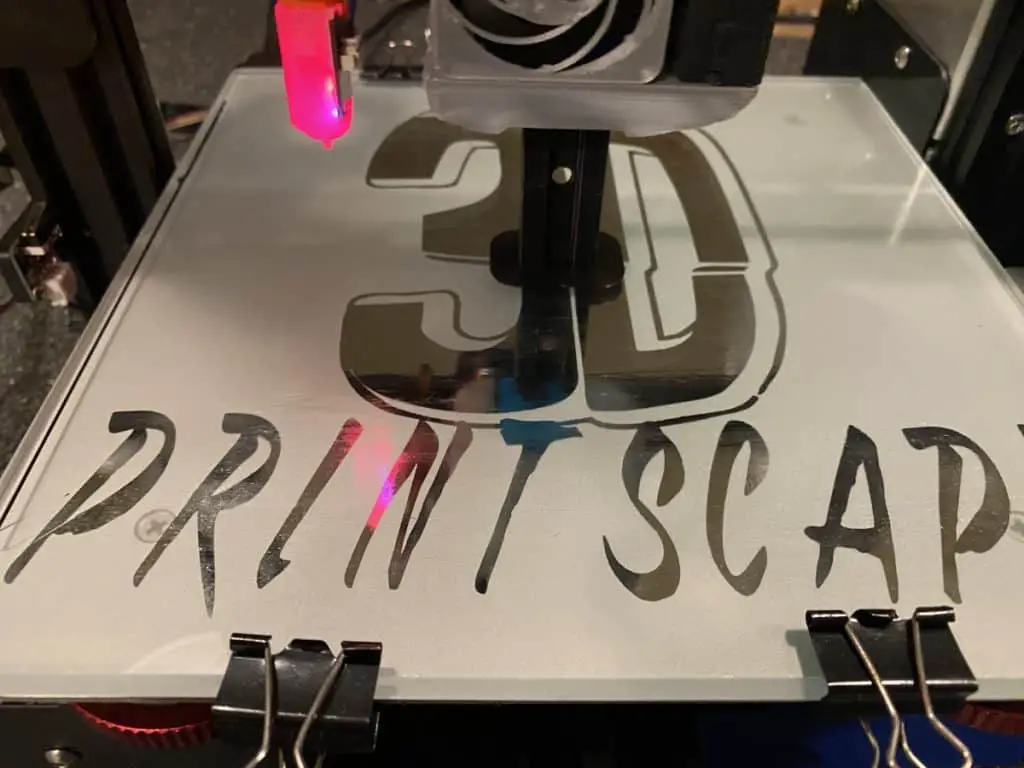
- Attach the pen mount to your 3D printer with the cable ties.
- Secure your paper to the bed with clips or masking tape.
- Secure the pend in the mount with a rubber band.
- Position the height of the pen’s tip a little lower than the extruder nozzle.
Software section
- Install Inkscape.
- Install the Inkscape plugins.
Create a header and footer for gcode
- Go to your Inkscape extensions folder where you unzipped the plugins.
- Open laser.py with a text editor.
- Scroll down to the header and footer and add the text as below:
G28
G90
G0 Z20
M117 Deploy Pen NOW! 10
G4 P1000
M117 Deploy Pen NOW! 9
G4 P1000
M117 Deploy Pen NOW! 8
G4 P1000
M117 Deploy Pen NOW! 7
G4 P1000
M117 Deploy Pen NOW! 6
G4 P1000
M117 Deploy Pen NOW! 5
G4 P1000
M117 Deploy Pen NOW! 4
G4 P1000
M117 Deploy Pen NOW! 3
G4 P1000
M117 Deploy Pen NOW! 2
G4 P1000
M117 Deploy Pen NOW! 1
G4 P1000
M117 Drawing..
For the footer, add:
G0 Z20
G28 X0 Y0
M18
This header and footer will guide your 3D printer at the start and end of the process. You’ll also have a 10 second window to make sure everything looks right before the print starts.
- Open Inkscape.
- Create the vector graphics you want to print. (Add text, shapes, etc)
- Once you’re done with creating the design, select all, go to the Path tab and click on “Object to path”
The extension that we’re using is meant for lasers and will only follow the outlines of the design. We’ll fill in the other sections with the other extension.
- Select your design and turn the “Fill” off and turn the “Stroke” on. (To see the outlines)
- While the design is still selected, go to the extensions drop-down menu at the top, hover over generate laser code, and click on JTech Photonics Laser Tool.
- Copy the values from the picture below to get the printer to lift the pen between strokes and move at optimal speeds.
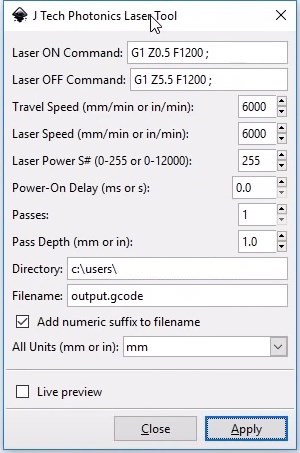
- Once you click Apply, you’ll see a bunch of arrows all over the design, these are to show the path that the pen will follow when drawing. (Don’t close the window yet)
- Measure the distance between your printer nozzle and pen tip, both X and Y axes.
- Add the values to the figures at the bottom of the page. Click Apply again.
Now you can go to the laser tool’s output directory to get the gcode. There will be a version for every time you click apply. Load the gcode into your printer and start the print.
Importing images to Inkscape
- Drag and drop the image into Inkscape.
- Select the image.
- Go to the path tab and click on Trace Bitmap.
- Click on the live preview and adjust the settings until you’re satisfied.
- Click on Ok and move the original image away.
- With the vector selected, turn off Fill and turn on Stroke to see the outline of the image.
- Go to the extensions tab again and select KM Laser, GENERATE: HATCH FILL
- Adjust the values as you see fit. (These are the horizontal lines that will fill the solid areas of the vector)
- Click apply.
- Go to the extensions tab, Generate Laser Gcode, JTech Photonics Laser Tool.
- The settings should be the same as before so when you click apply, the gcode will be saved.
Related Articles
- How to Print a File from Thingiverse (The Easy Way!)
- Create a Temperature Tower Using Cura – The Easy Way
- What Computer Do I Need for a 3D Printer?
- Cura Profiles
Conclusion
Adding 2D plotter capabilities to your 3D printer can definitely stir up some new creative juices. With not much more than a pen and some free software, you could be plotting within the hour. With so many types of pens to use and materials to print on, you can make unique artwork that stands out.
Make sure you check out our YouTube channel, and if you would like any additional details or have any questions, please leave a comment below or join us on Discord. If you liked this article and want to read others click here.