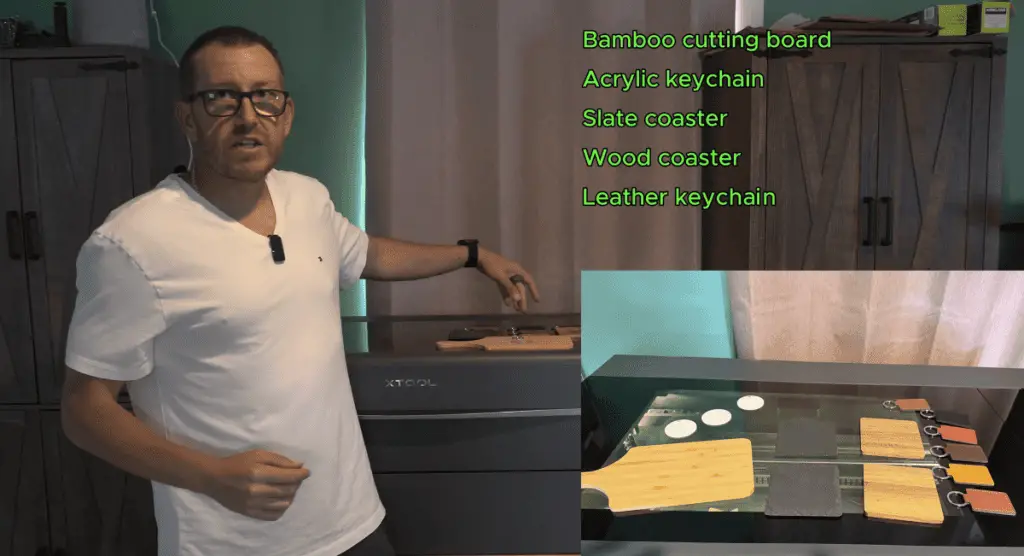
If you just picked up an xTool P2 — or you’ve had one sitting on your bench and aren’t sure where to start — this guide is exactly what you need. In this walkthrough, I’ll cover 5 beginner-friendly projects that are perfect for getting comfortable with your machine. No fancy accessories, no complicated files. Just the base P2 and materials you can grab off Amazon.
I’ll walk you through every setting I used inside xTool Creative Space (XCS), including bitmap mode, lines per centimeter, power, and speed — so you can follow along and get great results on your first run.
Before jumping into any project — especially if you’re using materials you didn’t buy directly from xTool — always run a material test grid first.
If you’re using xTool-branded materials, they provide pre-tested settings so you already know what to expect. For everything else (like the budget Amazon finds I used here), a quick 5×5 test grid takes about 4 minutes and saves you from ruining your workpiece.
How to run a test grid in XCS:
Refresh your camera and take a close-up capture of your material
Select your mode (Honeycomb Panel or Process on Slats) and material type
Create a rectangle shape → set it to Engrave mode
Go to Apps → Efficiency Tools → Material Test Grid
Set a 5×5 grid with 2mm spacing
Scale it to fit your material and hit Process → Start
The grid tests speeds from 200–600 mm/s and power from 20–80%. This is the foundation that informs every setting choice below.
Project 1: Engraved Wood Coaster
A simple wood coaster is the perfect first project — the material is forgiving, inexpensive, and the results look great with a custom logo or design.
What you’ll need:
Round wood coaster (basswood or birch, approx. ¼ inch thick)
Your design file (I used a simplified version of my logo — ChatGPT is great for creating clean, engravable versions)
XCS Setup:
Set mode to Honeycomb Panel, material to ¼” Basswood
Refresh camera and take a close-up of the coaster
Run an Aimed Measure to get your focal distance
Import your image → Scale to fit → Rotate to align with your coaster
Settings I used:
Setting
Value
Bitmap Mode
Jarvis
Lines per cm
240–300 (higher = better detail, slower)
Power
35%
Speed
400 mm/s
Estimated Time
~12 minutes
Rob’s tip: Jarvis mode gives the best results for logos and text on wood. If your image is lower resolution, you can drop lines/cm to 180–200 and save time without a visible quality loss.
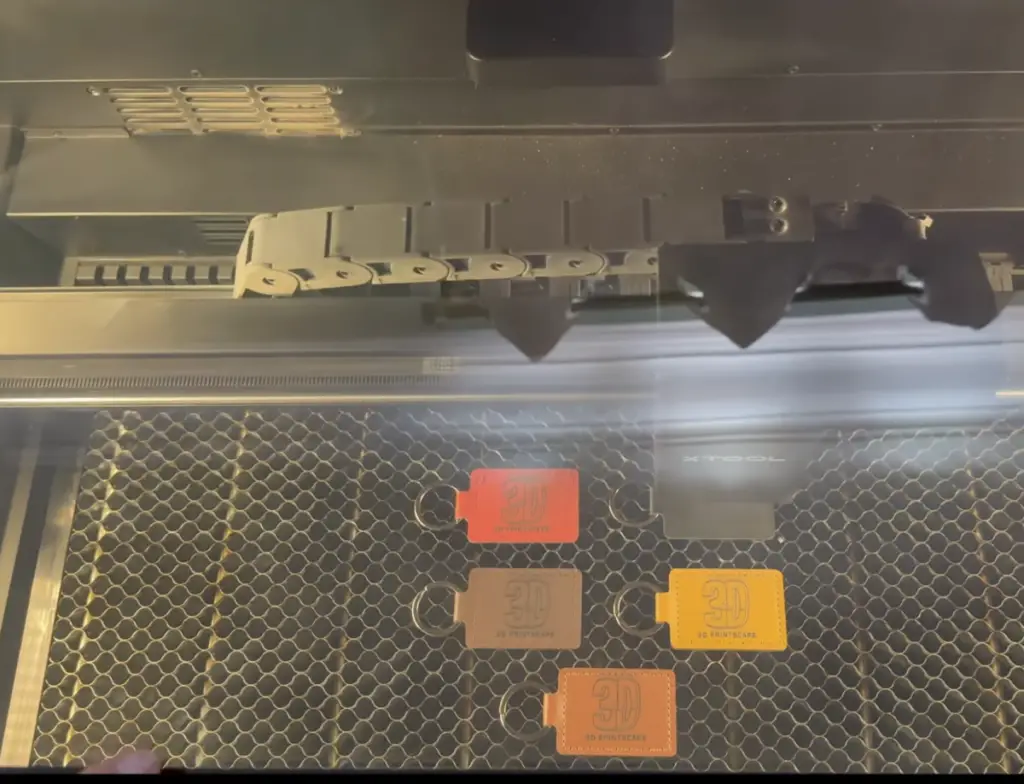
Project 2: Leather Keychain Tags
Leather is one of the most satisfying materials to engrave — great contrast, professional results, and the multi-color batch approach means you get 5 keychains done in one run.
What you’ll need:
Leather keychain blanks (I used 5 different colors)
Your design or logo file
XCS Setup:
Set mode to Honeycomb Panel, material to Cowhide Leather
Close-up capture near your first keychain
Measure distance — leather with a keychain ring is slightly elevated, so measure at the ring to ensure the laser doesn’t hit the clamp
Import your image → place on the first keychain → copy it 4 times → use arrow keys to fine-tune alignment on each
Settings I used:
Setting
Value
Bitmap Mode
Default (XCS recommendation)
Power
Default settings
Speed
Default settings
Estimated Time
~6 minutes for all 5
Rob’s tip: The default XCS settings for leather are well-dialed-in. No need to overthink this one — run your test grid first and match the default power/speed, and you’ll get great results right out of the gate.
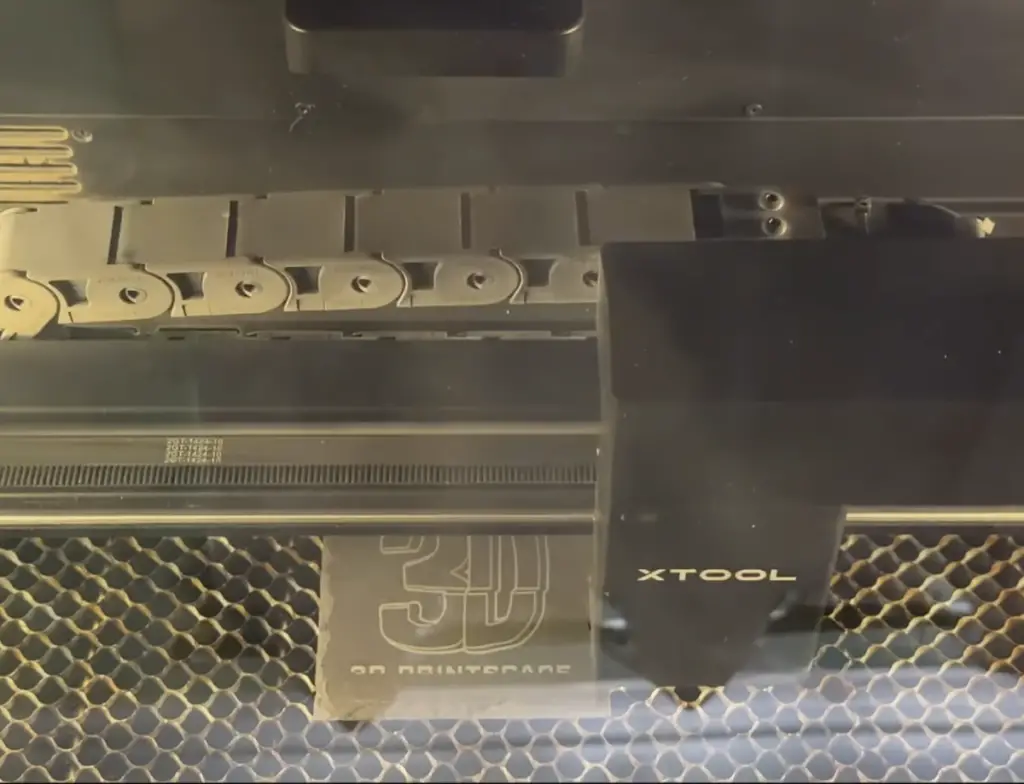
Project 3: Slate Photo Coaster
Slate is one of those materials that looks incredible when engraved — the white-on-black contrast is dramatic and it makes a great gift. The key is using the right dithering mode.
What you’ll need:
Slate coaster blanks
A photo or graphic (works best with good contrast)
XCS Setup:
Set mode to Honeycomb Panel, material to Stone → Rectangular Blank Rock Slate
Camera refresh → close-up capture. Note: if your slate is larger, you may not capture all of it in close-up — that’s fine, just get the bottom edge aligned
Import image → Scale to fit → Aimed Measure for focal distance
Settings I used:
Setting
Value
Bitmap Mode
Jarvis
Lines per cm
200
Power
20%
Speed
400 mm/s
Estimated Time
~9–10 minutes
Rob’s tip: For lower-resolution images, you can drop lines/cm further (150–180) without noticeable quality loss — save yourself some time. I went 240+ on the wood coaster because it was a detailed logo; 200 is plenty for most photos on slate.
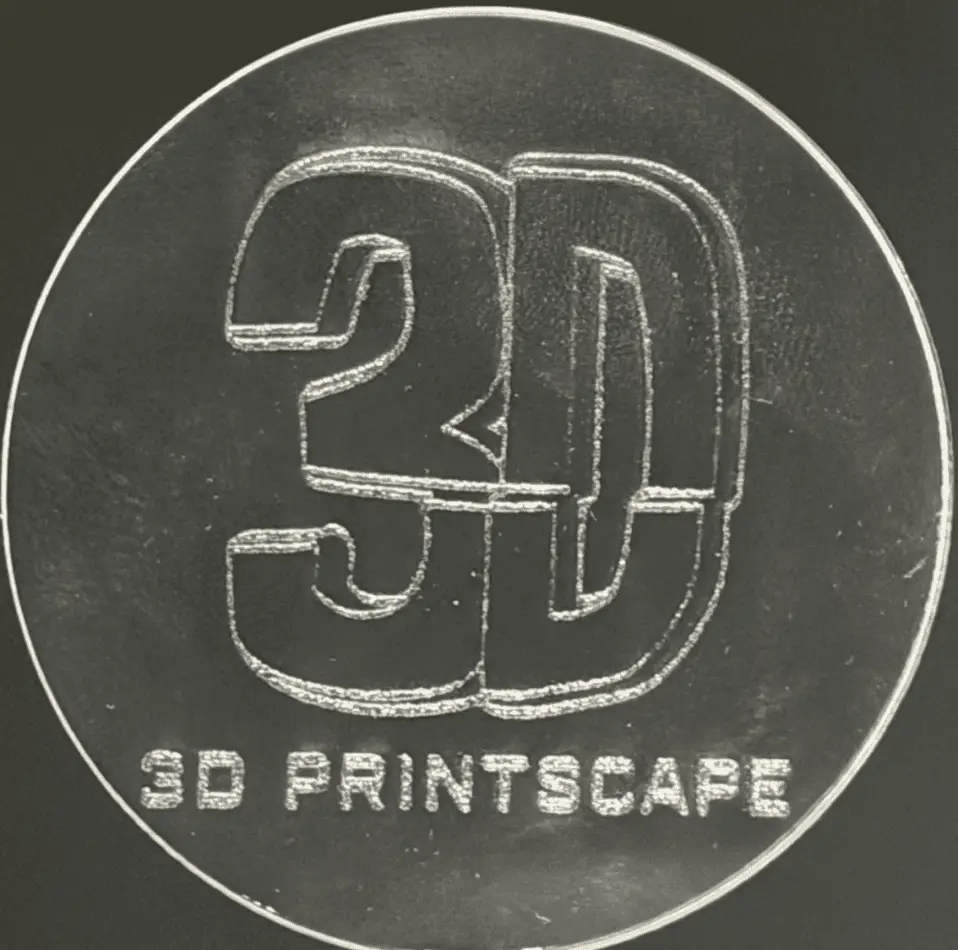
Project 4: Acrylic Cut-Out Keychain
Clear acrylic is a little trickier than the other materials — it’s lightweight and can shift during engraving. The magnetic clip trick is the solution.
What you’ll need:
Clear cast acrylic sheet (cut to keychain size or buy precut)
Magnetic hold-down clips
Your design file
Important: Cast vs. Extruded Acrylic This is a detail most beginners miss. Cast acrylic engraves cleanly and gives a frosted white result. Extruded acrylic doesn’t engrave well with CO2 — it melts and flares. Always buy cast acrylic for engraving projects.
XCS Setup:
Use magnetic clips around the edges of the acrylic to prevent movement from air assist
Measure at the clamp height (not the material) — this prevents the laser from hitting the clamp
Remove the protective film from the top before engraving. Leave it on the bottom (it protects the surface from honeycomb scratches)
Set material to Plastic → Clear Transparent Acrylic
Settings I used:
Setting
Value
Bitmap Mode
Jarvis
Lines per cm
160–200 (default range)
Power
15%
Speed
Default
Engrave depth
Light surface etch only
Rob’s tip: For acrylic keychains, you’re just doing a surface scratch — not deep engraving. The default 15% power is right in the sweet spot between 10% and 20% from my test grid. When in doubt, go lighter — you can always add a second pass.
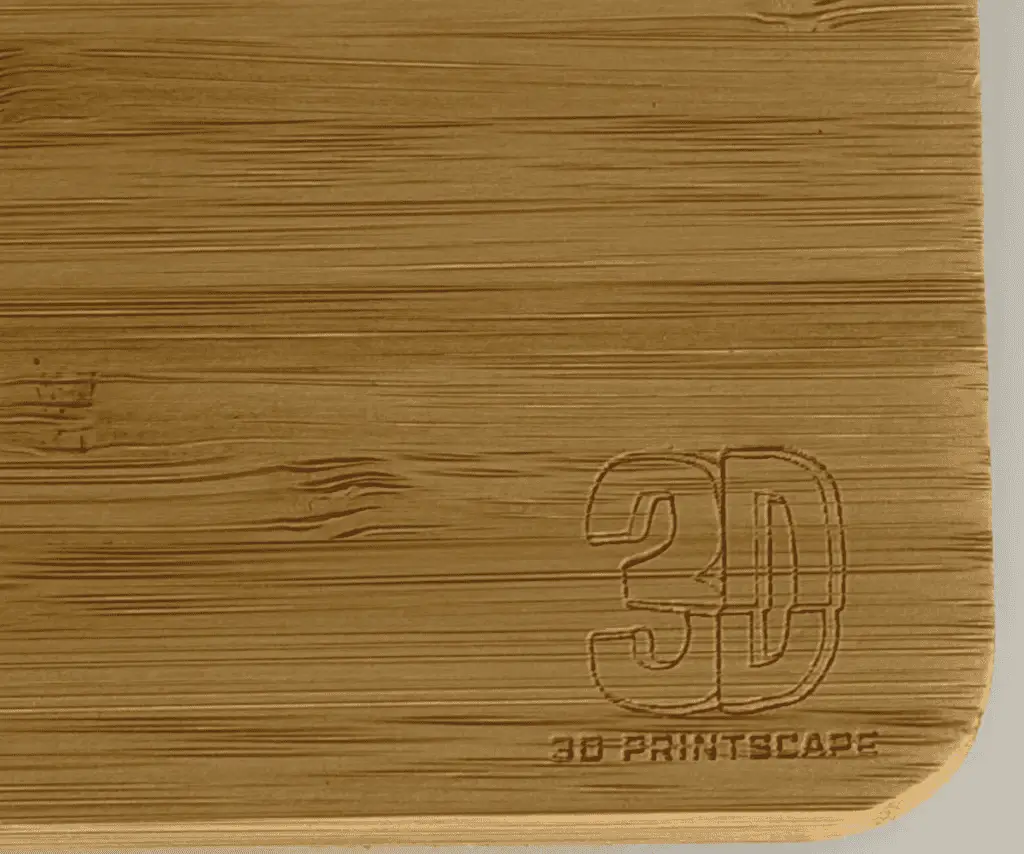
Project 5: Bamboo Cutting Board Logo
A custom logo in the corner of a bamboo cutting board is a clean, professional-looking project — and a great upsell item if you’re selling on Etsy.
What you’ll need:
Bamboo cutting board
Logo file (simple, clean designs work best)
XCS Setup:
Set mode to Honeycomb, material to Wood → Bamboo Cutting Board (search for it in the material panel)
Camera refresh → close-up of the corner where you want your logo
Import logo → size it small — I kept mine as a subtle accent in the bottom right corner
No test grid was run on this specific piece (first time with this material), so I estimated conservatively
Settings I used:
Setting
Value
Bitmap Mode
Jarvis
Lines per cm
120
Power
40%
Speed
450 mm/s
Rob’s tip: I didn’t have a material sample to reference, so I went conservative with 40%/450mm/s. The golden rule with bamboo (or any new material): start lighter than you think you need to. You can always run a second pass to darken. Burn too deep and the material is gone.
Quick Settings Reference
Project
Material
Bitmap Mode
Lines/cm
Power
Speed
Wood Coaster
Basswood ¼”
Jarvis
240–300
35%
400 mm/s
Leather Keychain
Cowhide Leather
Default
Default
Default
Default
Slate Coaster
Rock Slate
Jarvis
200
20%
400 mm/s
Acrylic Keychain
Clear Acrylic
Jarvis
160–200
15%
Default
Bamboo Board
Bamboo
Jarvis
120
40%
450 mm/s
Materials & Links
All the materials I used in this video are available on Amazon. Settings will vary slightly by supplier — always run a test grid first on new materials.
Affiliate disclosure: Some links above are affiliate links. I may earn a small commission at no extra cost to you if you purchase through them. This helps support the channel.
What’s Next?
If you found this guide helpful, I’ve got a lot more xTool content coming. I just picked up the xTool P3, and I’ll be covering both lasers in future videos. If there’s a specific project or setting you want me to cover, drop it in the comments on the video — or come find me in Discord.
I'm Rob, the founder of 3dprintscape.com. I’m a Marine Corps vet with a master’s degree in Information Systems and have been working in the technology field for over a decade. I started working with 3D printers because I was fascinated by the technology and wanted a hobby that my kids and I can enjoy together.
3D scanning technology has been around for a while — but it's mostly been inaccessible to hobbyists. The scanners that do exist for the hobbyist market require you to connect a phone, process...
If your 3D prints are coming off the printer looking rough, stringy, or just plain ugly — you're not alone. The good news? You don't need a new printer or expensive filament. Five settings in...