If you’re doing a DIY project with UV resin, you may think it only requires an application and some additional drying time. But without the right light, your resin will never cure properly. So, what kind of light do you actually need for UV resin?
You need a UV light for UV resin. UV lights are sold as stationary lamps or flashlights, and provide direct UV light exposure, allowing resin to cure quicker and more efficiently. However, many UV lamps are only designed to cure thin casting and may not be as effective for larger projects.
In this article, I’ll elaborate on the kind of light you need for UV resin and why a UV lamp is an ideal solution. I’ll also explore the reasons why your UV lamp isn’t curing your resin correctly. Keep reading to learn more.

Why UV Lights Are Required To Cure UV Resin
Ultraviolet resin is reactive to a particular slice of the electromagnetic spectrum, meaning that it won’t activate without enough exposure to UV light.
And while it is possible to leave your UV resin project to cure outside on a particularly sunny day, you may not see the desired effects as soon as you’d like. This is because the sun’s UV rays cannot reach and permeate the resin as evenly or quickly.
On the other hand, a UV lamp offers more power density, which can help activate the resin faster and cure within minutes.
The Size and Power Wattage of the UV Lamp Matters
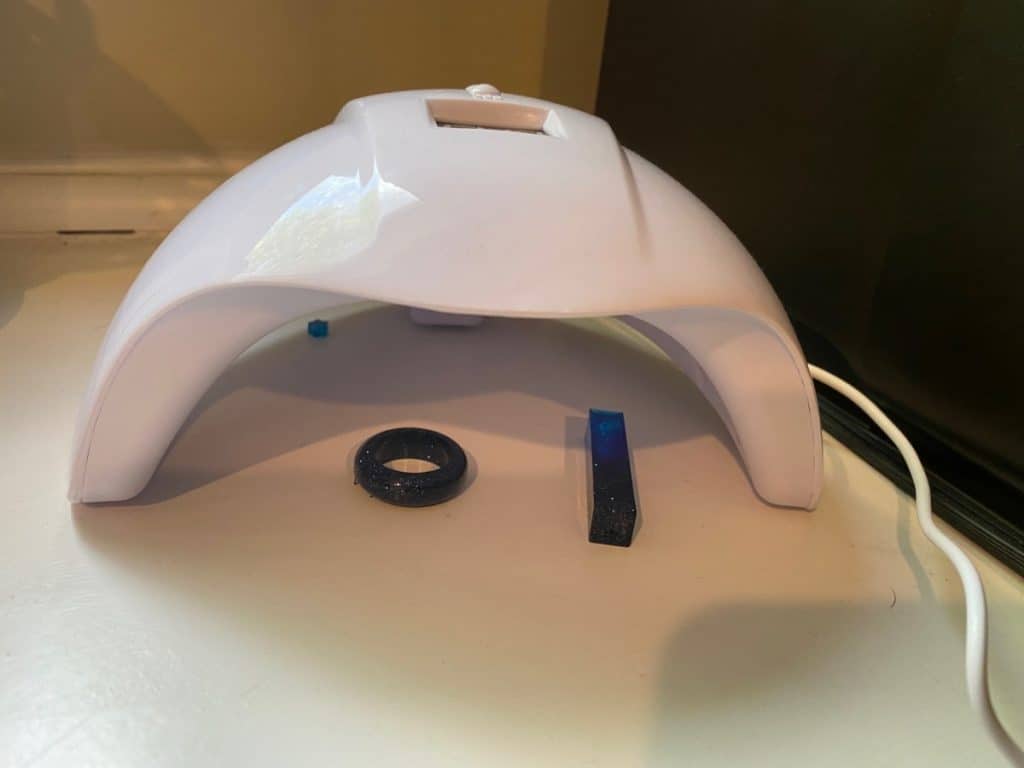
Choosing a proper UV lamp for resin casting often depends on the nature of your project and the size of your casting. If you’re making hand-held items no more than a few inches long or wide, a nail lamp is a great option.
UV nail lamps are practical because they’re low-cost, easy to use, and not powerful enough to cause harm. In addition, many UV nail lamps come with built-in timers that make it easy to keep track of how long you cure each item.
For example, a 4-watt UV nail lamp is typically powerful enough to cure most small castings. The time needed will ultimately depend on the thickness of the casting and how many layers are used, but a small casting beneath a 4-watt UV lamp should take no more than 5 minutes at a reasonable temperature and humidity level. Smaller samples of high-quality UV resin can even be solidified in under a minute.
However, if the project you’re working on involves bigger items or much thicker layers of resin, a larger scale reflector lamp may be in order. Use caution with these larger lamps, as they’re often far brighter than nail lamps that give off a low-intensity dose.
In fact, these types of reflectors require little time to cure resin, but eye protection is strongly recommended, even for just a few minutes at a time.

Why Your UV Resin Isn’t Curing With a UV Lamp
In some instances, you may find that your UV resin just isn’t curing how you’d like it to. When it doesn’t cure properly, it can feel sticky, or appear discolored and texturized.
There are several reasons why this might occur. These include:
Not Curing the Resin Long Enough
Before attempting to cure your resin, it’s important to check the power of your lamp in comparison to your casting. As mentioned before, small UV lamps won’t be as powerful as larger lamps, and may require longer curing times for a thicker casting.
If your resin does require longer to cure, you should extend the curing period until it solidifies completely.
Not Cleaning the Lamp
Having buildup on the lamp can reduce its ability to cure UV resin thoroughly. UV lamps have reflectors that enable the UV light to reach all angles of your resin for even curing. When the reflectors aren’t cleaned properly or have a layer of debris on them, they won’t be as effective, and you may find yourself having to cure the resin for longer, or rotating it more often.
To prevent your UV lamp from gathering too much buildup, you should use rubbing alcohol and a soft cloth to wipe away debris.
At the same time, if your lamp is cracked or damaged, it’s not safe to use and likely won’t cure your resin efficiently. In that case, it’s better to replace the lamp than attempt to use a broken one.
Aggressively Stirring the Resin
Suppose you’ve taken your resin from under the UV light, only to see hardened bubbles that give it a texturized effect. When this happens, the problem isn’t necessarily because of your lamp, but likely because of your resin.
Sometimes unwanted bubbles can take shape in the liquid resin that’ll remain trapped in the solidified mass unless they’re removed before exposure to UV light.
Bubbles most often form when the liquid resin is too aggressively agitated by stirring and folding air into it. They can also occur due to of chemical changes that develop from storage or extreme temperatures. To avoid this, you should refrain from overmixing your resin and keep it in a cool place and away from direct light.
And if you notice bubbles in the resin, you should try to remove them before curing, as they can be more difficult to get rid of once solidified.
To learn more about getting rid of resin bubbles before curing, check out this YouTube video:
Related Articles
- How To Cure UV Resin Without UV Light
- Can You Put UV Resin Over Epoxy Resin? Details Inside!
- Why Is My UV Resin Sticky After Curing?
- How Long Does It Take For UV To Cure Resin?
- How Long Can You Leave Resin in a 3D Printer?
Conclusion
UV resin is a convenient solution for many home projects, if you have the right tools to take advantage of its swift curing time. However, it’s important to note that UV resin can only cure under a UV light, which you can purchase in the form of a lamp or flashlight.
The size and power wattage of UV lamps are relative to the scale of your project. Smaller objects can be cured using UV nail lamps, while larger projects will likely require bigger reflector lamps.
However, all UV lamps should be cleaned and taken care of to ensure effective curing.
Make sure you check out our YouTube channel, and if you would like any additional details or have any questions, please leave a comment below. If you liked this article and want to read others click here.
